

I finally gave these nightstands a makeover. . . with slats and a little paint! These West Elm nightstands had been sitting in my garage for 2 years! It’s amazing how just those 2 things completely transformed them!

*This post contains affiliate links. Please see full affiliate disclosure here.
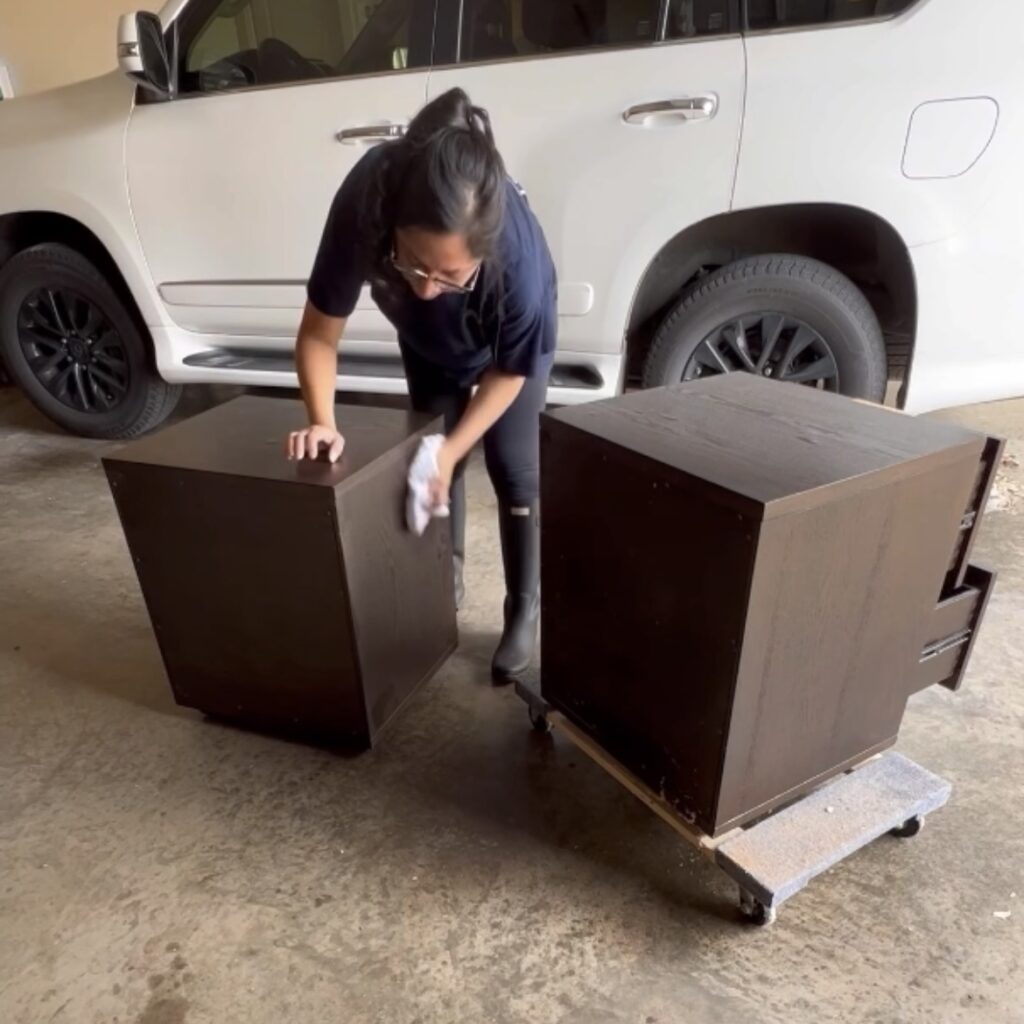
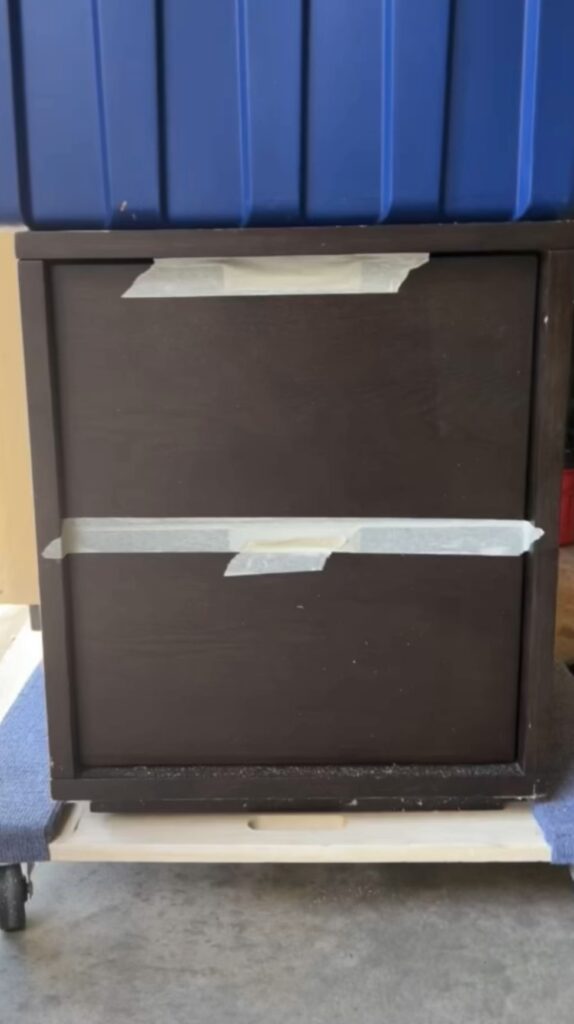
I scored these nightstands on FBMP and structurally they were in great condition. Paid only $40 for them, however, they were kinda giving file cabinet vibes. Here is how I transformed them. . .
Tools and Supplies Used for this Project
- Titebond III Wood Glue
- Mirka Sander
- Sanding Block (220 Grit)
- Bondo
- Milwaukee Pin Nailer
- Titebond Quick and Thick
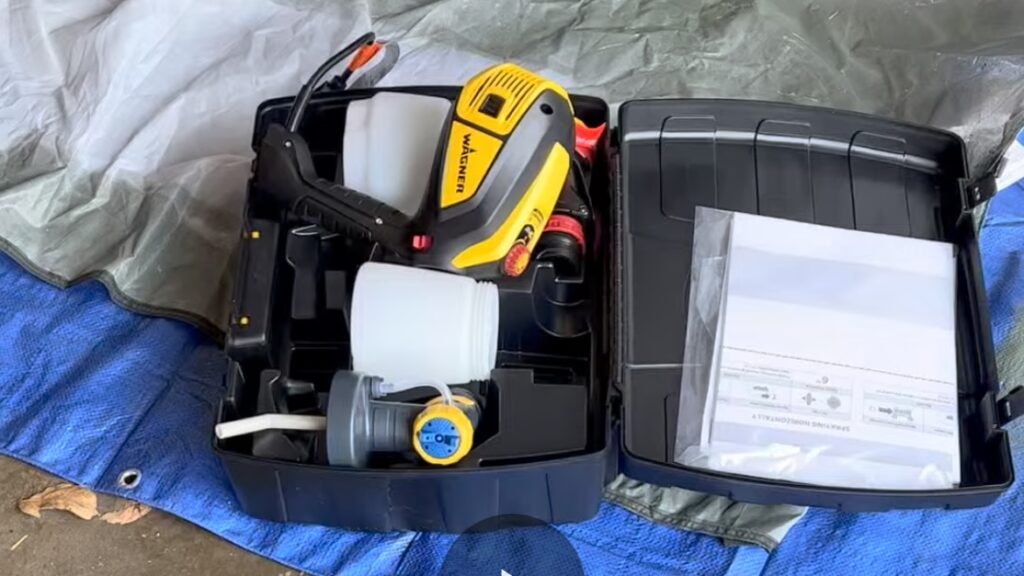
- Wagner Paint Sprayer
- 4″ Foam Roller
- 1″ Chip Brush
- BIN Primer
- Fusion Mineral Paint – Coal Black
- Fusion Stain and Finishing Oil – Natural
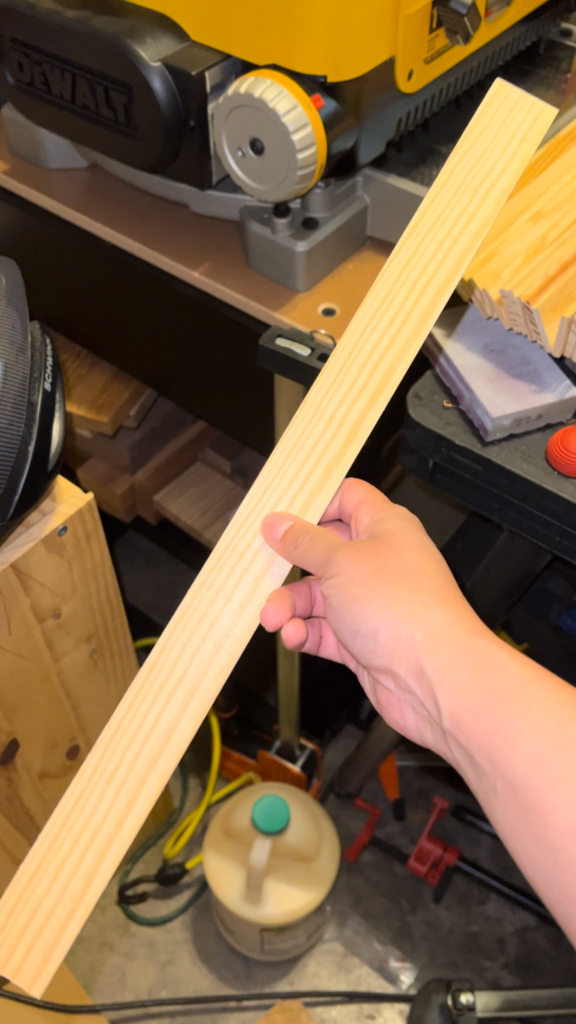
- Lattice Strips
- Miter Saw (or other saw to cut slats down to size)
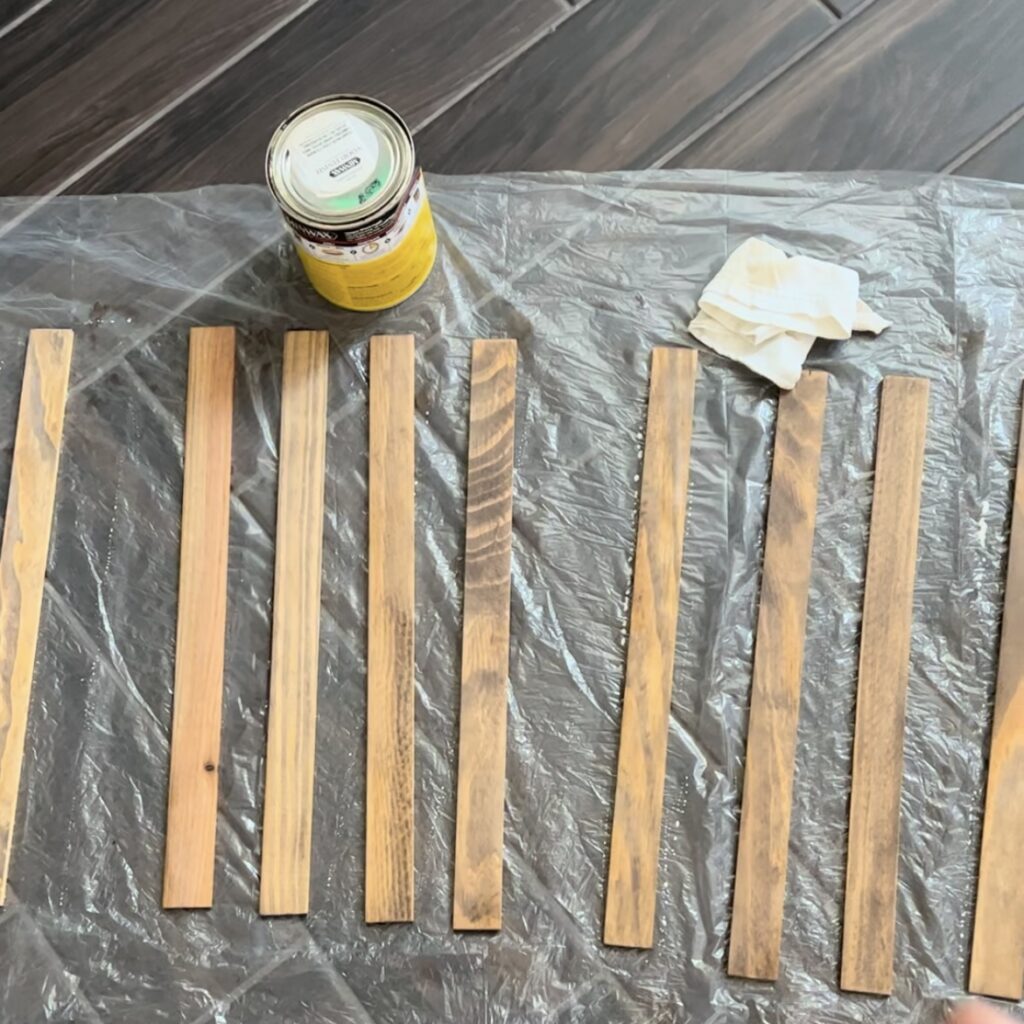
- Minwax Stain – Special Walnut
- Gold drawer handles
- Drill
Cleaning, Repairing, and Patching
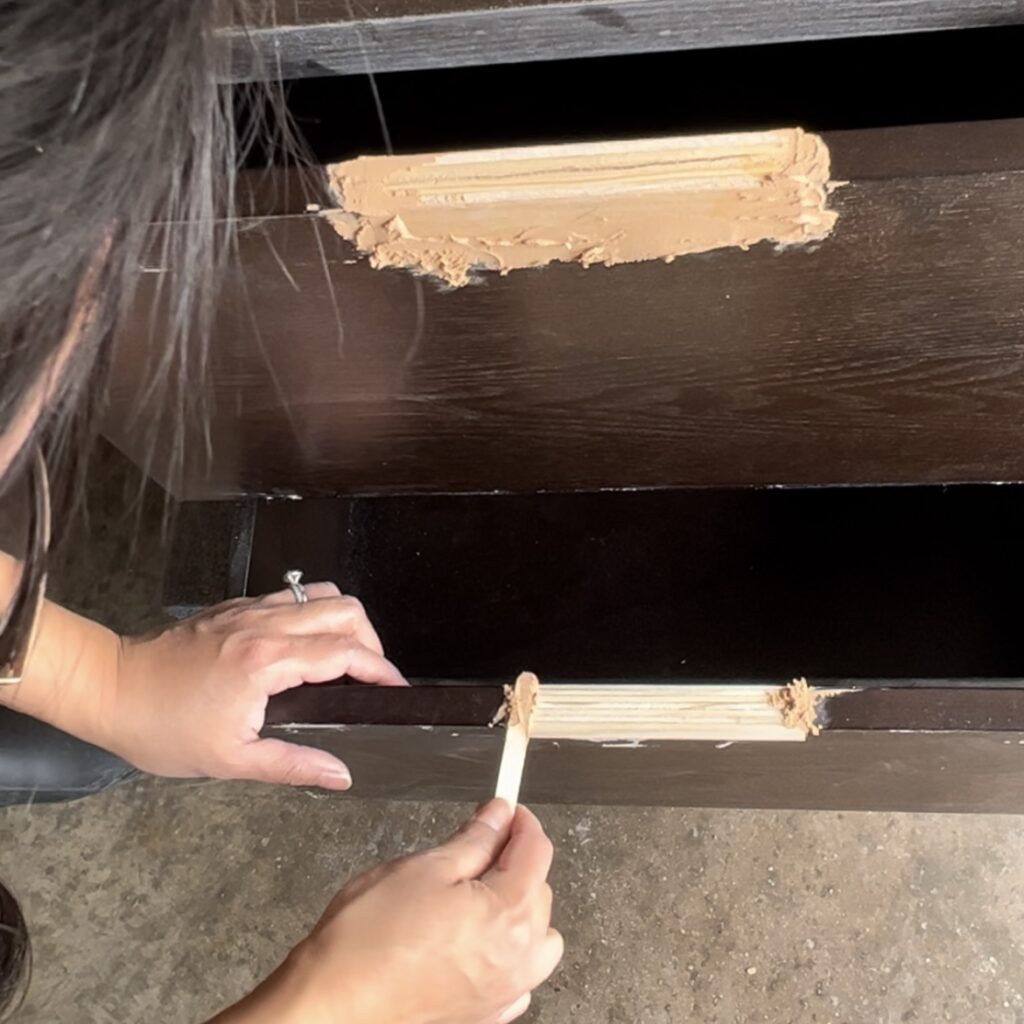
I started by giving these pieces a good clean with a rag and 409. You want to use something that will cut any grease and leave your piece really clean. I prefer using something that is a little more environmentally friendly but didn’t have anything at the time. 409 worked. Then I continued by filling the gaps on the drawer fronts with pieces of plywood scraps I had, to make the drawer fronts look like one piece. I used Titebond III wood glue to glue the pieces in.
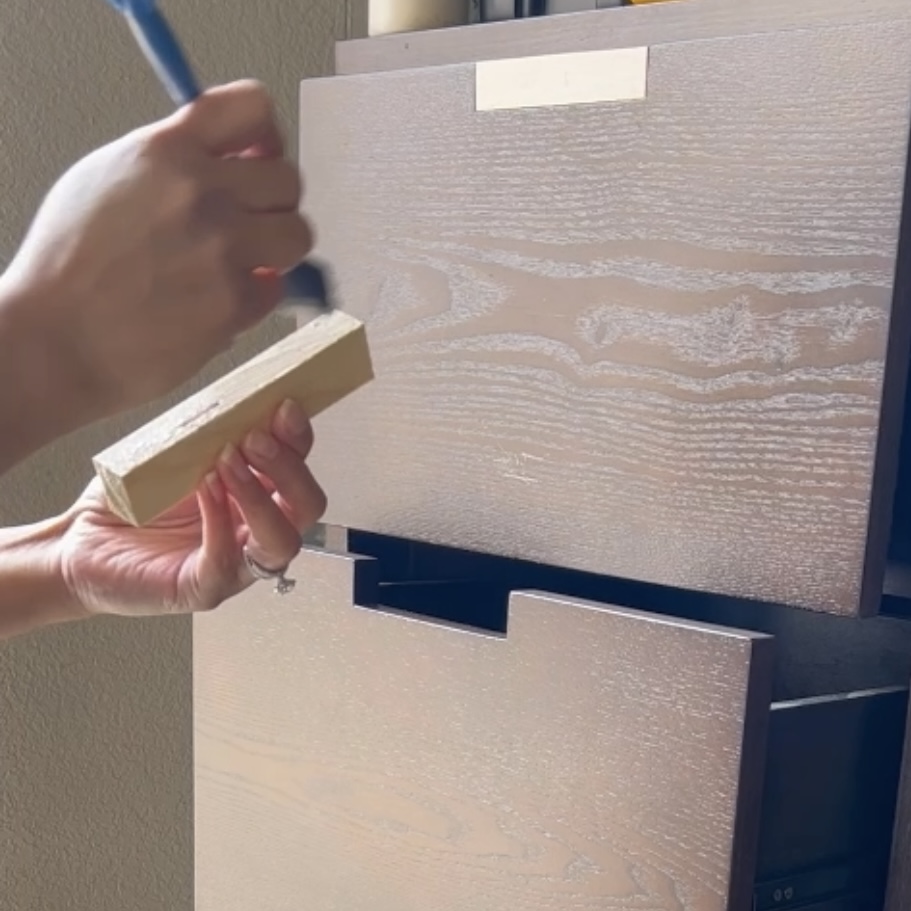
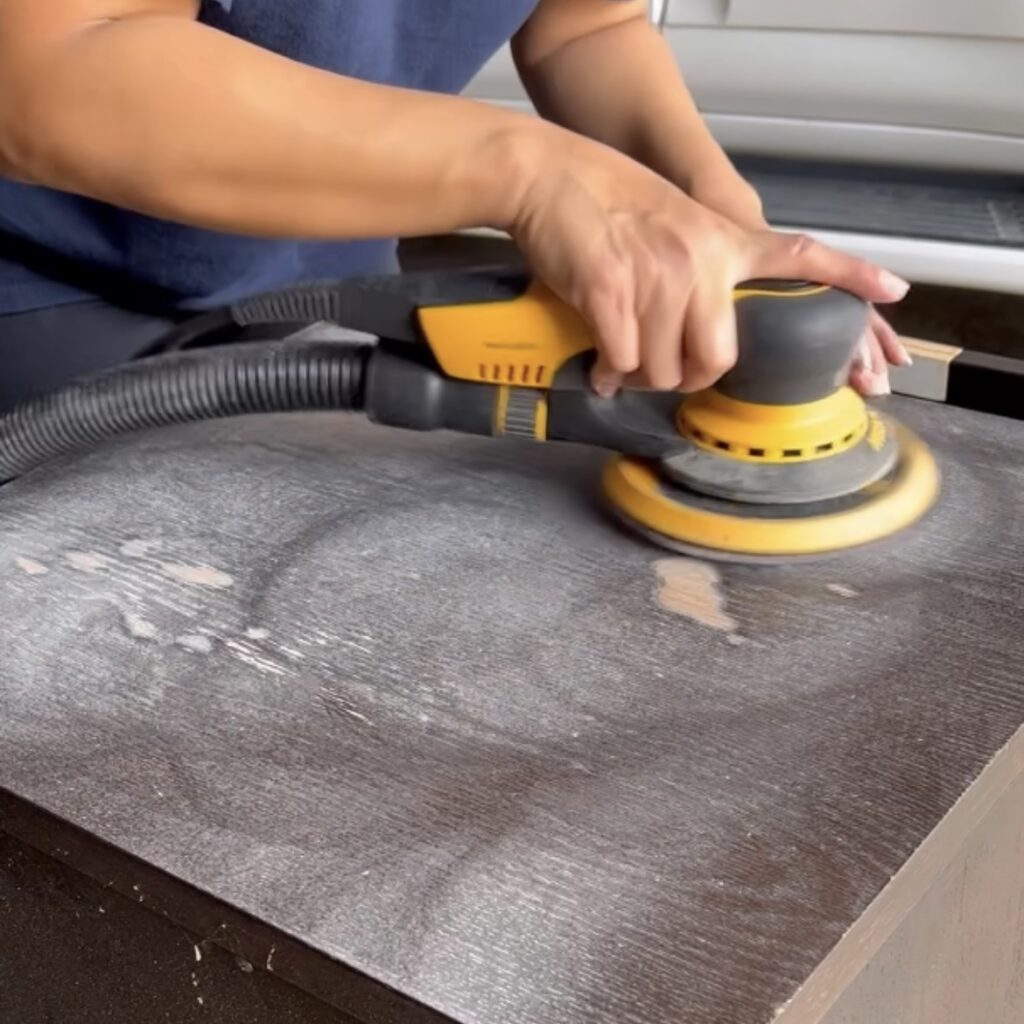
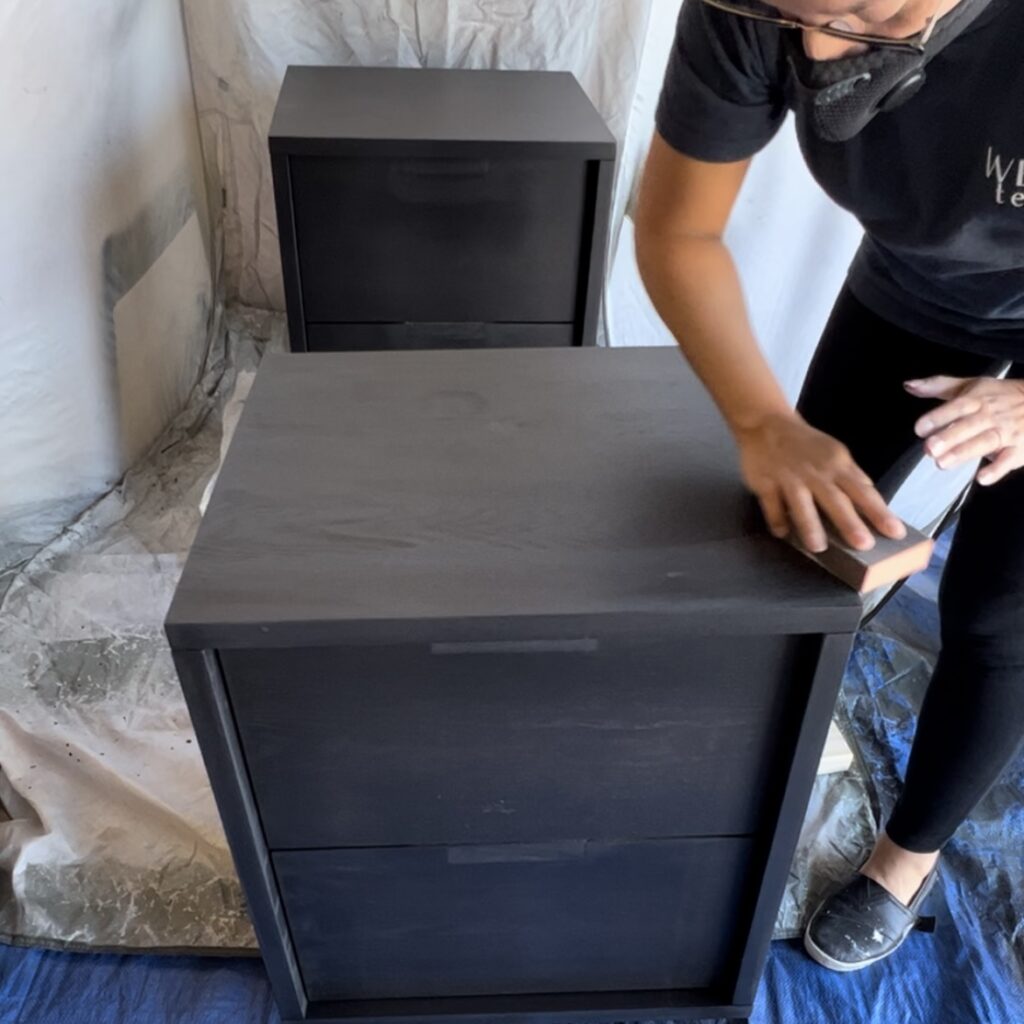
Besides scratches, I noticed the tops had water damage, which definitely needed to be fixed. I gave each piece a good scuff sand with my Mirka sander, paying close attention to smooth out those areas where there was water damage.
I mixed up some Bondo to fill the gaps on the handles I had just plugged with pieces of plywood. I prefer to use Bondo for these kinds of repairs where the area is larger than a nail hole. It does a better job at staying intact, especially when sanding larger surfaces areas.
And just a warning – if you’re using Bondo, make sure you’re working in a well ventilated area because this stuff reeks. The other thing about it is – it dries super fast depending on how much hardener you add. It’s better to mix it in small batches. Bondo only takes about 15 minutes to cure – I usually wait about 30 mins, and then I sand. After sanding everything and giving it a final clean, we’re ready to move on to paint.
Moving on to Paint
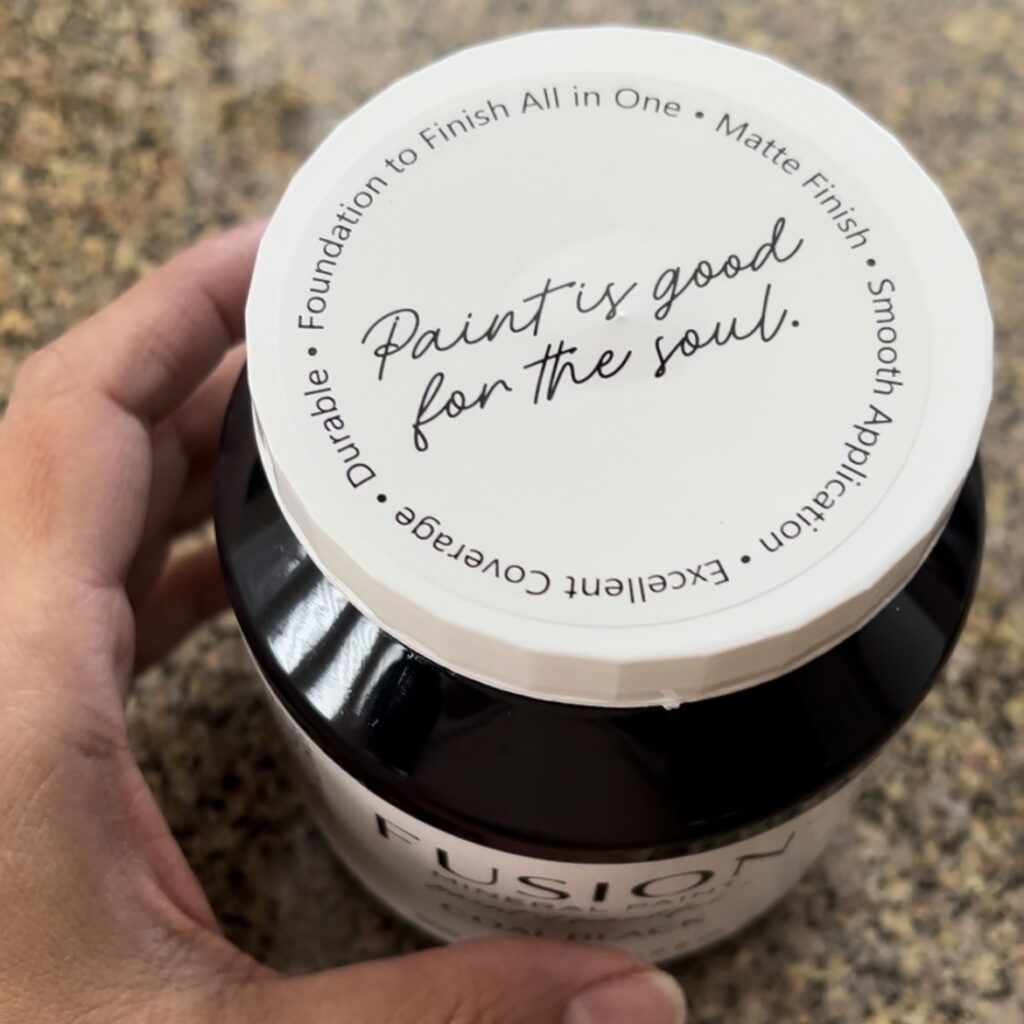
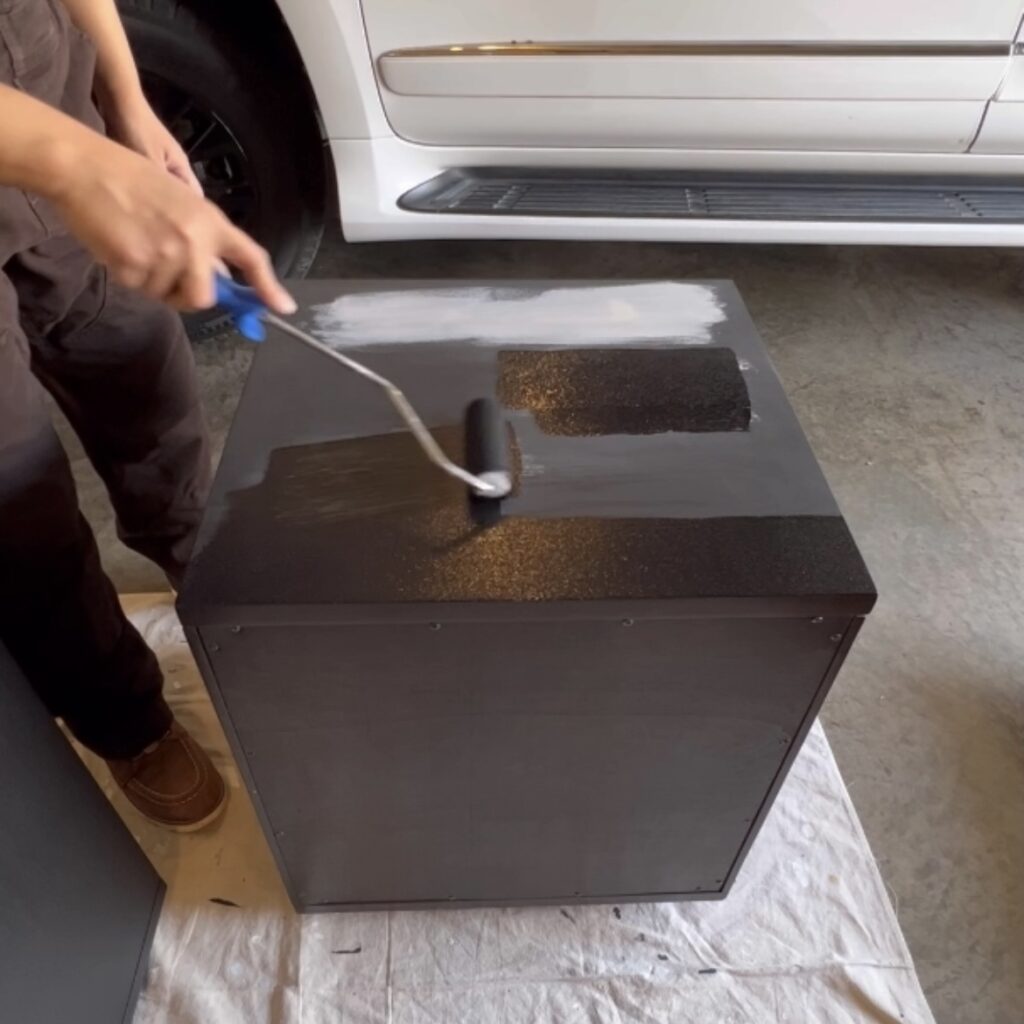
I decided I was going to paint these black. My go-to paint for furniture flips is usually Fusion Mineral Paint (FMP). Fusion Mineral Paint has a black color “Coal Black” that is a rich dark black. I love it and have used it on lots of pieces I have flipped. I have pretty much used FMP on all my flips because it’s an all-in-one paint that typically doesn’t require priming.
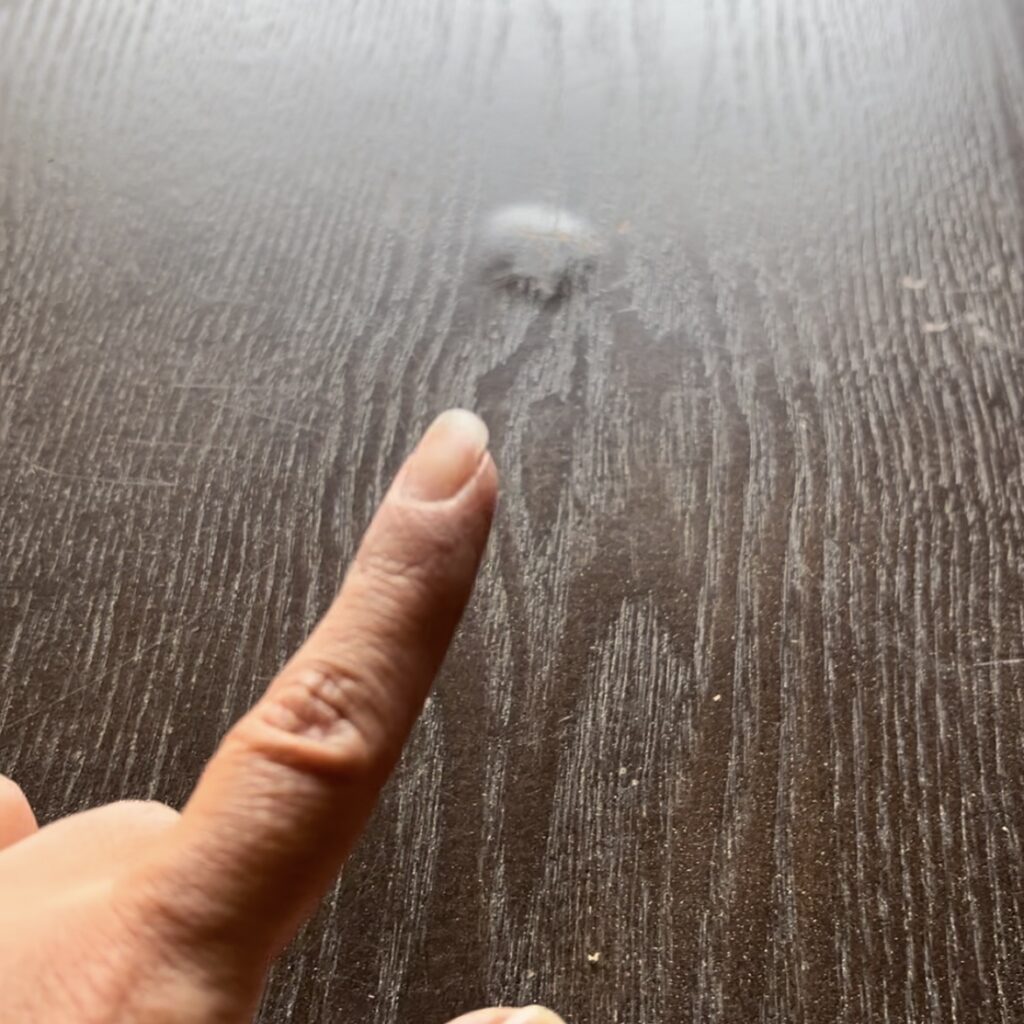
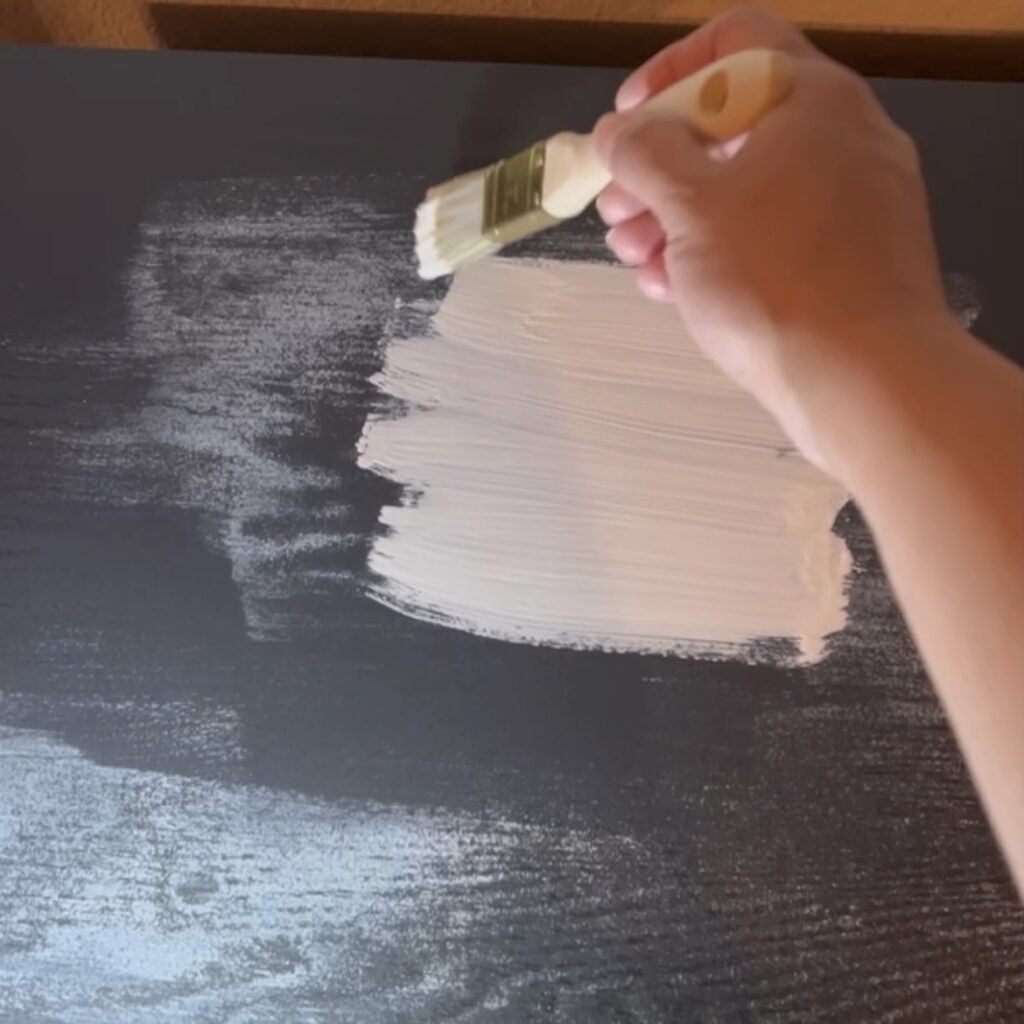
But here’s where I made a mistake. I went ahead and painted without priming the tops first – which, remember, had water damage. As I was spraying away I noticed you could still see the water damage on the tops of the nighstands and immediately regretted not priming those tops. But I figured I could go back and prime them and repaint them since I needed a second coat.
By the way – this Wagner Flexio 3500 is my favorite sprayer. So easy to use and so easy to clean!
Anyway, I gave the first nightstand a light sanding and did NOT like the way the top looked.
I could not stop thinking about how bad those tops looked so after I put my kids to bed that night I went out into my garage, grabbed a cheap little chip brush and sanded and primed those tops with BIN primer. 🙂
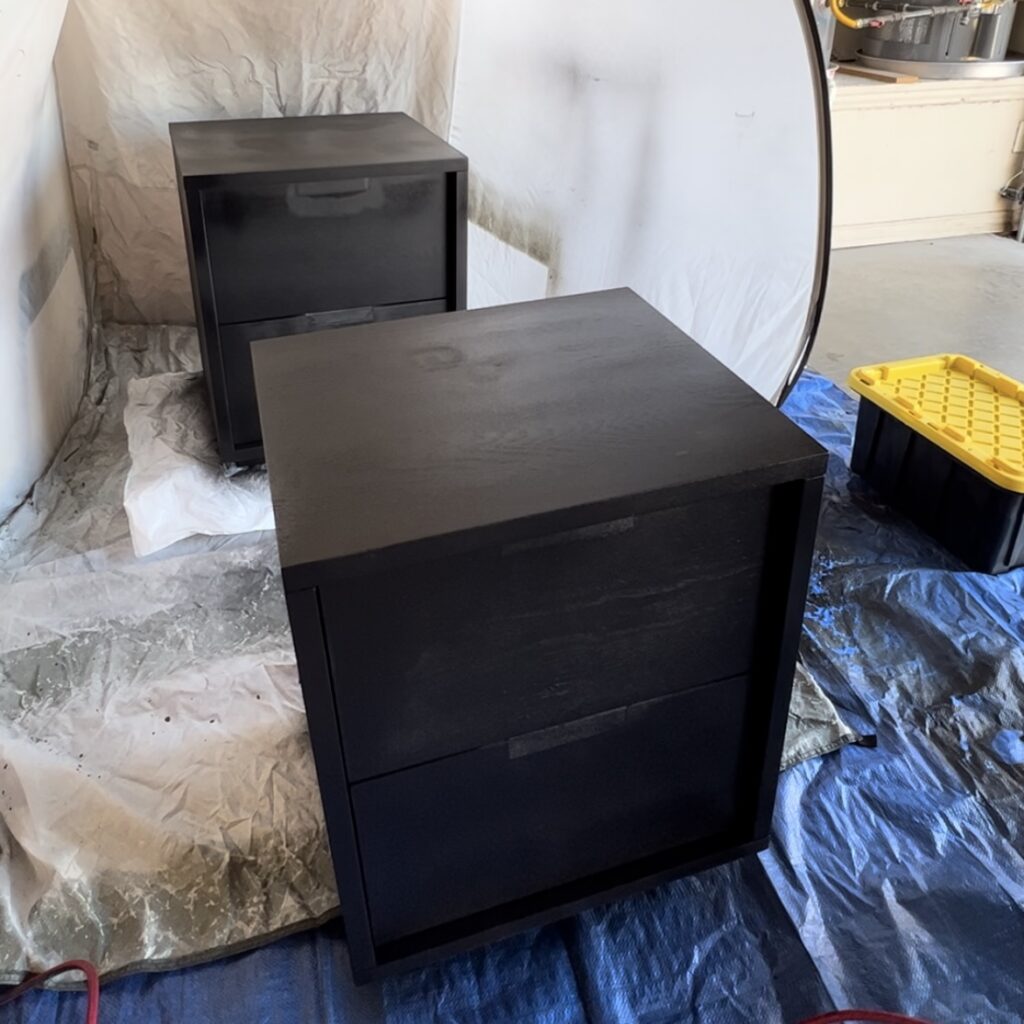
The next day I put a second coat of paint over everything and they looked SO MUCH BETTER!
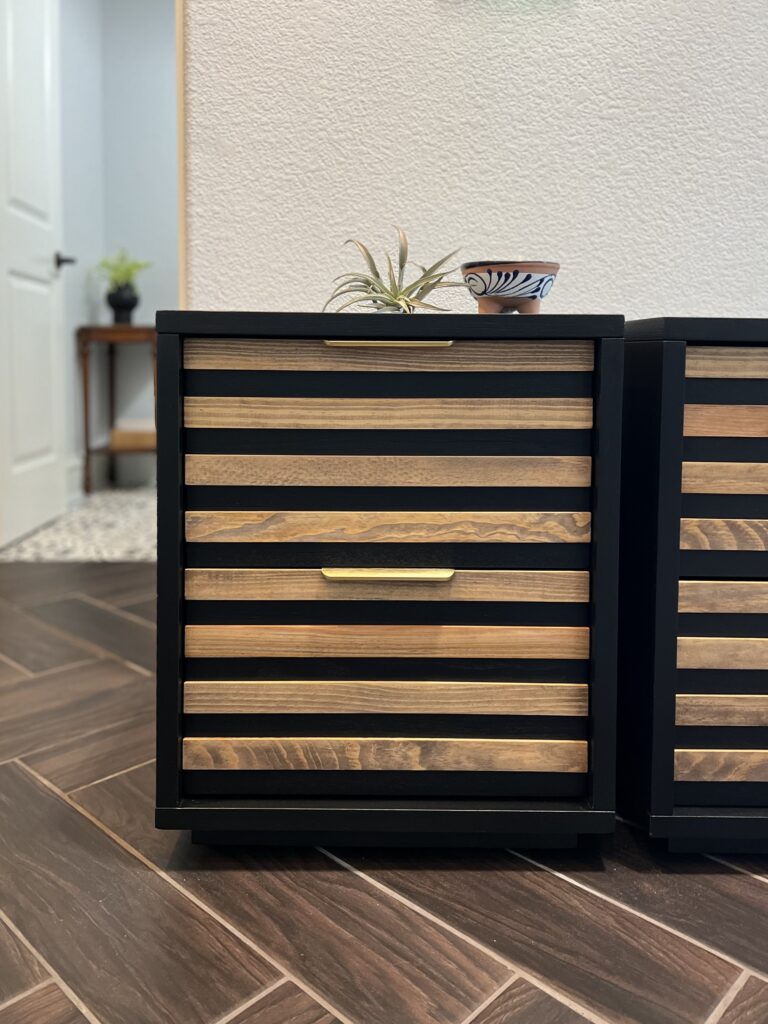
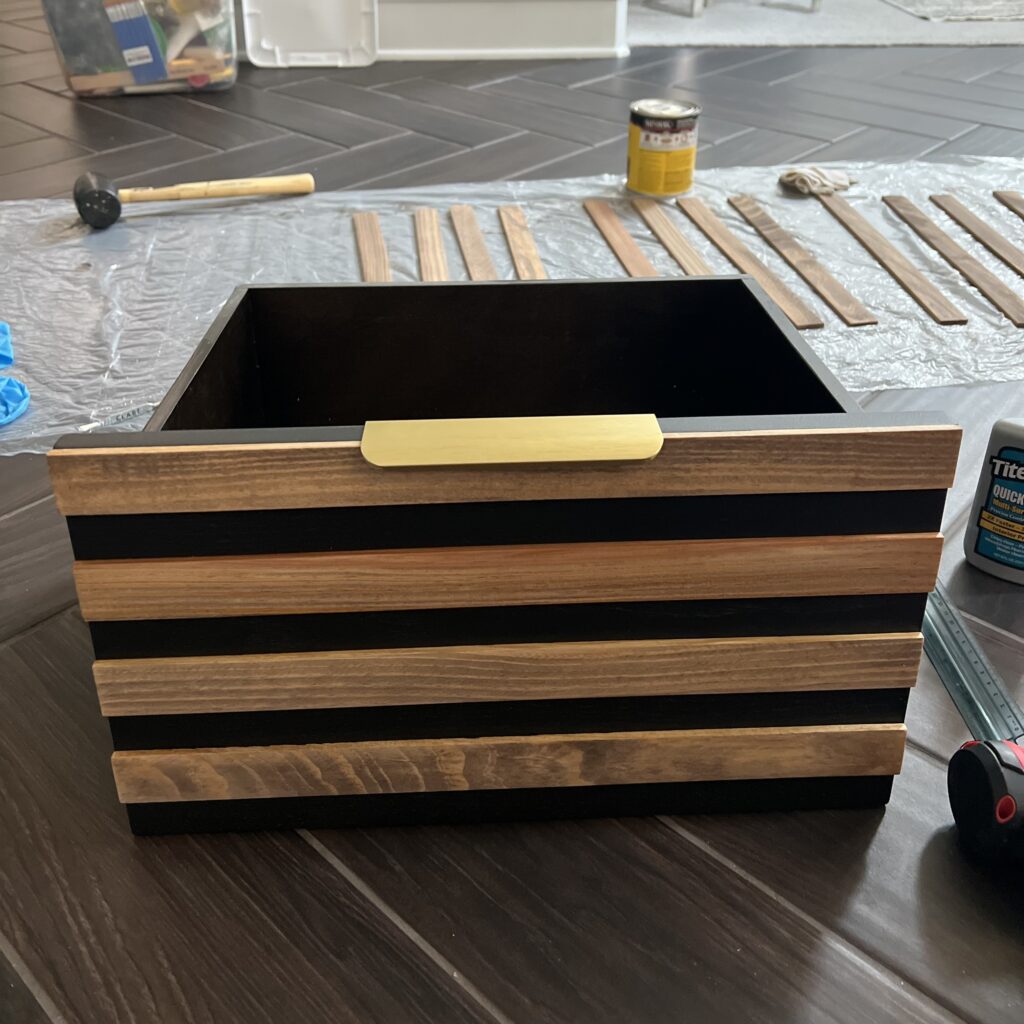
Adding Slats
Now comes the fun part! I had these leftover pine lattice pieces from a different project and decided to stain them because I wanted to give the nightstands a modern look by adding these slats to the drawer fronts.
I used one coat of Minwax stain in the color Special Walnut, which is a warmer brown. Wood tones with black is one of my favorite combinations so I was really excited to see how this was going to turn out.
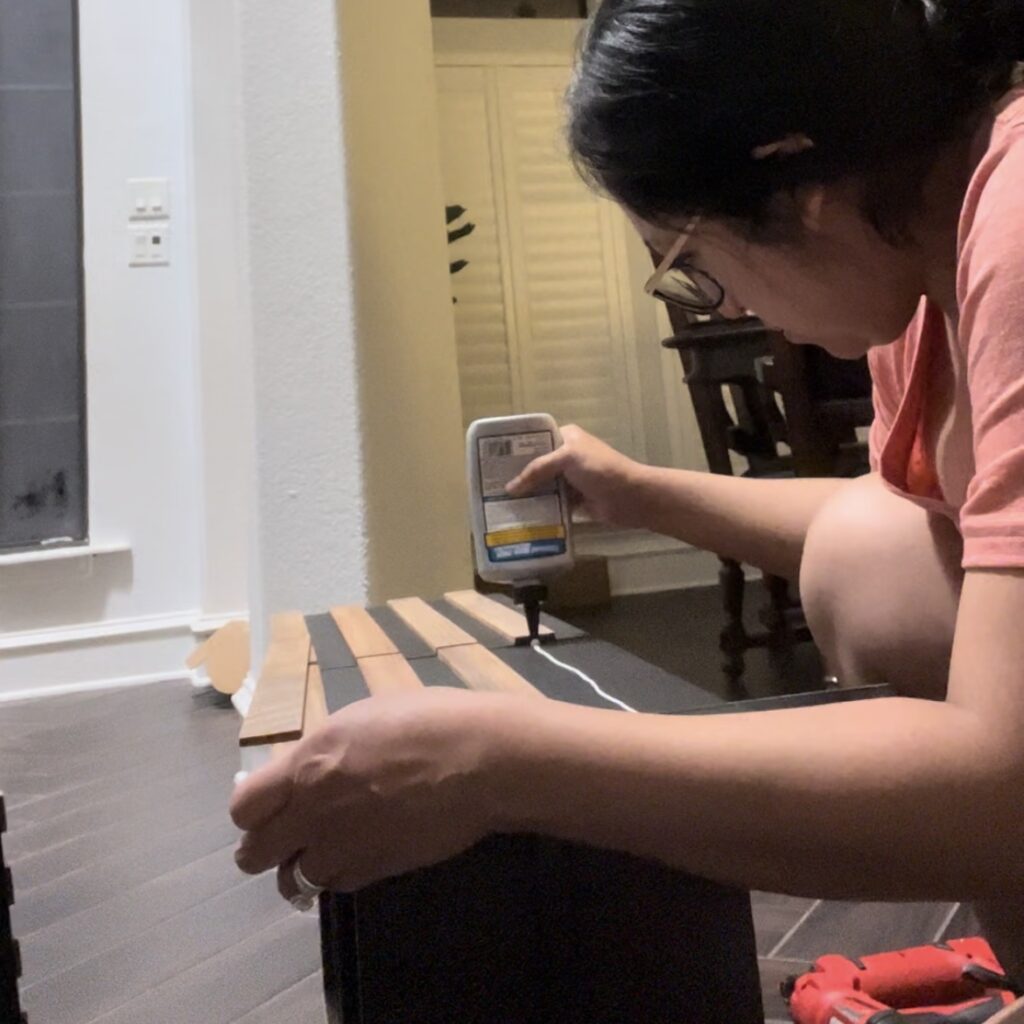
After the slats dried, I attached each slat with Titebond Quick and Thick as well as pin nails. I used a pin nailer instead of Brad nailer because pin nails leave smaller holes and I didn’t want to go back and fill nail holes. I used a ruler to make sure the spacing was the same between slats and made sure everything lined up nicely.

Adding Final Touches
The final step was adding hardware. I went with these thinner gold drawer pulls because I needed something that was thin enough to fit in the space between the drawers. These handles were really easy to install because they sit on top of the drawer front. When installing knobs or pulls, I highly recommend you drill a pilot hole with your drill prior to screwing in hardware so your drawer front won’t crack.
Final Reveal
Ok…here is a reminder of where we started, as well as the after!

I’m in love! These turned out exactly how I envisioned them. I love the contrast of the wood against the black with pops of gold…they’re literally perfect!
And as far as the tops – they turned out awesome! You can’t even tell where there was water damage! So lesson learned – always prime water damaged areas!
I hope you enjoyed seeing the transformation of this nightstand with slats. If you’re new to DIY, flipping a furniture piece is a great way to get started. You can get so creative with furniture flips! Like adding resin flowers to a furniture piece. If you are interested in painting a piece of furniture, I put together a guide that outlines the basic steps of how to paint furniture. You can always reach out with any questions. I’m always happy to help!
You can check out the Instagram Reel of when I did this flip or watch the YouTube video below. Best of luck and Happy DIYing!


