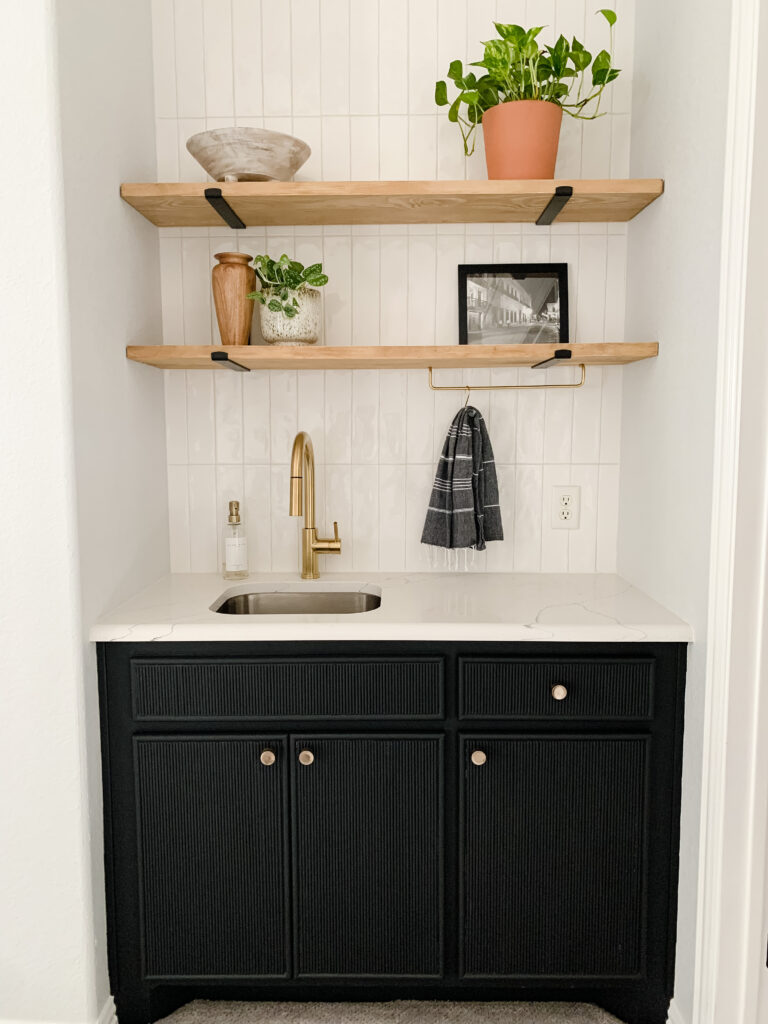
When I added the tile backsplash to the wet bar area in my house, I loved it. But after a couple of days of taking in what the space looked like I decided it needed something else. So, I started planning on adding floating shelves to the space and I’m going to show you how I did it, using L brackets and framing lumber! It’s a very budget friendly way to add shelves without overcomplicating the install.


*This post contains affiliate links. Please see full affiliate disclosure here.
Supplies I used for this project:
- 2×10 and 2×4 Lumber (It’s easier to just buy a 2×12) 🙂
- Stain of Choice (I used FMP Stain and Finishing Oil)
- Shelf Brackets
- Toggle bolts (To hold shelf brackets)
- Bondo
- White Paint (I used FMP Picket Fence)
- Titebond III
Tools I used:
- Circular Saw
- Clamps
- Planer (Optional)
- Drill
- Ceramic Tile Drill Bit
- Sander
Putting the Shelf Together
For this project, I used floating shelf brackets from National Hardware. These brackets are for shelves that are up to 11 3/8″ wide so I used scrap pieces of 2×10 I had and a 2×4 to add the rest of the width so my shelf would be 11 3/8.” If you don’t have scrap wood pieces you can use, this is where you use a piece of 2×12 framing lumber. Cut it down to the length you need.

I cut the edges of both pieces with my circular saw and squared them up as best as I could in preparation for the glue up. I used Titebond III to glue both pieces together that would create one shelf – did that twice since I needed 2 shelves – and let them sit overnight in clamps.

The next day I used my circular saw to cut the width of the shelf to 11 3/8.” I used a scrap piece of MDF 1×4 as a guide so that I could make my cut as straight as possible. Make sure you wear PPE for this part because a circular saw usually creates a lot of sawdust.

The next day I ran my shelves through the planer. This step is optional. I own a planer and it was so much easier to use that to flatten my shelves vs sanding them to get them even.

Adding the Floating Shelf Brackets and Drilling into Tile
For the backsplash area, I used painters tape to mark up the spots where I wanted to add my
brackets. I then drilled holes into the backsplash where I would be installing my shelves. Please note that in order to drill through tile you need special drill bits that are for stone, granite, and ceramic. When drilling into the tiles I kept wetting the bit so that it wouldn’t get too hot (this is a very important step). I share an Instragram reel about the process here.


To install the brackets, I added a toggle bolt into the holes that I drilled into the backsplash and drilled the bracket into the wall. Drilling into tile can sound scary. The biggest fear is always the fear of cracking the tile and messing up your new tile job. I was afraid, yes, so I tested it out on a scrap piece of tile and plywood first, before I drilled into the real thing.


Installing the Shelves
By this point, the glue that I used to stick my shelves together was dry so I cut my pieces down to
the length I needed. I used Bondo to fill in any spaces in the shelves. Bondo is a wood filler that hardens pretty quickly and doesn’t shrink. It does not tend to crack like regular wood filler does, which is why I like to use it on projects like this. I anticipate this shelf will get use and I don’t want to risk the wood filler cracking or chipping later on if I place a glass cup on it.

Once the Bondo had dried, I used my sander to make the wood pieces smooth before applying a finish. I decided to go with my tried and true white paint wash method to blend in all the colors on the wood before applying stain. I used Fusion Mineral Paint in the color Picket Fence for the white wash.

The white paint wash toned down some dark spots on the wood and made the stain look so much better on the wood! This method is my go-to staining method because it’s easy and dries quickly. You can read about it here. Once everything dried I added the shelves to the brackets, securing them down with screws. And that’s it! Easy peasy! Don’t you think the space looks so much better with shelves?


Final Thoughts
There are several ways to add floating shelves to a space. This method is one of the simplest methods especially if you’re at the beginning of your DIY journey. I decided to go with this easier method because it was my first time drilling into tile and I didn’t want to risk messing up my new tile job. It’s not a space I use super often and I figure if I change my mind later down the line, I can always go back and add better brackets to make this a true floating shelf with hidden brackets. Remember DIY is a journey to learning and with each project you get better and better. So don’t be afraid to try! You can always go back and change it. 🙂
Here is the Instagram reel of when I shared this project. Reach out if you have any questions. See ya on the ‘gram!
