Staining is one of my least favorite things to do. I’m not a fan of the smell, not a fan of the prep work involved, and I’m also impatient. 🙂 With staining vs painting, you have to wait about a day or so in between coats otherwise the stain will turn out blotchy. Pine is a soft wood and very absorbent and if you don’t take the time to do the proper prep, the stain will also turn out blotchy.
This method is my staining go-to because it’s easy, it’s faster, and really minimizes the imperfections that sometimes come with working with pine, especially framing lumber. Just keep in mind that if you’re using stain you want to dispose of the rags properly so you don’t accidentally start a fire. 🙂 Here is the method I like to use for staining pine:
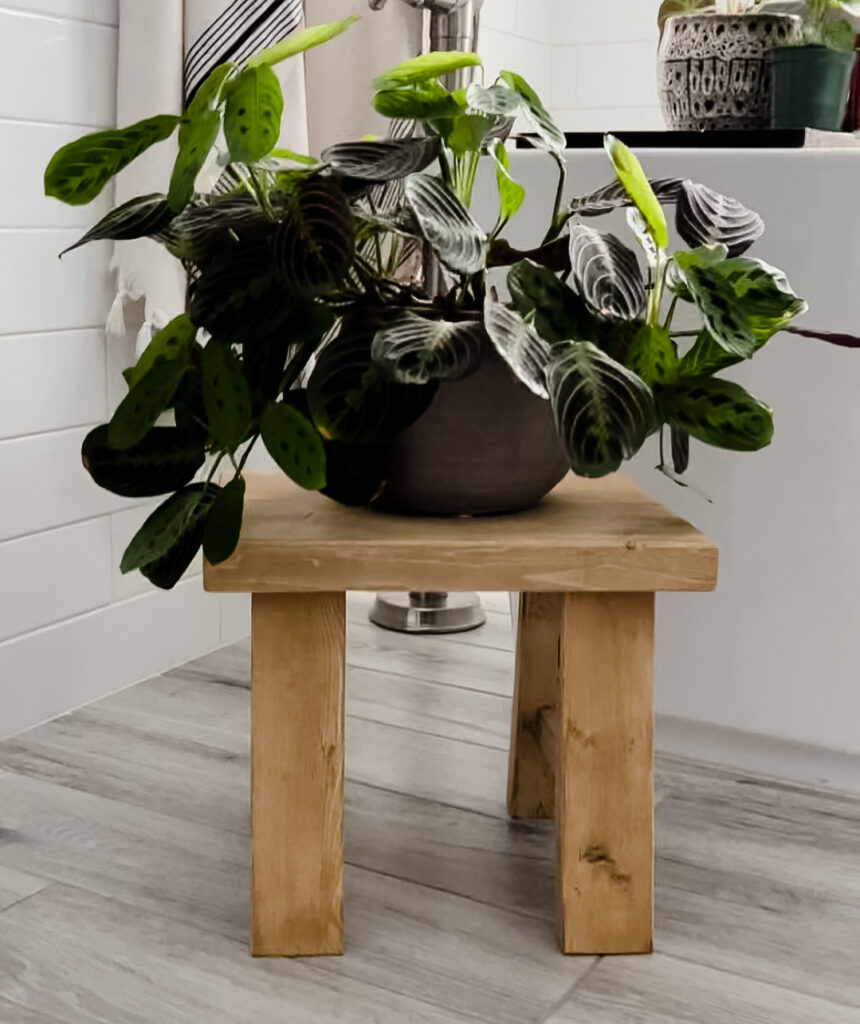
1. Start off by sanding (in this case, I was staining this stool). You want to make sure you work your way up to a 220 grit. I usually start with 120, and depending on the piece, I do 180 or just skip straight to 220.
2. After you’ve sanded it’s time to whitewash. I like using Fusion Mineral Paint in the color Picket Fence, which is the whitest color Fusion has, but really you could use any white paint. I add a little water to the paint. Probably about a 60/40 mix with paint being most of the mix. You basically want the final mixture to have a watery consistency. I like applying it with a brush.


After applying the whitewash and letting it dry, do a light sanding with 220 grit before applying the stain.
3. Once you’ve sanded your piece, apply the stain. I use Fusion Mineral Paint All-in-One Stain and Finishing Oil to stain. I like using this one because it doesn’t smell as bad as other stains and it has a top coat already in it. All I have to do is stain once and it’s done. Using an old t-shirt or a staining pad, I take a bit of the stain and start rubbing it all over the stool. I let the stain set for about 4-5 minutes and then I go back and rub some of the stain off until I get a warm brown tone.


As I stated before, Fusion Mineral Paint allows for just one coat and you don’t have
to seal it in the end. If you are using a regular stain without a top coat, don’t forget to add a top coat once the stain is dry.
And that, my friend, is how you can finish your piece in just one day!
I love using Fusion Mineral Paint products because they are very DIY friendly and most have zero VOCs. The stain does have VOCs but compared to a store bought stain, it is much less because the stain is made with linseed oil. Again, I cannot stress enough the importance of making sure you are disposing of your stain rags the correct way! It is so important to keep that in mind!
This is the Instagram reel where I show you how I use this method. And as always, if you have any questions, feel free to reach out! Happy staining!