

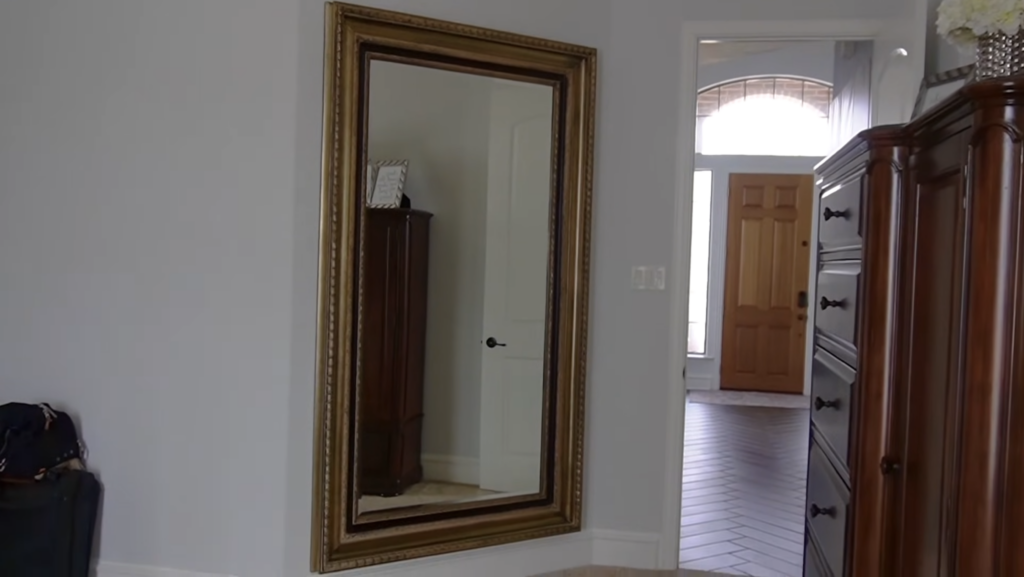
Hanging a large mirror can feel like one of those projects that sits on your to-do list forever. I know, because mine sat on the wall (well, leaned against it) for eight years. Eight. Years. Y’all, I just could not commit. The mirror is heavy, it’s tall, and the thought of it crashing down at 3 a.m. kept me from doing anything about it.
Here’s the thing. Once I finally did the research and found the right hardware, the whole project came together in an afternoon. So if you’ve got a giant mirror, a heavy piece of art, or a chunky farmhouse frame waiting to go up, this post is for you. I’m walking you through exactly how I hung a mirror that’s 49.5 inches wide and 7 feet tall using a French cleat system, what I would do differently, and the tools that made it doable for someone like me who is not a professional installer.
Spoiler: this is not a one-person job. But it is absolutely a doable job.
*This post contains affiliate links. Please see full affiliate disclosure here.
Why I Chose a French Cleat for a Heavy Mirror
If you’ve never used one, a French cleat is honestly genius. It’s a two-piece bracket where each piece has a beveled edge that interlocks with the other. One piece goes on the wall, the other goes on the back of whatever you’re hanging. When you set the item down, the bevels lock together and gravity holds everything in place. No wires, no awkward picture-hanging hooks trying to support 80 pounds of glass and frame.
For something this heavy, I needed hardware that could actually handle the weight without sagging or pulling out of the wall. I went with the Ook model. You can grab them here:
Quick heads up. I started with the 18-inch bracket and ended up swapping to the 30-inch. More on that detour in a minute, because it’s exactly the kind of thing that can throw off a project if you don’t plan for it.
Tools and Supplies You’ll Need
Here’s everything I used to get this mirror up safely. Most of these are tools you’ll reuse on a hundred other projects, so they’re worth the investment if you don’t already own them.
- DeWalt Drill for drilling pilot holes and driving screws
- Montana 4-in-1 Drill/Driver Countersink Bit so you can switch between drilling and driving without changing bits constantly
- Ook 30” French Cleat (or the 18-inch version if your studs cooperate)
- Irwin Quick Lift Construction Jacks and these are the real heroes of this project
- Stud Buddy Stud Finder to locate your studs
- Command Picture Hanging Strips or 3M velcro strips for stabilizing
- A regular bubble level (the tiny one that comes with the bracket is not always enough)
- Measuring tape, pencil, painter’s tape
- A vacuum (you’ll thank me later)
- And of course, the mirror itself if you’re shopping for one
That’s it. No specialty equipment, no contractor needed.
Step-by-Step: How to Hang a Heavy Mirror with a French Cleat
Okay, let’s get into the actual install. I’m going to walk you through this the way I did it, including the parts where I had to back up and start over, because that’s real life and you might run into the same things.
Step 1: Lay the Mirror Face Down and Prep the Back
This is where you need a helper. Recruit a husband, a friend, a strong neighbor, whoever you’ve got. My husband helped me lay the mirror face down on the floor on a soft blanket so I could work on the back.
My mirror came with a small D-ring hook on the back, which I removed. You don’t need it once you’re using a French cleat, and leaving it on can actually mess with how flat the mirror sits against the wall.
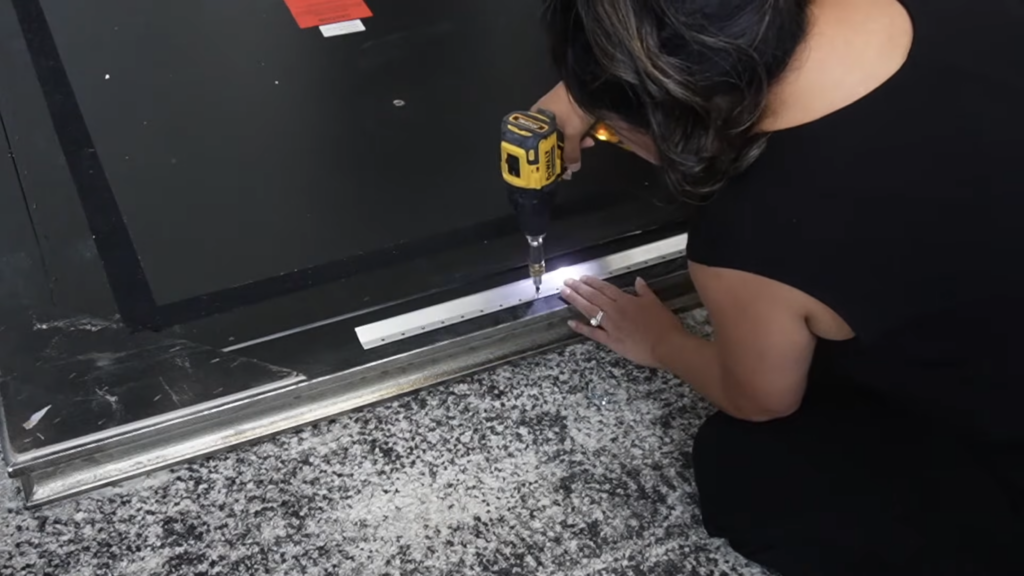
Step 2: Install the First Cleat Piece on the Back of the Mirror
Center the bracket on the back of the mirror, making sure the bevel is angled correctly. This part trips a lot of people up. The piece on the mirror has the bevel pointing down and toward the wall. The piece on the wall has the bevel pointing up and toward you. When the two slide together, they lock.
Drill pilot holes first. I cannot stress this enough, especially if you’re working into a wood frame. Pilot holes prevent splitting and make driving the screws so much easier. The Ook hardware comes with all the screws you need. The 18-inch bracket includes 12 screws, so I planned to use 6 per bracket piece. Same idea for the 30-inch.
Vacuum your mess as you go. Wood dust on the back of a mirror is a pain to clean up later, and it can scratch the surface if it migrates around.
Step 3: Find Your Studs and Mark the Wall
Lean the mirror back against the wall to get it out of the way. Now grab your stud finder and mark every stud in the area where the mirror is going. Use painter’s tape so you don’t end up with random pencil marks all over your wall.
Here’s where my plan fell apart. My studs were not where I needed them to be. The 18-inch bracket I had was too short to span two studs once it was centered behind the mirror. And listen, when you’re hanging anything over 50 pounds on drywall, you absolutely need to hit at least one stud, ideally two. Drywall anchors alone are not enough for a mirror this size.
So I pivoted. I ordered the 30-inch Ook bracket, which is rated for 300 pounds and is long enough to easily span two studs. Worth the extra few dollars and the wait. If you’re planning a project like this, I’d honestly just buy the 30-inch from the start. More security, more flexibility on placement.
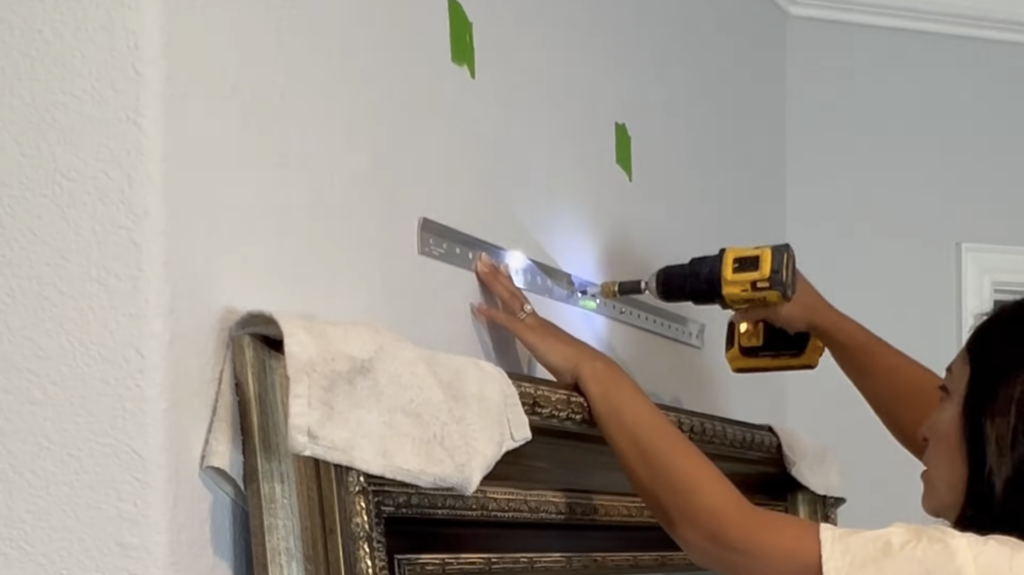
Step 4: Install the Cleat on the Wall
Once I had the new bracket, I pulled all my old tape off the wall and started fresh. I measured up from the floor to figure out exactly how high I needed the wall bracket so that when the mirror dropped into place, it would hover at the height I wanted. Remember, the mirror sits about an inch lower than the top of the wall bracket once the cleats interlock.
Use a real bubble level to check the bracket. The Ook hardware comes with a tiny built-in level, and it does work sometimes, but it has a habit of falling out of the bracket while you’re trying to use it. On the 18-inch bracket, mine kept popping loose. On the 30-inch, it stayed put. Either way, have a separate level handy. You do not want to drill into your wall twice.
Drill pilot holes into the studs, then drive the screws home. Make sure the bracket is rock solid before you move on. Give it a tug. If it moves, something’s not right.
Step 5: Lift the Mirror Into Place
This is the part where most people pull a muscle or drop the mirror. I used Irwin Quick Lift Construction Jacks, and they were a total game changer. Each jack can lift up to 330 pounds and raise it 10 inches high. Since I needed to lift the mirror about 9.5 inches to get the cleats to engage, this was perfect.
My husband held the mirror steady while I went back and forth between the two jacks, raising one side a click, then the other, then back again. Slow and even. We got it into position on the first try, which honestly felt like a small miracle.
Once the cleats clicked together, gravity took over. The mirror just settled in place. No wobble, no slipping. That’s the magic of a French cleat.
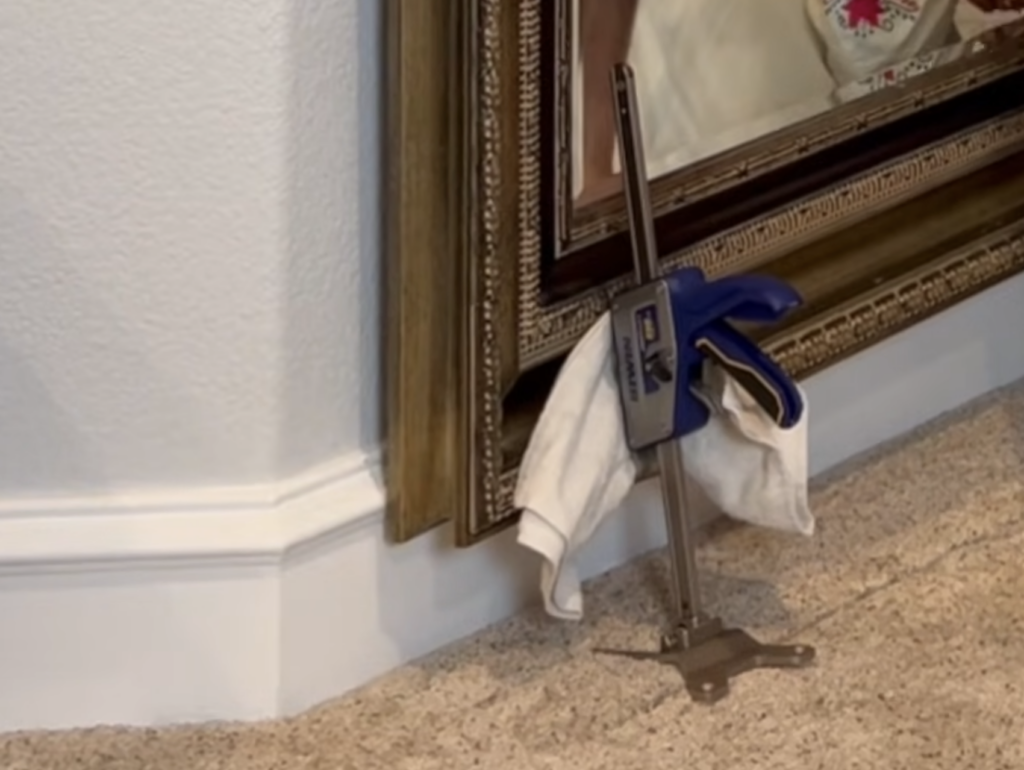
Step 6: Stabilize the Bottom
My wall has a slight curve to it (older homes are full of surprises), so the bottom of the mirror wanted to lean out a tiny bit. I grabbed some 3M velcro strips, layered a few together to build up the right thickness, and stuck them between the mirror and the wall as a cushion. You could also use Command picture hanging strips for the same purpose. Whatever you use, this little step locks the mirror against the wall so it doesn’t shift if someone bumps it.
Tips I Learned the Hard Way
A few things I picked up along the way that might save you some frustration:
- Buy the longer bracket. The 30-inch Ook cleat gives you so much more flexibility for hitting two studs. Don’t waste money on the 18-inch unless you already know your stud placement is perfect.
- Always work with a partner on heavy mirrors. Even with construction jacks, you need someone to keep the mirror from tipping while you adjust.
- Mark a reference line at the bottom of the frame in pencil. I drew a tiny line on the wall under the bottom edge of my mirror so I could quickly check months later if it had sagged at all. Spoiler: it hasn’t budged.
- Vacuum constantly. Drywall dust gets everywhere, and a clean workspace makes a big difference.
- Don’t trust the mini level that comes in the kit. Use a real one.
How Much Does This Project Cost?
If you already own a drill and basic hand tools, the actual hanging hardware is the main expense. The 30-inch Ook French cleat runs around $25 to $35 depending on where you buy it. The Irwin Quick Lift jacks are around $40 to $50 for a pair. So you’re looking at roughly $65 to $85 for the dedicated supplies, plus whatever the mirror itself cost you.
Compared to paying a handyman to hang it for you (and risking them using the wrong hardware), this is a steal. Paint is magic, but so is hardware that’s rated for the job.
Has the Mirror Held Up?
Yes. It’s been several months since I finished this project, and the mirror has not moved a millimeter. No sagging. No tilting. No middle-of-the-night crashes. It looks exactly the same as the day we hung it.
That little reference line I drew at the bottom of the frame? Still right there where it should be. I check it every now and then, just for peace of mind. The French cleat system is doing its job perfectly.
Frequently Asked Questions About Hanging a Heavy Mirror
It depends on the cleat. The 18-inch Ook French cleat is rated for 200 pounds, and the 30-inch is rated for 300 pounds. Always check the weight rating before you buy. And remember, the cleat is only as strong as what it’s anchored into. You need to hit at least one stud, ideally two, for any mirror over about 50 pounds.
I would not recommend it for anything over 25 to 30 pounds. Heavy duty drywall anchors exist, but they’re not as reliable as a stud, especially over time as the wall flexes and the anchor loosens. If you cannot hit a stud, use a longer bracket so you can find one. That’s exactly why I went up to the 30-inch cleat.
Construction jacks. Hands down. The Irwin Quick Lift jacks I used can each handle 330 pounds and raise the mirror up to 10 inches, which is more than enough for most cleat systems. Trying to muscle a heavy mirror into place by lifting it is how people drop them.
Yes. The little built-in levels are helpful but they fall out of the bracket constantly. Use a regular bubble level to double check before you drill. Trust me, drilling extra holes in your drywall is not fun.
French cleats work great on drywall over wood studs, which is what most homes have. For plaster walls, brick, or tile, you’ll need different anchors and possibly masonry screws. Always research the wall type before you start.
Final Thoughts
If you’ve been putting off hanging a heavy mirror because it feels too risky or too complicated, I really hope this post takes some of that fear away. The right hardware (a French cleat rated for the weight, hitting your studs, and a pair of construction jacks) makes a project like this absolutely doable. Even if you’ve never tackled something this heavy before.
Eight years I waited. Eight. And the actual install was an afternoon. Don’t be like me. Hang the mirror.
If you have questions about this project, drop them in the comments and I’ll do my best to help. And if you tackle a big mirror yourself, I’d love to hear how it went. For more DIY projects and tips, you can explore the blog. Happy DIYing, y’all.


