Building planters is a lot easier than you think and so much fun! Back in 2020 when I discovered the versatility of pocket holes, I built this DIY modern planter and it has held up really well outdoors. I loved it so much I built a second one for my tomatoes when I thought I wanted to give gardening a try (that didn’t last long). Almost 3 years later I can tell you these planters have held up really well and want to share with you how easy it is to build one of these to your liking. 🙂
*This post contains affiliate links. Please see full affiliate disclosure here.
Supplies you will need (for this size planter)
(2) Cedar Fence Pickets
1/2 inch plywood project panel OR 1×12 pine
(1) 1×2 furring strip (if you don’t have small scrap wood pieces to cut down for base supports)
(12) 1/2 x 2 x 3 hobby board slats
Outdoor Screws (the length depends on the thickness of your base support)
Paint, Stain, or Outdoor Poly
Tools for this project:
Brad Nailer
As always, the brand of tools doesn’t matter. 🙂 These are tools I personally have owned and love so I am linking them. But as long as they do the job, that’s what matters the most.
If you have scrap wood that is the size of the base of your planter, you can use that too! I had 1/2 plywood leftover from a different project and that is what I used for the base of my planter. I also used cedar 2x3s I happened to find at Lowe’s. At my local Lowe’s these are a hit or miss but really, any 2×3 or 2×4 will do. You just need something thick to attach the pocket holes to when you are building the sides of your planter.
Cut List
Fence Pickets – Cut (8) pieces to 12″
2x3s – Cut (4) pieces to 23.5″
Furring strip (or scrap wood pieces) – Cut (4) pieces to 10″
Base – You will make this custom cut at the end when your planter shell is put together

Putting the Sides Together
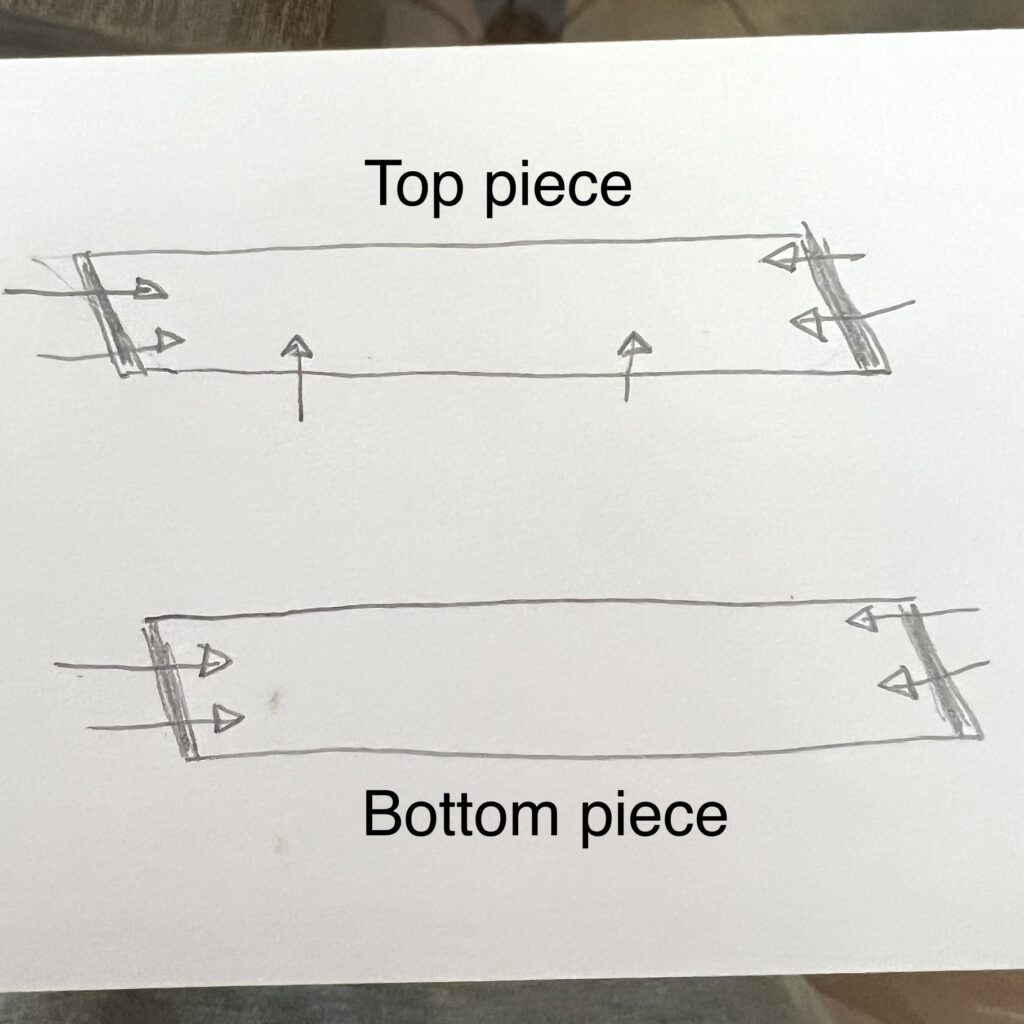
4 of your fence pickets will have 6 pocket holes, the other 4 fence pickets will have 4 pocket holes. Like so. . .

Once all your pocket holes have been made, attach what will be your sides together, and add your pieces for your base supports. I had scrap pieces of 2x3s that I cut in half and used those as my support pieces. If you don’t have scraps you can use, you can buy a furring strip and cut it down. Furring strips are very inexpensive and the supports don’t have to be fancy. Attach the supports to the side (the part that will be the inside) and don’t forget to add pilot holes before you screw in your pieces to avoid the wood from splitting.

Attaching the legs
The next step is to attach the sides to the legs (2x3s). Pretty easy right? As I attached each leg I put the planter on the floor to verify the legs were level. Using a right angle clamp helps hold your piece together while you are attaching your side pieces. The final result will look like this!

Final part of Planter Build
The final part consists of adding your base to your planter. Measure the distance inside your planter taking into consideration the legs and use a jig saw to cut out the corners to accomodate the space for legs. The first time I made this planter I was very new at the jig saw and had a really hard time! Give yourself grace if this is your first time using tools. I promise it gets easier!

I chose not to attach the base of the planter because I didn’t feel like it was necessary. But if you feel like you want to secure the base to your supports, feel free to do so!
Finishing off the Planter
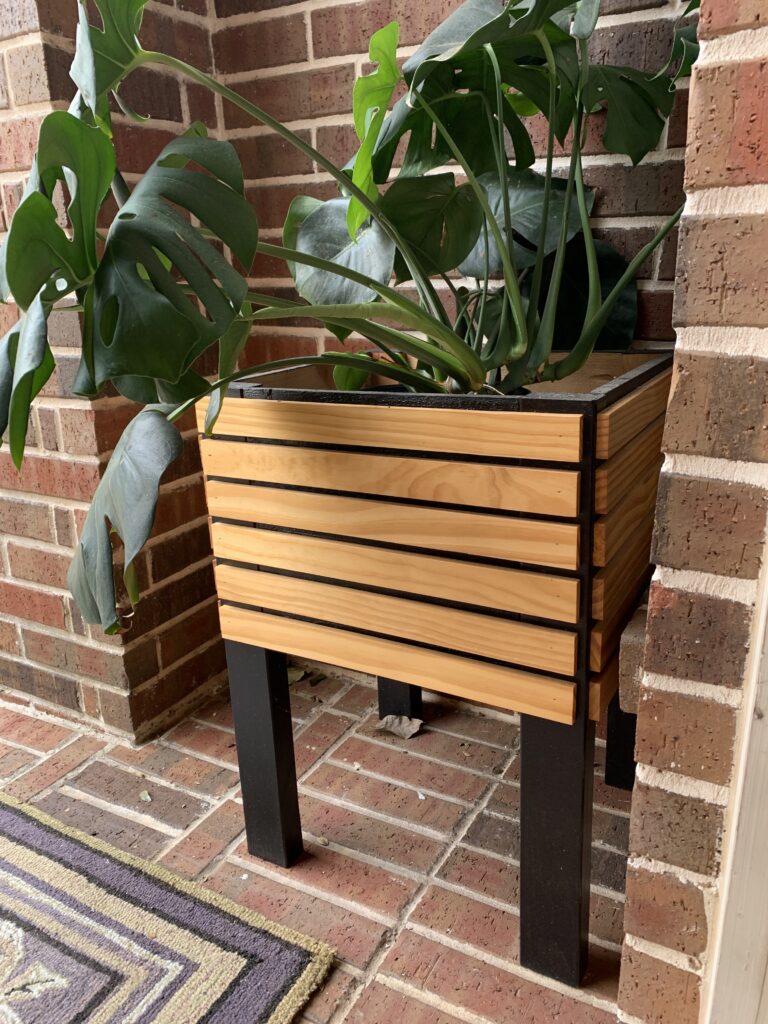
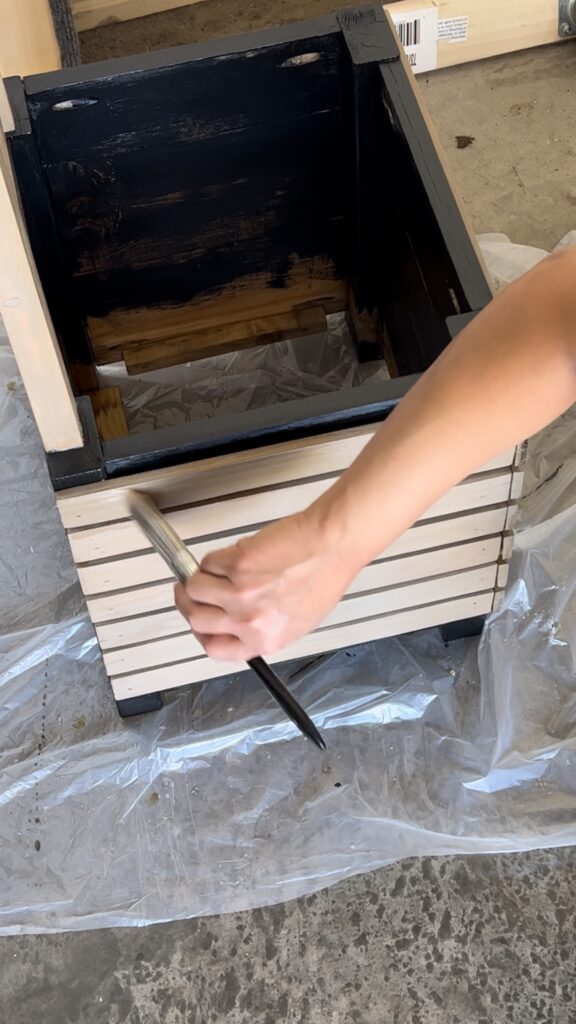
Technically at this point if you don’t want to add slats you are done! You can either paint, stain, or simply add poly for extra protection. I painted the frame of the planter black so the wood slats would pop against the black color.

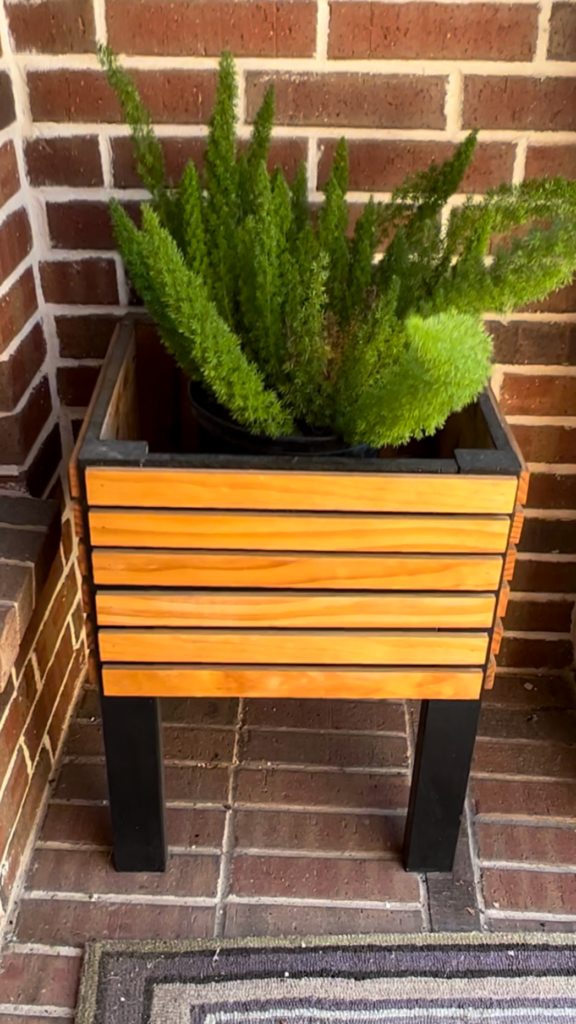
I HIGHLY recommend doing one of those 3, especially if you plan on having your planter outdoors. The weather in Texas can be brutal and I have had the experience of having to refinish a planter because I thought it wouldn’t be so bad if I didn’t. The original planter I built I finished with a urethane poly and it has held up amazingly well – I just don’t like that the wood slats have yellowed over time.
It’s not a bad look, it’s just a little more yellow/orange than I wanted.
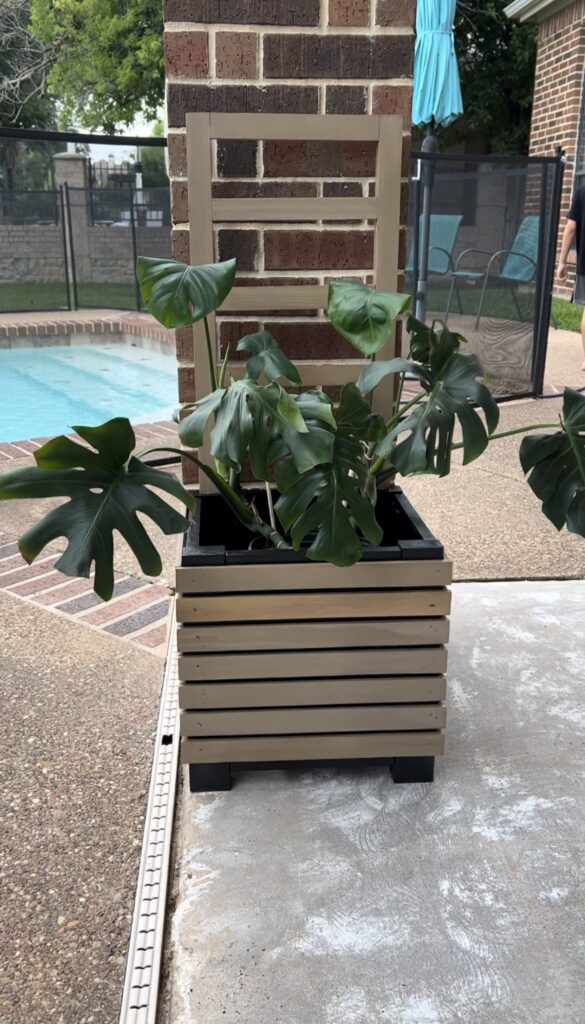
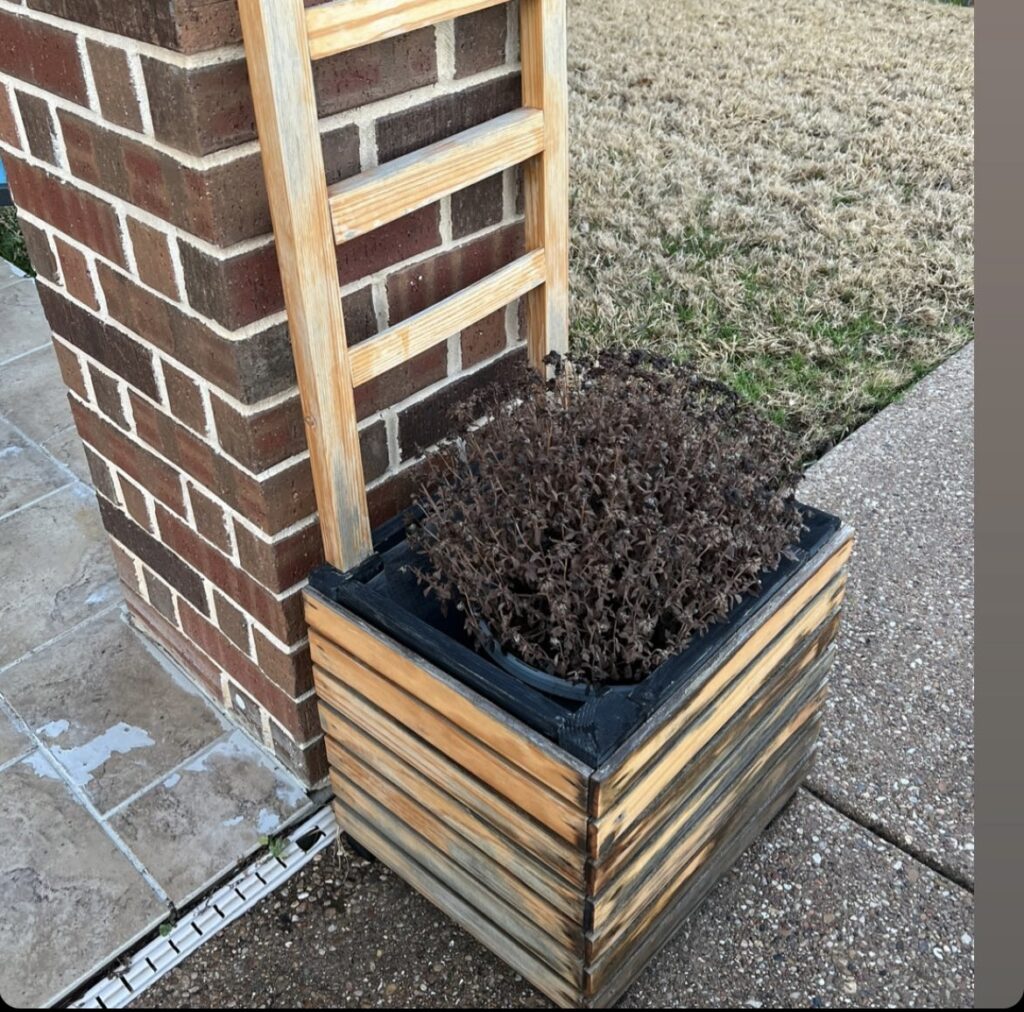
For the second planter I built, I didn’t use a finish other than painting the box black and the wood and the slats did not hold up well. It only looked nice for about a year. Then it just looked. . .sad.
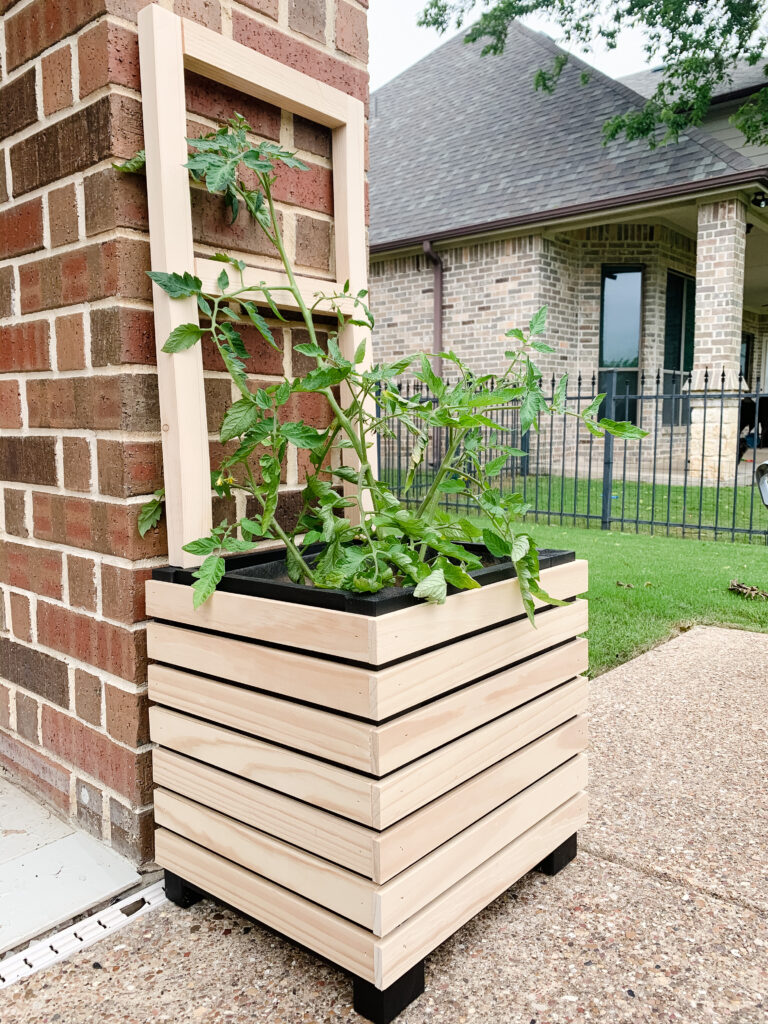
Anyway, if you choose to add slats this is how you do it. Adding the slats really dressed up the planter and it’s seriously so easy. You can add the slats with either a brad nailer or a pin nailer.

All you have to do is measure the slats and decide what length you want them to be. For the first planter I cut the slats just shy of the total length of the planter. For the second planter I went all the way across.
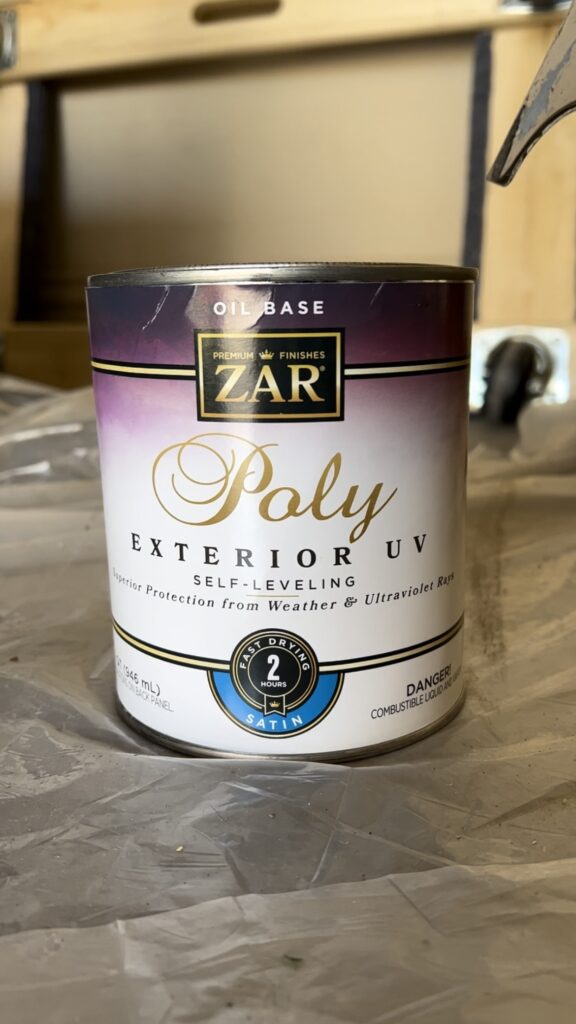
Once you have all your slats nailed into place it’s time to add a finish. I recently used Zar Exterior UV Poly and wow was I impressed! It’s such a good finish – I went with a Satin finish. It’s super easy to use! After sanding my slats and repainting my planter box I sealed it with this Poly and it was fantastic! No sanding between coats and each coat dried in 2 hours! This has officially become my favorite clear poly to seal all my outdoor wood projects.
That’s it! You just built yourself a cute DIY modern planter! Make sure you check out my Instagram posts where I go into detail about how I built this planter and how I refinished the sad planter. 🙂 If you have any questions shoot me a message or find me on Instagram and send me a DM there. Happy Building!