


We’ve been busy DIYing over here at texasdiymama! This past month I completed 2 major projects and I’m going to start by sharing this beadboard accent wall and how you can add this to a room too. Its actually very budget friendly! Add beadboard paneling with trim at the top or do like I did and add a shelf!
*This post contains affiliate links. Please see full affiliate disclosure here.
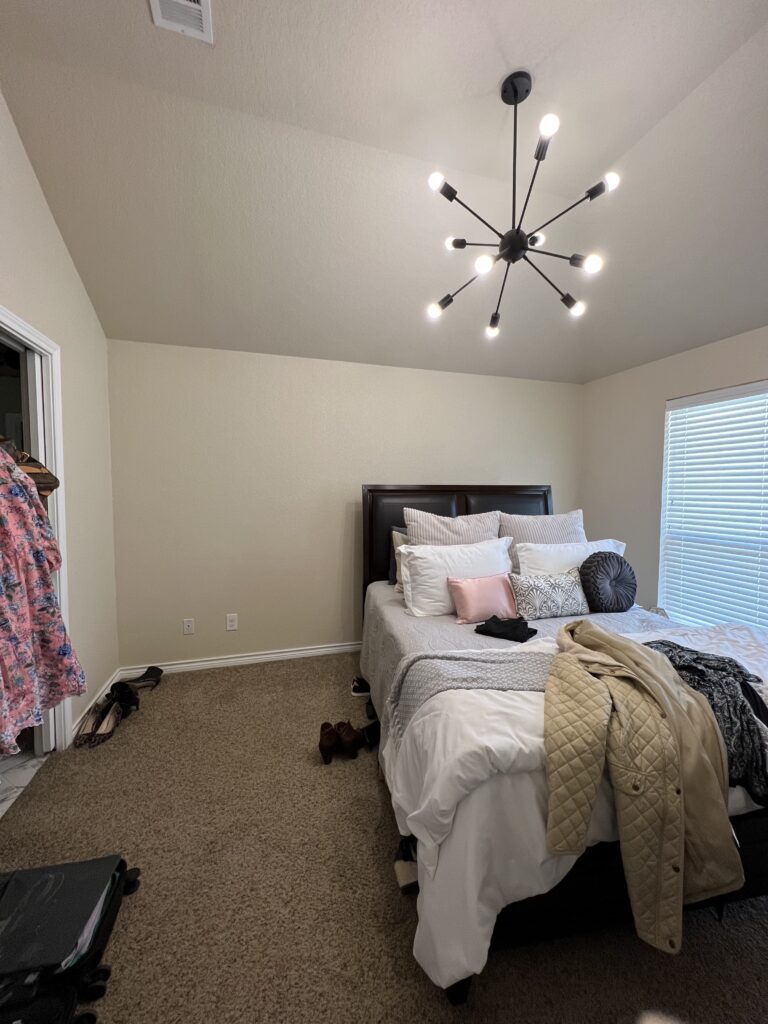
Here is the before – this room had a plain wall so let’s fix that!
What you Will Need
Supplies
- Beadboard Paneling (From Home Depot or Lowe’s)
- Chair Rail (Found mine at Lowe’s)
- 1×4 (I used MDF but you can also use pine)
- Liquid Nails
- Caulking
- Wood Filler
- Paint (I went with Sherwin Williams Emerald line)
Tools you will need for this project:
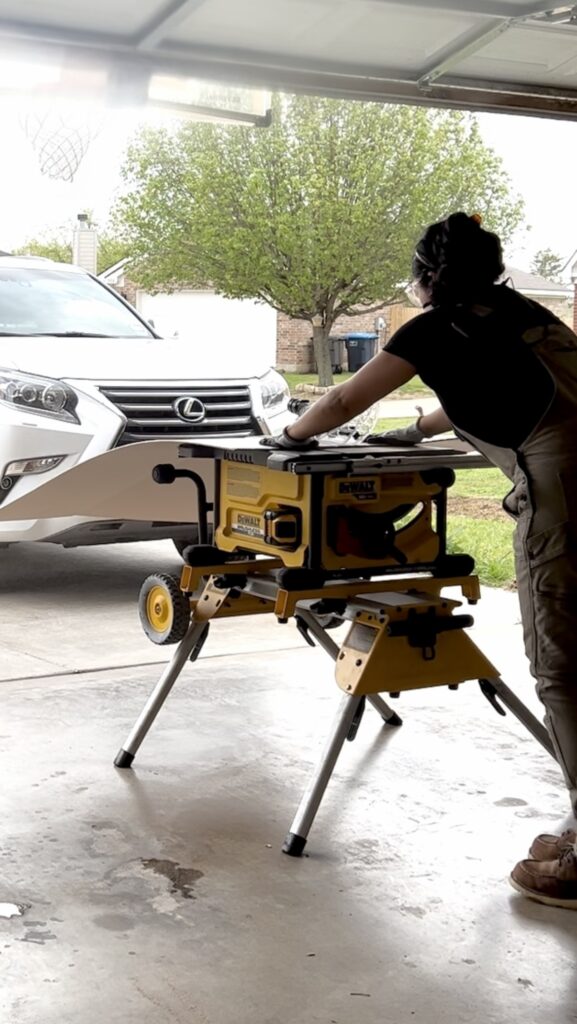
- Table Saw or Circular Saw to cut panels
- Miter Saw for trim
- Brad Nailer
- Jig Saw
- Drill/Driver
- Trim Puller
- Caulk Gun (For Liquid Nails and Caulking)
Something to note about my tool supplies – these are all tools I own. 🙂 Doesn’t matter what brand you have as long as they do the job!
Demo Day!
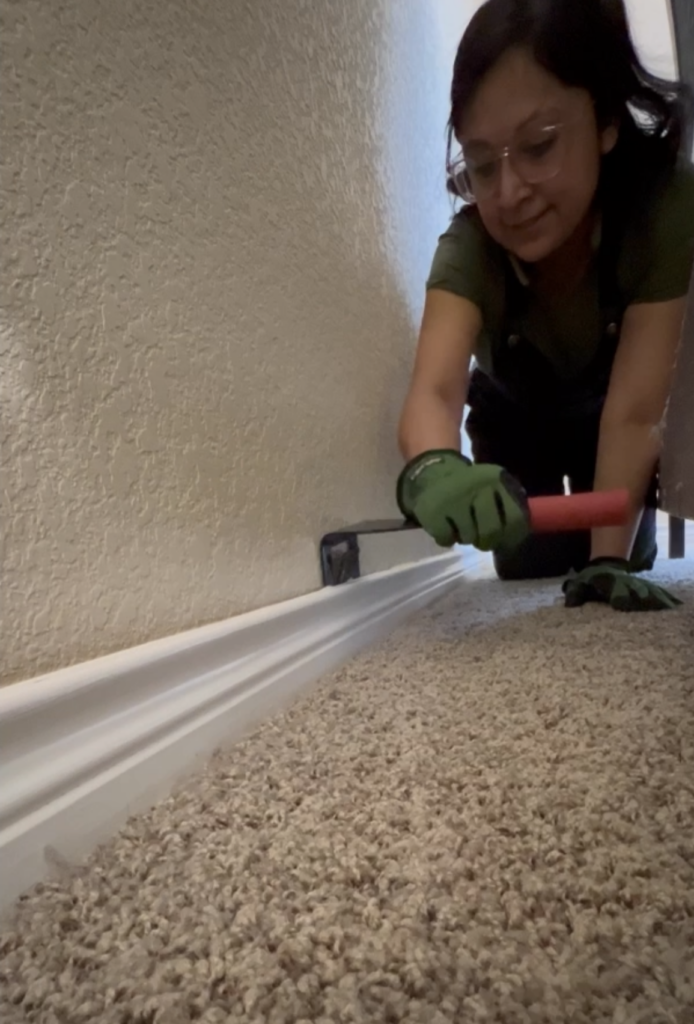
For this wall there actually wasn’t much demo at all. 🙂 Because it is a plain wall to start with, the biggest job here is removing the baseboard. Most people dread removing the baseboard because they don’t want to ruin the drywall as they remove. Let me tell you, if you use a Trim Puller like this one, you won’t damage your walls! This tool has been a game changer for me! By removing the baseboards and reattaching them on top of the beadboard, you will end up with a more professional look. Or if you don’t want to remove the baseboard that’s fine too. Remember it’s your home – do what you want to it!
Attaching Panels to the Wall
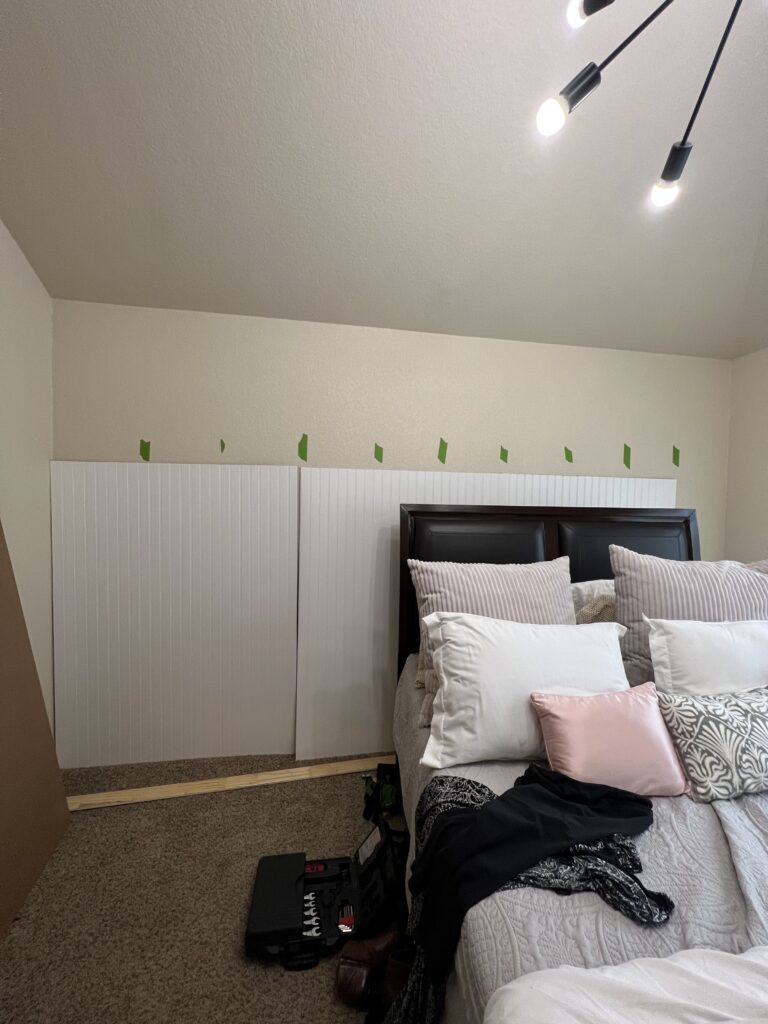
Make sure your panels are at the height you want. Lowe’s ripped down the panels for me when I bought them but then I realized the panels were still going to be too high. I ended up cutting off a couple more inches on the table saw. I then placed them against the wall to make sure I was happy with the height.
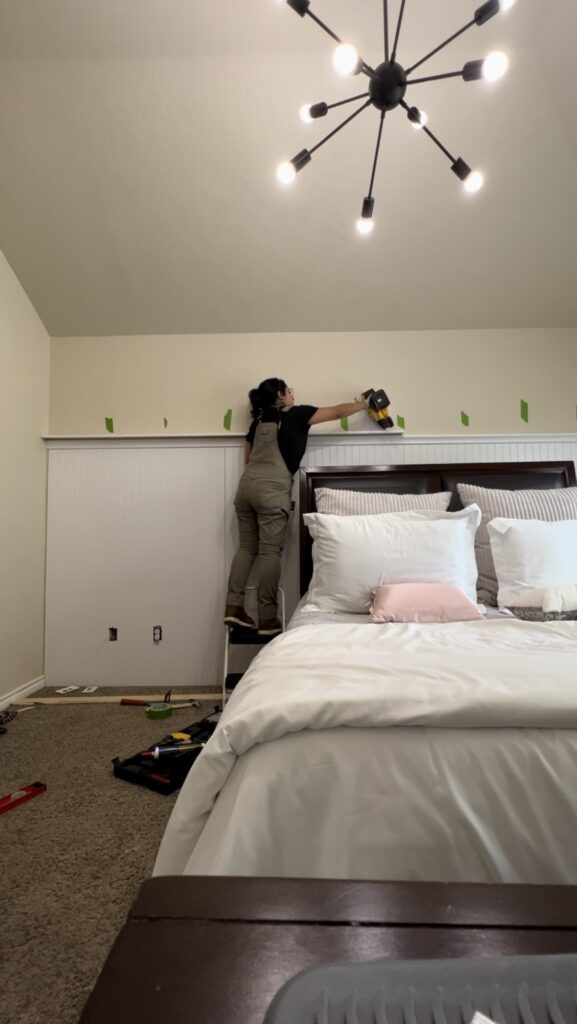
Next, I took some green painters tape and marked out where the studs were. This was to make sure I was nailing the panels at the studs.
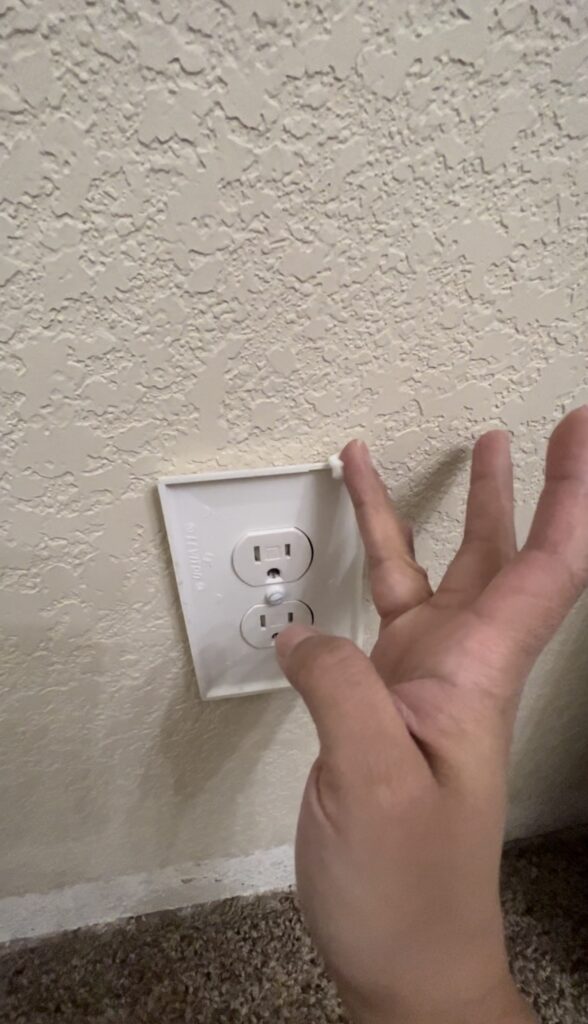
In order to figure out where on the panel I would need to cut out the outlet hole with the jig saw, I turned the outlet cover to the outside. Being that I wasn’t at my own house near all my supplies, I used toothpaste against the border of the outlet cover and basically “stamped” the outline of the outlet cover on to the panel. It worked! Because after I made my cuts, the holes lined up perfectly!
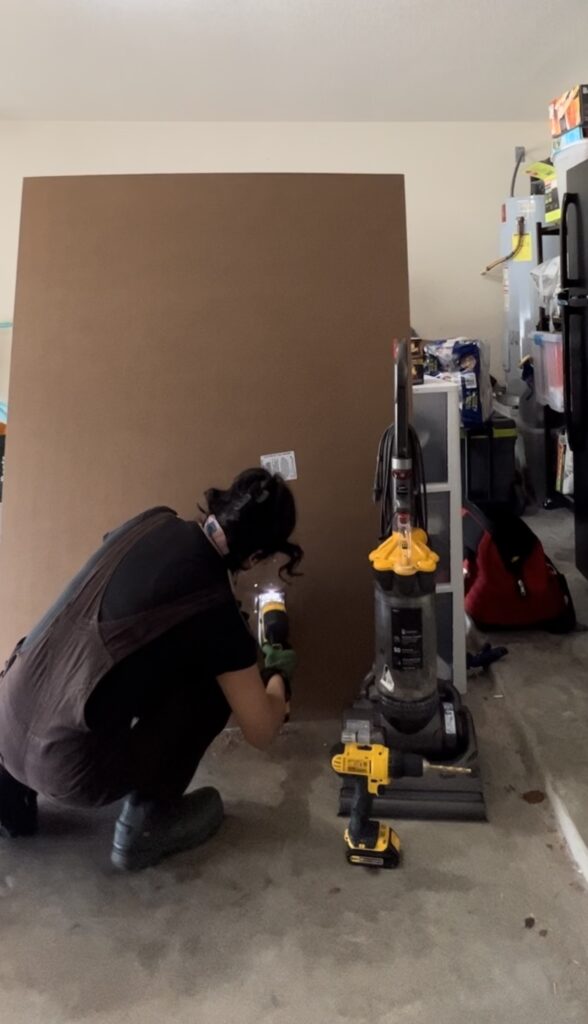
I’ve mentioned this before, but my family is full of very talented finish carpenters. Before I took on this project, I called one of my Tios and asked him if it was necessary to use adhesive to attach the panels to the wall. My biggest concern was if my sister ever changed her mind about having these panels, and decided to rip them out, they would damage the drywall. My uncle basically told me I didn’t have to use adhesive on the back of the panels, but it would be better if I did. So I used liquid nail and a brad nailer to attach each panel to the drywall.
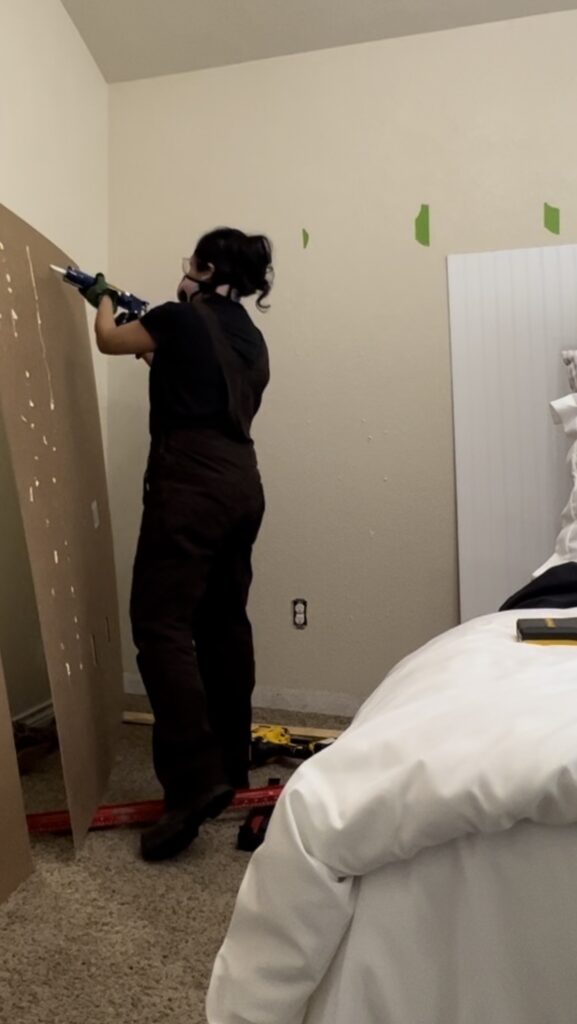
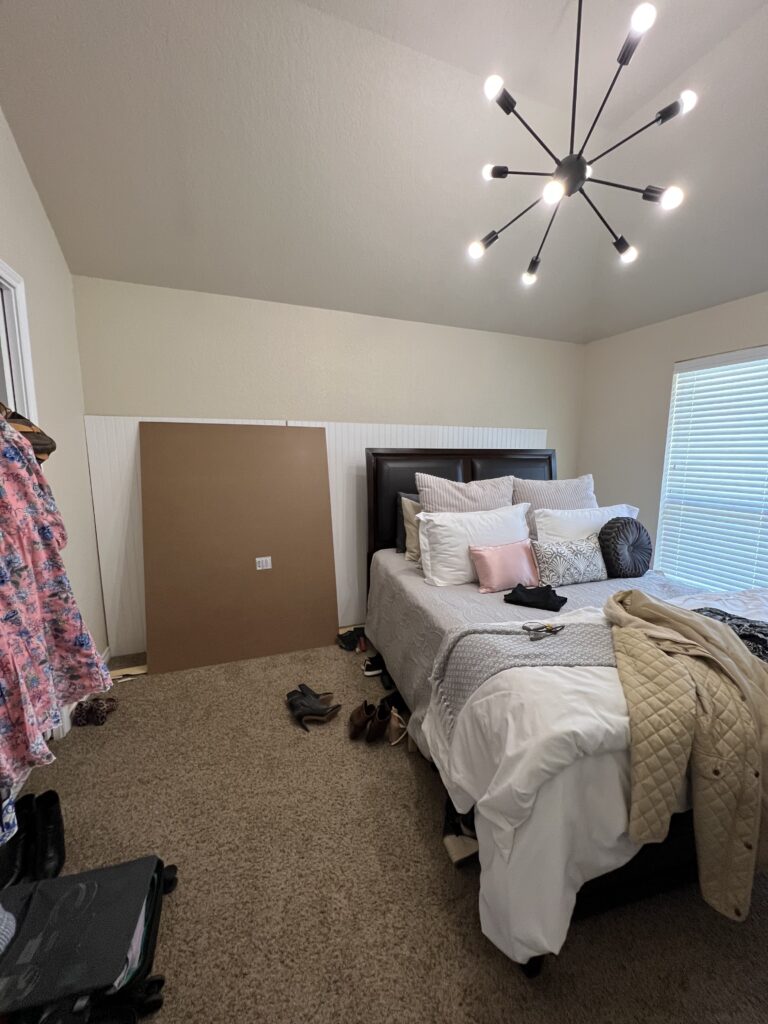
I used a table saw to cut down the panels to the size I needed. In order to determine what the size of the last panel needed to be, I had to install 3 out of 4 panels first, and then cut my last panel. I secured the last panel to the wall the same way as the previous panels – it was just a thinner piece.
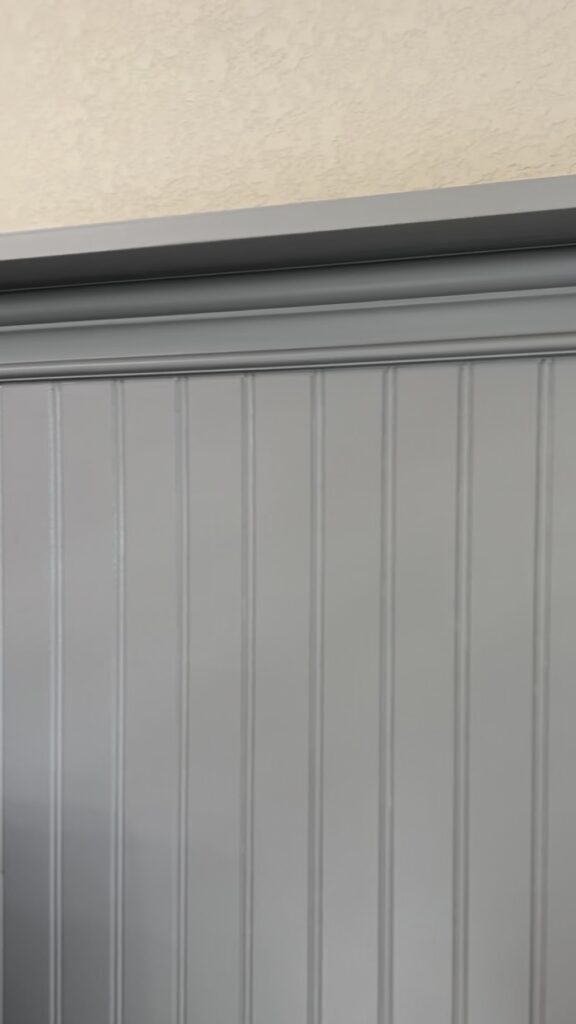
Adding the trim and shelf
When my sister and I were going over what she wanted this paneling to look like, she asked if I could add a small shelf to the top. She wanted something that was wide enough to basically hold some frames. So I used 1×4 MDF pieces for this. I found the chair rail I wanted in stock at Lowe’s and added a 1×4 above that. I used brad nails to attach the chair rail to the wall, but used both brad nails and 2″ screws to attach the shelf to the trim and the wall. Screws went in at an angle where the studs were, so the shelf would have more “meat” to attach to.
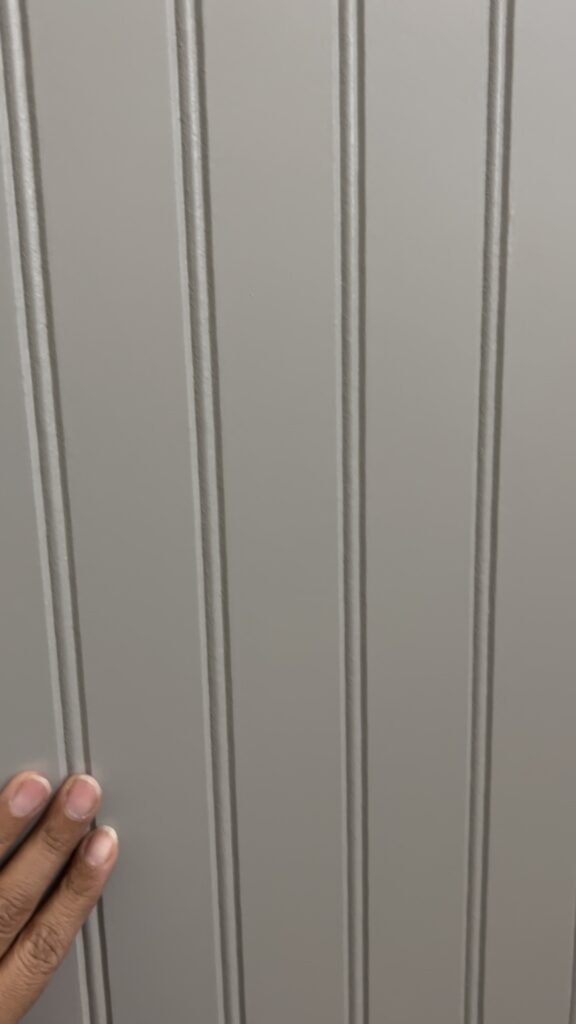
In order to try to hide where the trim came together, I cut the trim at an angle and did a “scarf” joint. I used CA glue to attach the pieces together and then sanded the trim at the joint to try and make it look like a smooth transition.


Final Steps
After everything was nailed in and secure, I used the brad nailer to attach the old baseboard on top of the beadboard. As mentioned before, this step is a preference thing. Some people would rather not remove the baseboards. I went ahead and removed them because I feel it makes my work look really finished – like a professional did the install. I have great carpenters in my family – I want to make them proud! 🙂

And of course, my least favorite part of DIY – the finish work. While this part is my least favorite, it is also so important because it makes such a difference in the finished look of what you build. Nobody likes to see gaps between transitions. My favorite caulking to use is the Dap Alex Fast Dry because you don’t have to wait long for it to dry before you paint it. I don’t have a favorite wood filler because they all work the same. Haha. . but for caulking, I definitely prefer this one.

Painting and Reveal
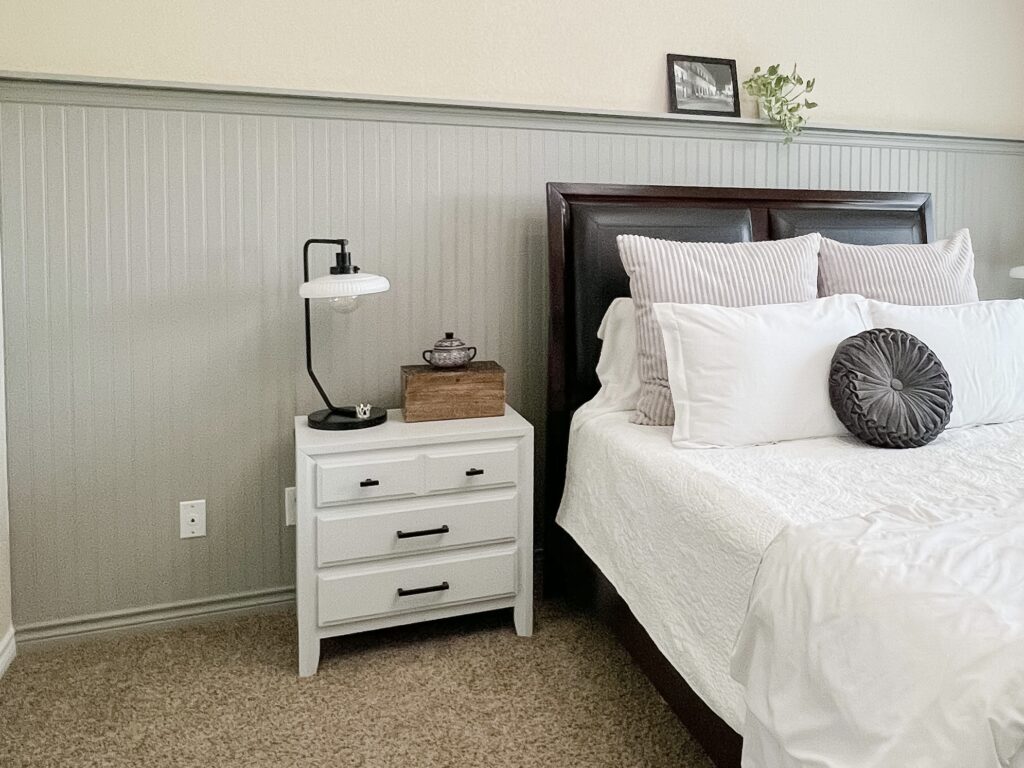
The last step of all – the painting! I’ve mentioned this before, but one of my absolute favorite brands of paint is Sherwin Williams Emerald Line. So of course, I had to go with the Emerald Trim Enamel on this project because the paneling is smooth and I was going to roll it. It’s always easier to spray a paneling project because with spray you can get into every nook and cranny, but I didn’t have the time to do the prep work and because this isn’t my house, I didn’t have enough time to prep the area to protect everything from overspray. So instead I invested in good paint.
I go into detail about why I love Sherwin Williams paint and a couple of other brands in this blog post. Let me tell you, it’s always worth investing in this SW Urethane Trim Enamel. That paint never disappoints! My sister chose the color Dorian Gray. It’s a beautiful grey with beige undertones. . .I really like it!

Reveal Time!
And of course after all that hard work here is the reveal! What do you think?


If you would like to watch the Instagram reel about the process, you can watch it here. I also want to give a shoutout to Sunbelt Rentals for providing the tools used in this project. This post is not sponsored by Sunbelt Rentals but my Instagram post was, and I had a really great experience working with them. The employees at Sunbelt Rentals were so nice and so helpful! Before I did this project, I had no idea they had so many tools to choose from for renting. I’m glad I know now because next time I have a project to do outside of my home that requires larger tools, I will be keeping them in mind!
And as always, for any questions about this project, feel free to reach out here or on IG! Happy building!


