


Wallpaper has made a comeback and I’m here for it. It is such a great way to elevate the look in a room. Have you ever tried installing wallpaper in a closet? I decided I wanted to elevate the look of my little girl’s room by trying this DIY. I have never installed wallpaper, so this is definitely a new DIY for me. 🙂
*This post contains affiliate links. Please see full affiliate disclosure here.
Back in October 2022 I took a trip to Waco and toured the Magnolia Castle. The castle had a bedroom that was pink, and the closet had the most beautiful wallpaper – I instantly knew that I wanted to add wallpaper to my daughter’s closet.
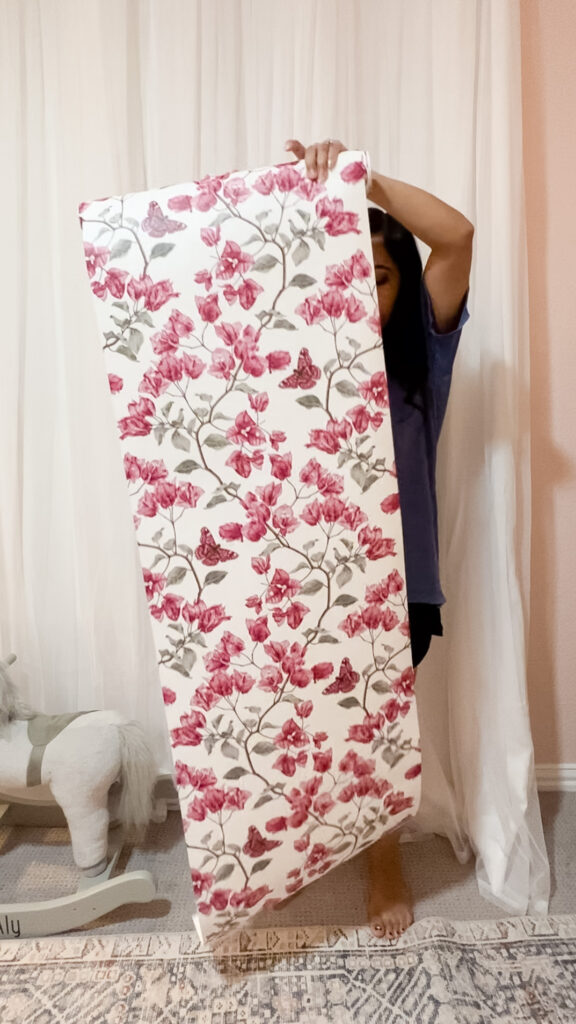
Installing wallpaper to a closet may seem like overkill but let me tell you – it is worth it. It really elevates the look and gives it personality. I worked with a company in Sweden called Photowall and they have hundreds of patterns and murals to choose from. I narrowed down my choices to 3, obtained samples and when I asked my daughter to pick a pattern, she picked the one I secretly hoped she would like the most. It is a beautiful pattern of bougainvilleas on a white background – so pretty!
Materials you need
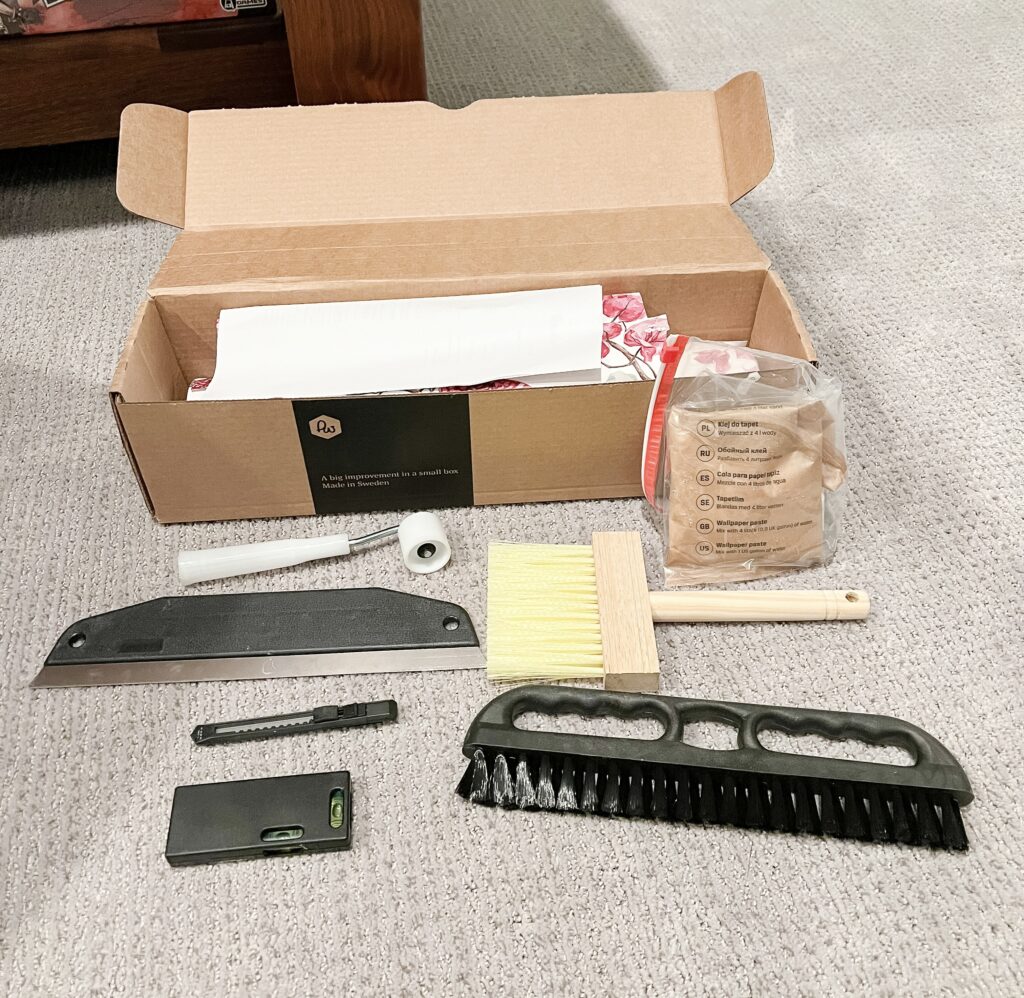
When you order your wallpaper from Photowall, it comes with glue in a powder form that you mix with water. They also offer a kit that brings everything you will need for the install. Most wallpaper has 2 options – standard or premium. I went with the premium option and was so impressed with the quality of the paper. Here is what each kit brings:
- Brush for applying glue
- Seam roller for seams
- Brush to smooth out wallpaper
- Knife for cutting paper
- Cutting guide for trimming
- Level that includes tape measure
- Pencil (not pictured)
And since I’m the worst at sharing before pictures, this picture was actually taken after I installed the wallpaper. 🙂 As you can see the supplies still look great and I have a little bit of wallpaper and paste left over that I can use on a future furniture flip.
Installing the Wallpaper
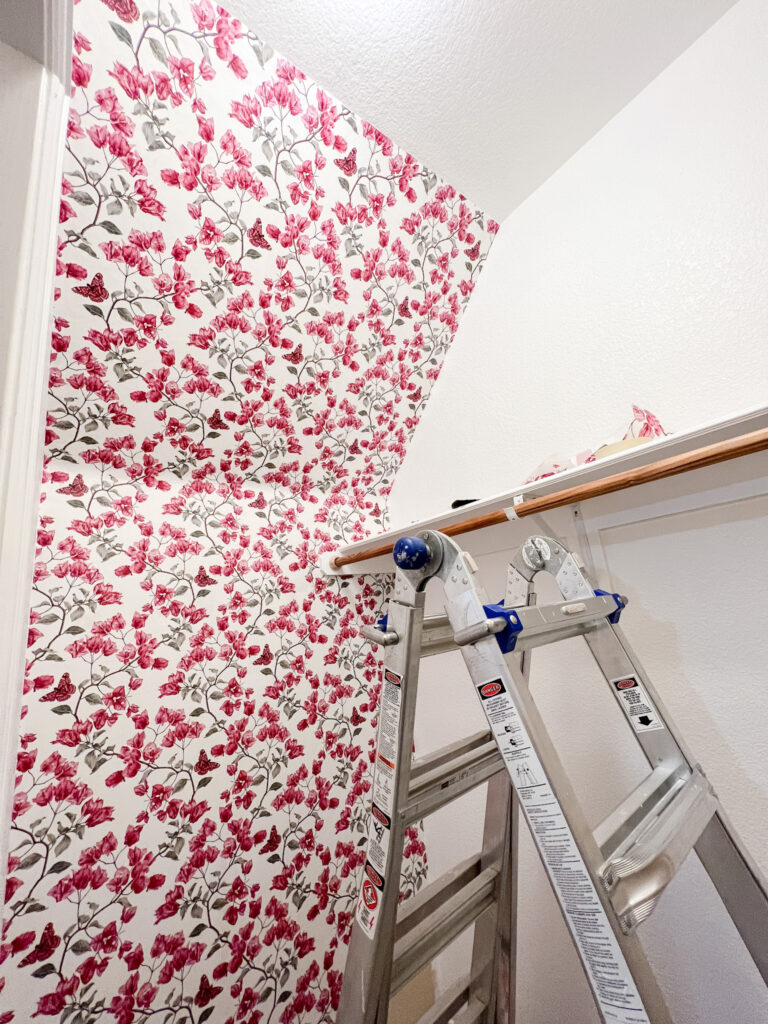
Installation is pretty straight forward. This type of wallpaper does not overlap. The seams come together to continue the pattern. Each piece is labeled in the order you install. Photowall suggests you cut your pieces beforehand and lay them in order. I like to live dangerously and cut them as I installed – I have to young kids who like to grab things when I’m not looking and I didn’t want to risk any pieces going missing. 🙂 This method worked out fine for me.

The mix of the glue is 1:1 to water. You mix it in a bucket and give it about 5 minutes to thicken. Then you are ready for install!

It’s almost like painting a wall with a large brush except you’re painting the wall with glue.

I found that this paper was very forgiving if I didn’t paste it level on the first try. Just pull it off the wall and readjust and then keep going. The hardest part was getting around the corners of the closet shelving without bending the paper. As I mentioned, this wallpaper is pretty thick and feels a bit heavy so trying to maneuver around the little nooks and crannies requires some patience. It took me about 2 hours to wallpaper 2 walls. If you are planning on installing wallpaper on a smooth wall it will be so much easier. I live in Texas and my walls have a knockdown texture – this paper stuck really well to the wall. No issues whatsoever.
Reveal and Final Thoughts
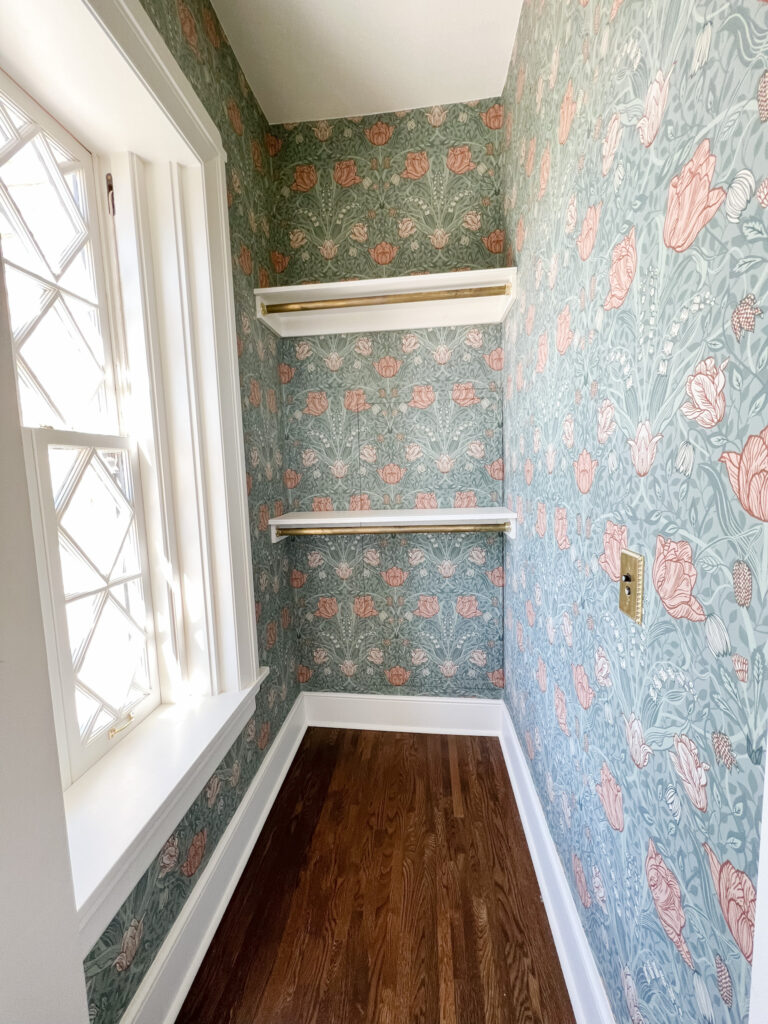
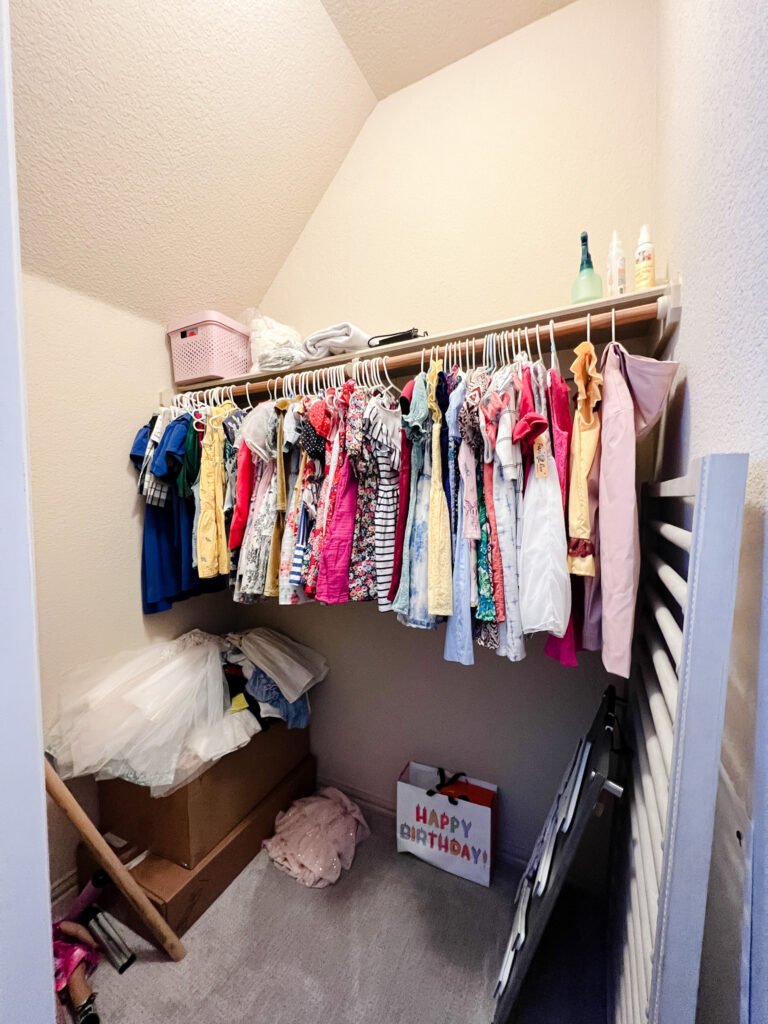
And that is it! This is the before. . . .
This is the final result. 😍

I am SO happy with how this space turned out! My daughter did a great job picking out this pattern. It really gives this space a magical feel! Installing wallpaper in a closet is a project I would definitely try again. It’s not a complicated DIY and could easily be done in a day or 2. Here is the Instagram reel where I share about this project. Make sure to also check out the previous post about the Anthropologie Primrose Mirror Dupe I did on a Target budget.
If you read this post in the next 2 weeks after publishing, and would like to give this wallpaper a try, you can go here and use discount code “texasdiymama15” for 15% off your order plus free shipping! And as always if you have any questions or comments about wallpaper feel free to reach out!


