


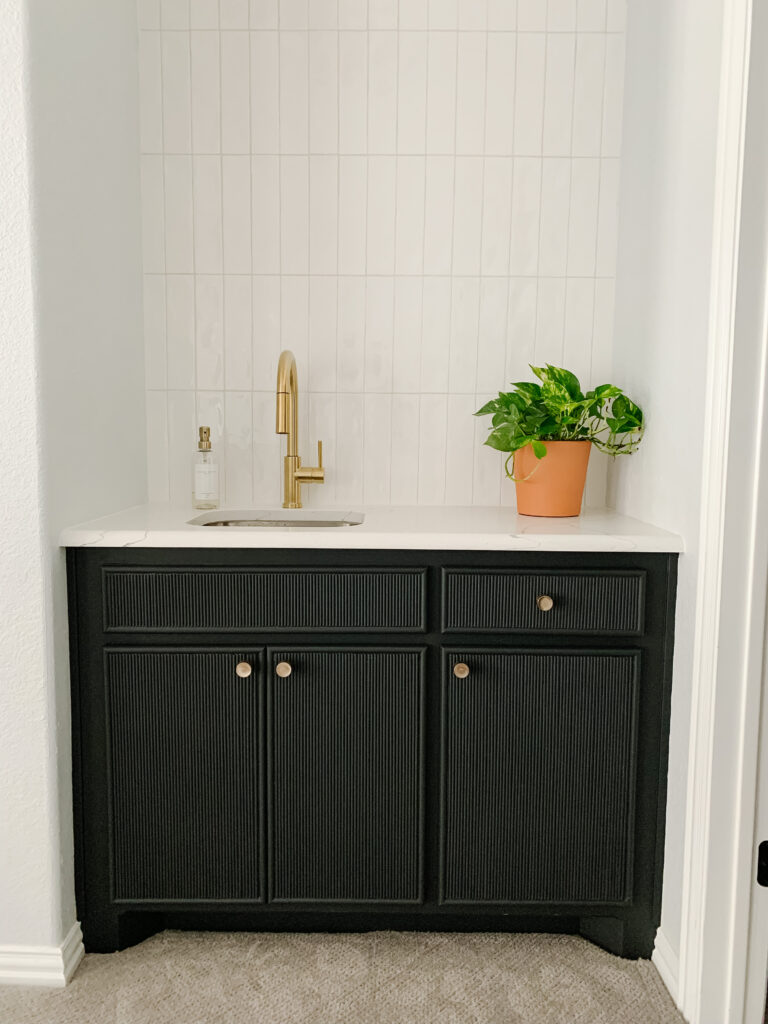
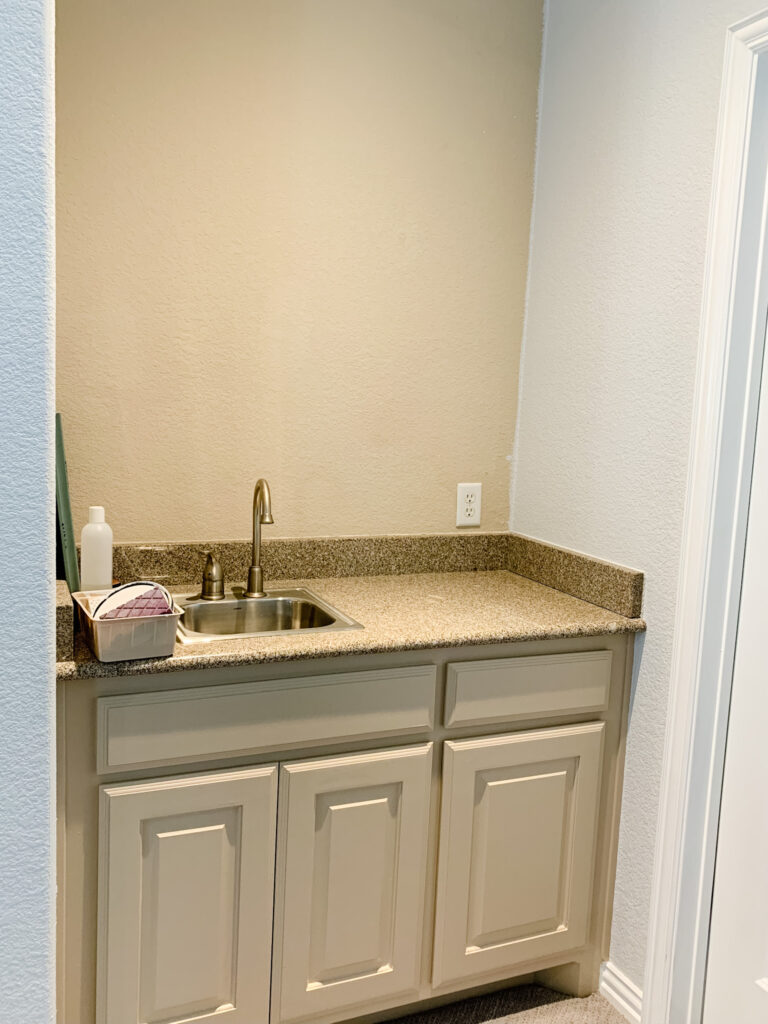
My wet bar area was a space I have had on my list of updates for a long time. It was such a sad little nook. I redid this space back in October 2021 and finished late January 2022. Originally I was going to just paint the cabinets and add tile but I decided to completely reface the cabinet and DIY reeded cabinet doors, add the tile, change out the granite for quartz, and add shelves. I went for a reeded look on the cabinet doors and I love it! This is how I built the cabinets. If you would like to learn how to install tile backsplash the “easy way” you can read about it on this blog post.
Here’s how I completed this DIY…
*This post contains affiliate links. Please see full affiliate disclosure here.
Supplies I used for this DIY:
- 1/2″ Birch Plywood (for cabinet doors)
- Wooden Dowels
- Half Rounds (Found the at Lowe’s)
- Caulk (You need a caulk gun for this one)
- Cabinet Knobs (I used these)
- Edge Banding
- Cabinet Hinges
- Kreg Concealed Hinge Kit
- Wood Glue (I used Titebond III)
- Wood Filler
- Paint of your choice
- Painters Tape
- Clamps (I used these Trigger Clamps)
Tools Used on this project:
- Purdy 6-in-1 Painter’s tool
- Hammer
- Drill
- Planer
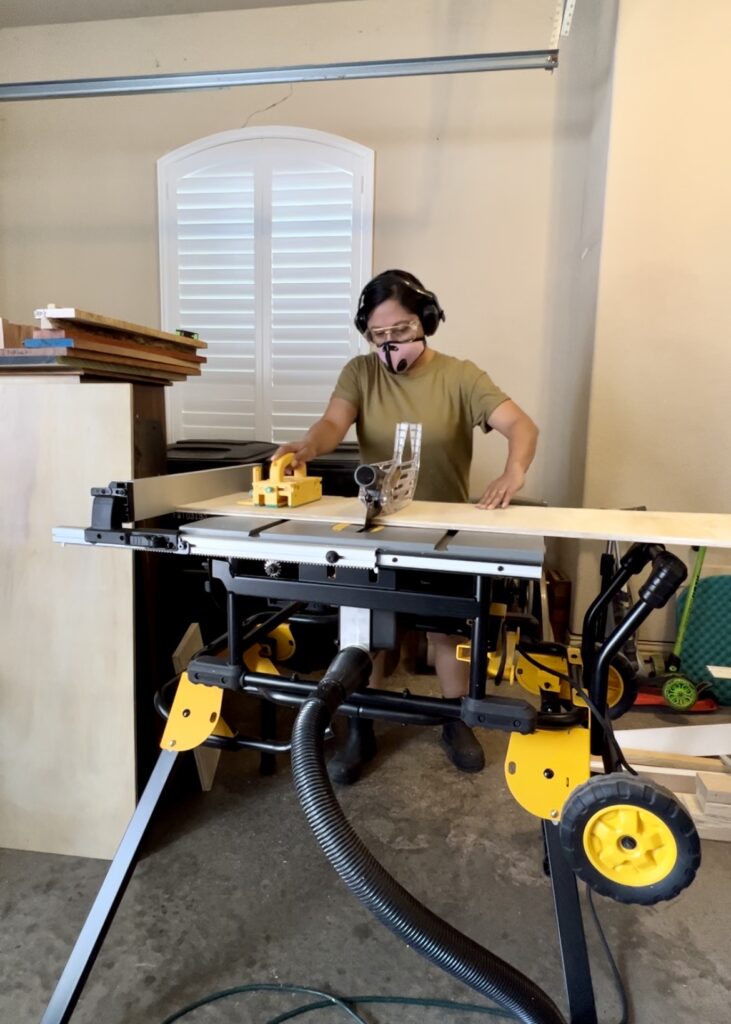
- Table Saw or Circular saw to cut Plywood sheet
- Miter Saw
- Sander (I own a Mirka)
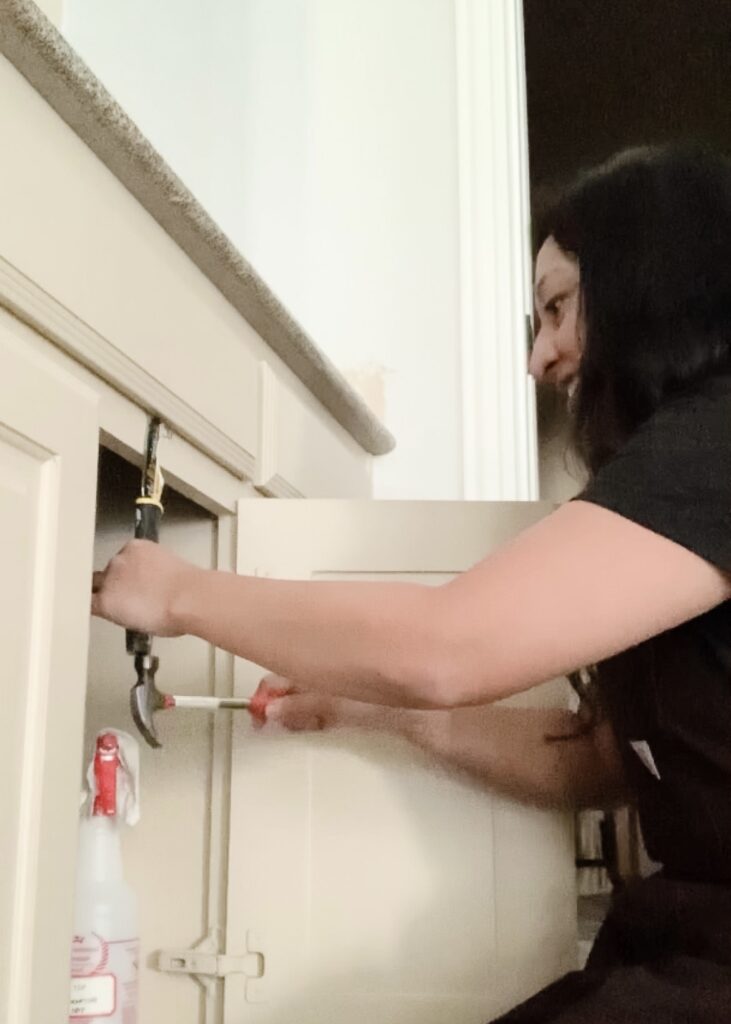
Removing Drawers and Doors
I started by removing all of the existing drawers and doors with a hammer and 6-in-1 painters tool.
Then, I sanded my drawer fronts.
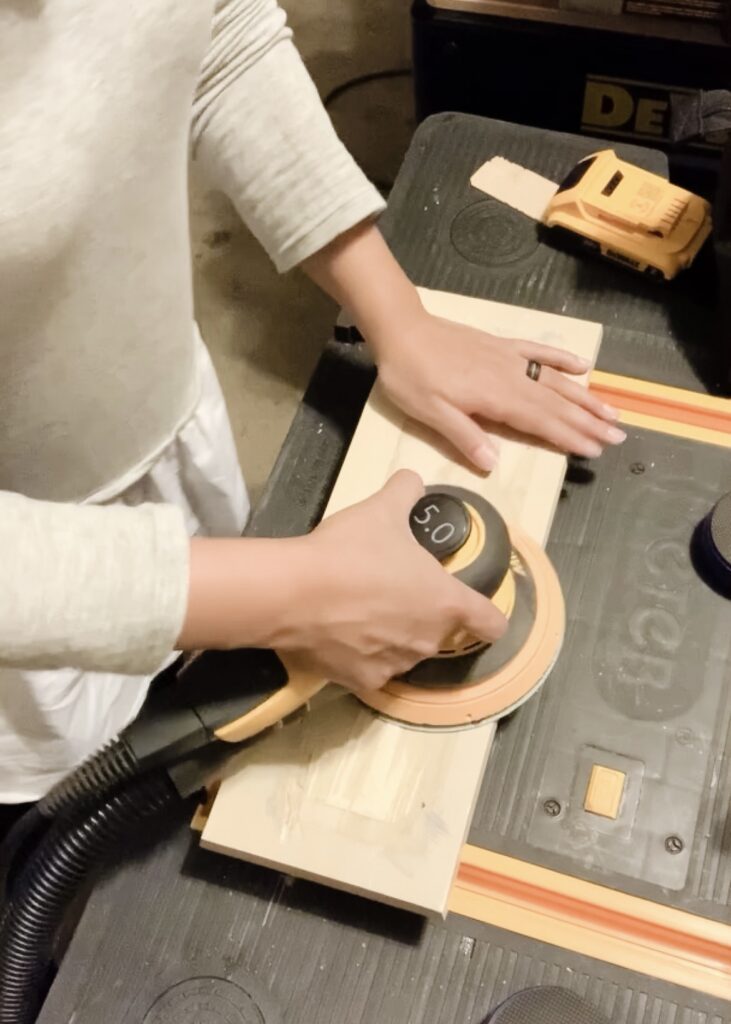
My drawers were previously painted and I had read conflicting opinions on whether or not it was ok to run painted pieces through a planer. Rather than risk messing up my planer’s knives, I opted to sand off the layer of paint and then ran my pieces through my Dewalt Planer in order to get rid of the detail on the edge of the drawers.

I didn’t want my drawers to be thinner than 1⁄2 an inch. Little by little I shaved off the layers that the original cabinet drawer front had.
I thought I could run the cabinet doors through the planer as well but as I ran them through I noticed small metal pieces and immediately stopped. It is never a good idea to run anything with metal through your planer – even if it’s a small piece of a staple. It will ruin your planer’s knives. I decided to abandon the idea of using the existing cabinet doors altogether and decided to build new doors if I was going to go for the reeded look on the doors as well.
Building Basic Doors
One of my friends recommended I use birch plywood to build the doors. Birch plywood is a bit more expensive but it has a smoother finish. I measured the existing doors first and cut my pieces of plywood to match the same size of the existing doors.
Plywood is made up of multiple sheets of wood. Because of this, the edges of plywood need to be “edge banded” if you want a smooth finish. The edges of a plywood sheet can have multiple gaps because it develops bubbles as they are layering the wood pieces.
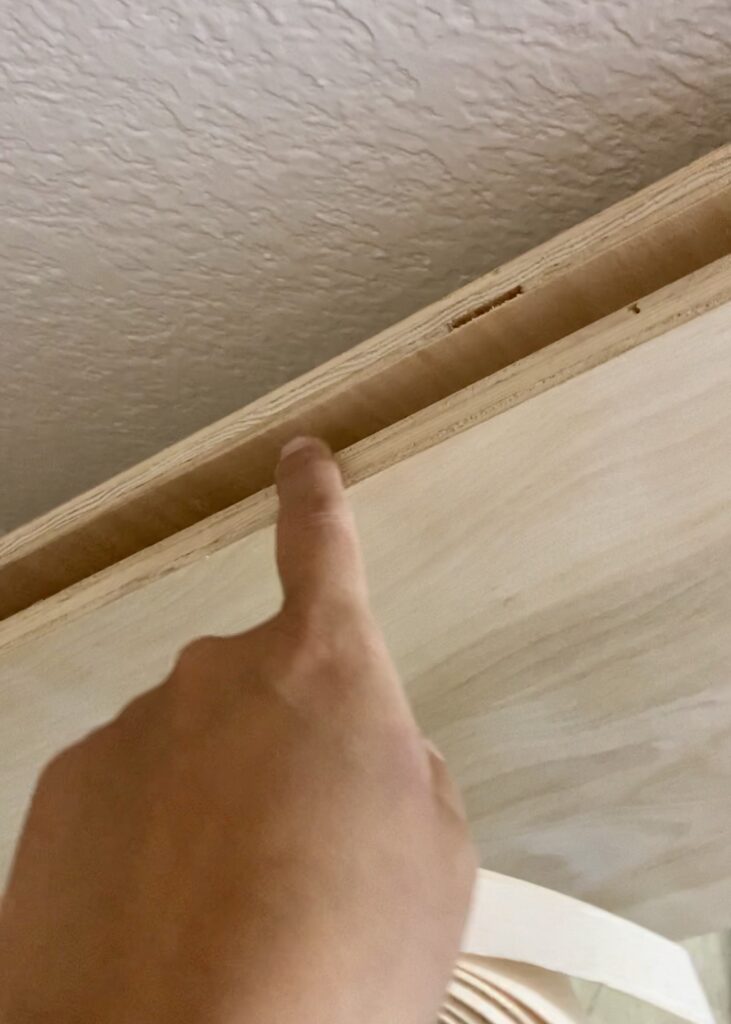
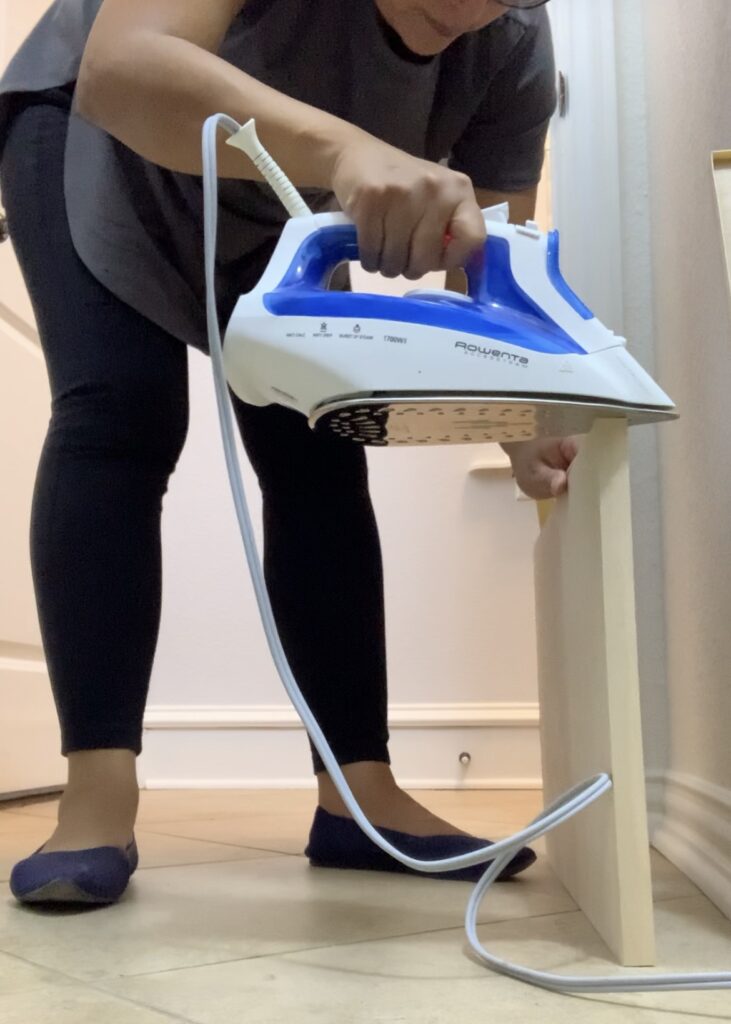
Edge banding has glue on one side and you basically iron it on to the edge of your piece. I ironed it all along the edge of my plywood door for a finished look! Once it was ironed on, I used a razor blade to take off the excess edge banding. Then I used my sander to smooth out the edges.
Next, I drilled holes for my cabinet hinges in the same spots as the old cabinet had. I attached concealed hinges.

On this blog post I won’t go into details of the different types of cabinet hinges – but basically what I did was replace the existing cabinet hinges with new ones. 🙂 Pro Tip: To make the installation of these hinges easier, consider purchasing a Kreg Concealed Hinge Jig Kit. Worth every penny. :). The existing hinges were painted the same color as the cabinet (beige) so I replaced them with new unpainted hinges. I then did a “dry fit” and was so happy when it all fit perfectly!
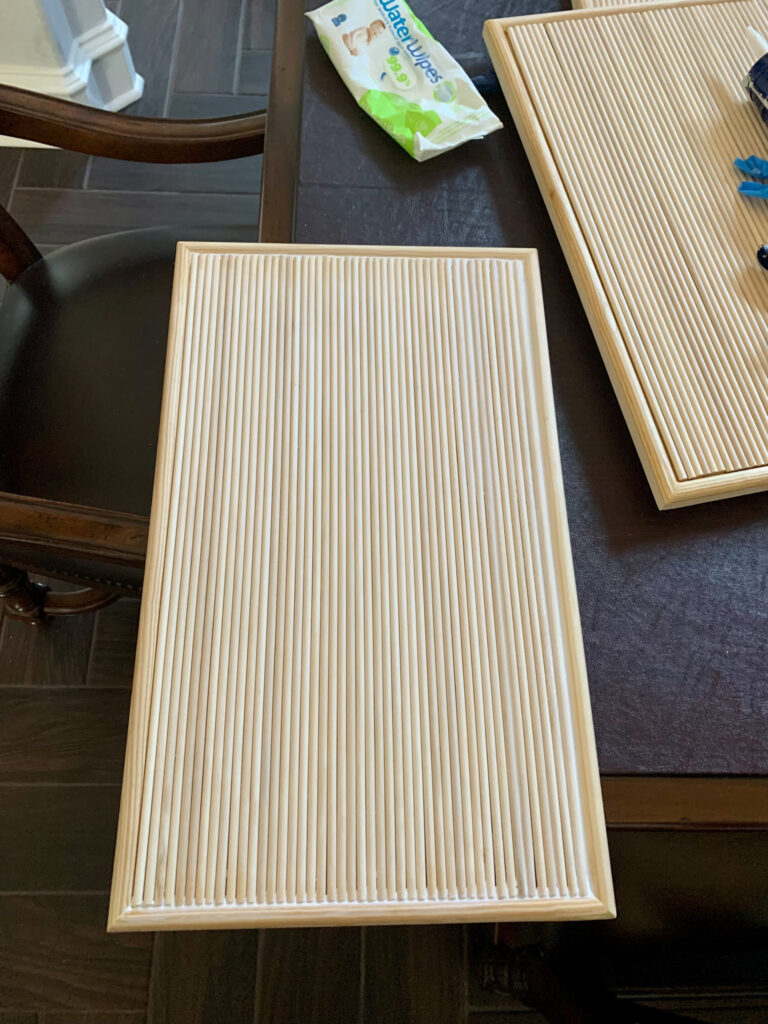
Adding Dowels to Cabinet Doors and Drawers
I needed a border for the reeds and decided to use half rounds for this. Lowe’s had the size of half rounds I needed so I purchased them there and installed them around the cabinet drawer and door fronts. I mitered the corners and then used Titebond III and used trigger clamps to hold them in place while they dried.
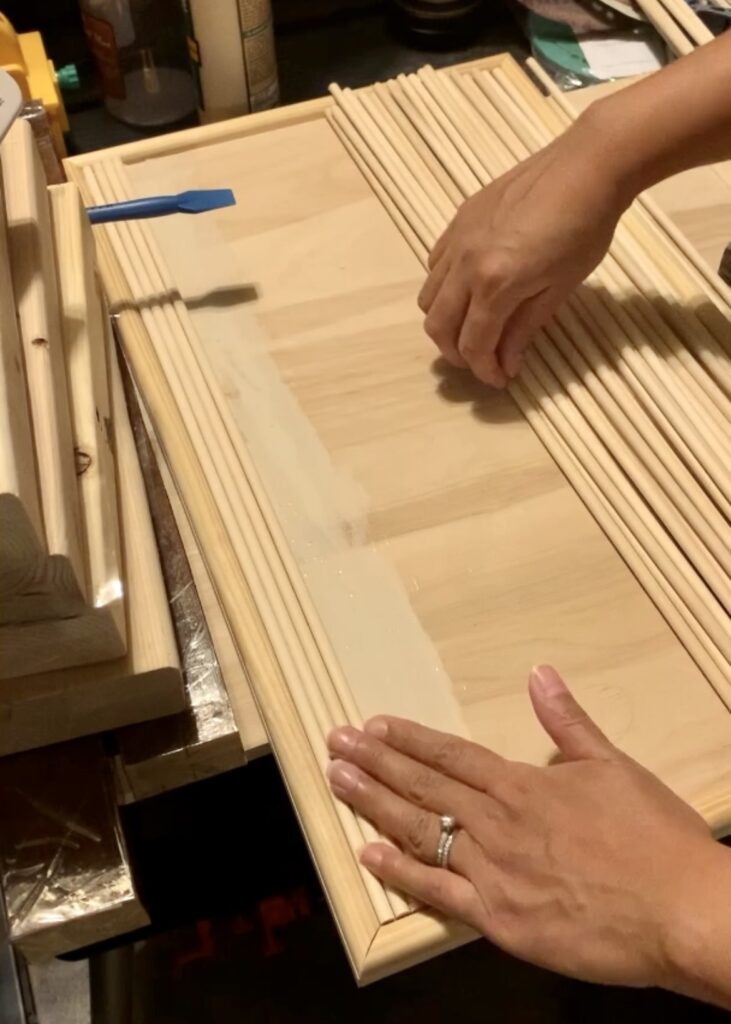
I went with 1/4″ dowels I found on amazon and cut them down to size on my miter saw. I cut several dowels at a time by taping around them with painters tape. By doing so it minimized splinters when chopping them. I lined them up on the drawer and door fronts and made sure they were the perfect size. Once they were the perfect size I glued the dowels down and let them dry. I used random materials I had around my shop to help keep the dowels in place.
Finishing Work
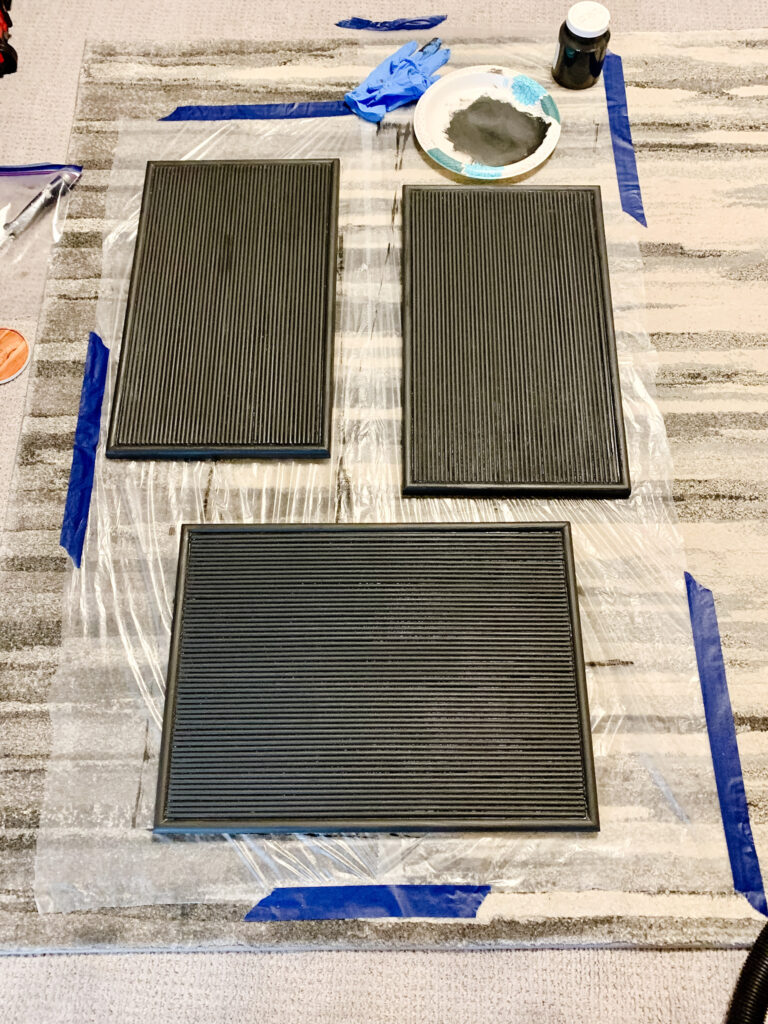
The finishing part is one of my least favorite parts of DIY but it is such a game changer when it comes to making your work look professional. Very important not to skip on this step! I used caulking to fill in the empty spaces between the dowels as well as the edges where the dowels met the half rounds. On some areas I used 2 layers of caulking to help create a more seamless transition. I also used wood filler between the edge of the half round and the edge of the cabinet to make it look like it was one piece.
Since I was painting over previously painted cabinets, I chose to go with my tried and true Fusion Mineral Paint to paint everything in a dark gray color, Ash, and I loved the way they turned out! I have used Fusion Mineral Paint before to paint cabinets in other areas of my house and have always been impressed with how well this paint adheres to previously painted surfaces. I put 2 coats of paint on my cabinet and let everything dry for 2 days.
Putting Everything Back Together
After completing all of these steps it was time to reattach the drawers and doors and be done! I am so happy with how this cabinet turned out. That reeded look is so good!!! This was my first time working with small dowels and while at first I wasn’t sure if I was going to have the patience to do it, it ended up not being that bad. 🙂 I would definitely try this again.


Here is the YouTube Short where I share how I DIY’d these reeded doors. This space is one of my favorite spaces to date and I hope you like it too. 🙂 Hope this tutorial is helpful and if you try this project, don’t forget to tag me on Instagram so I can share!


