

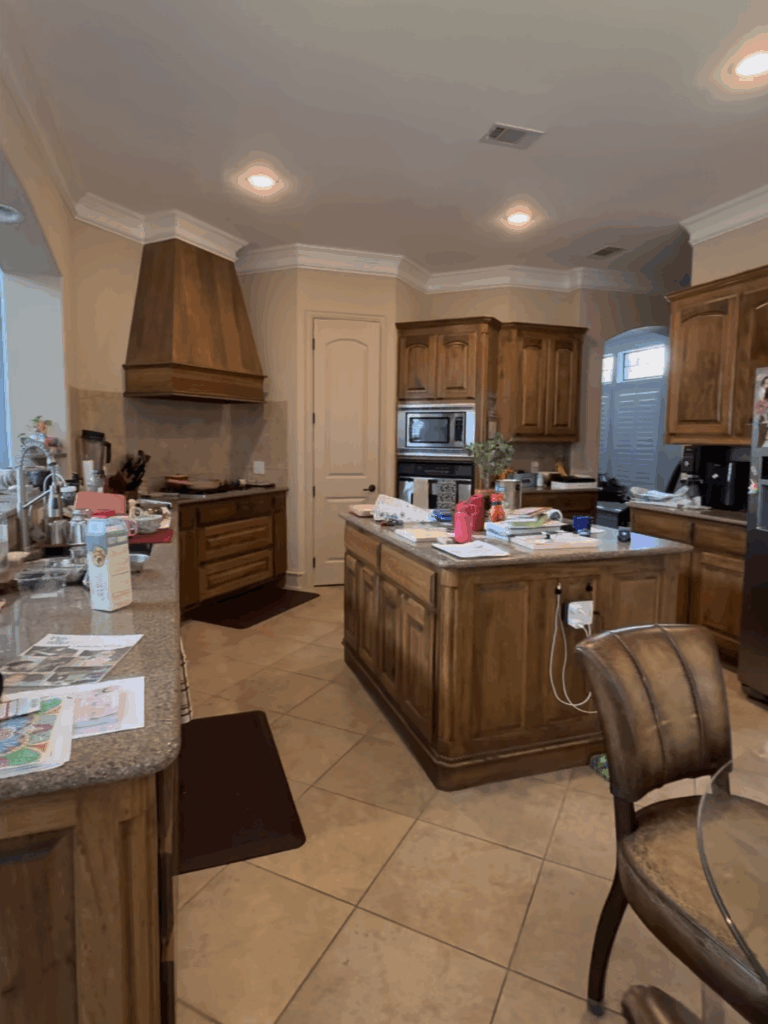
I’ve never been crazy about our kitchen. It’s dark, it’s dated, and for years I just kind of… lived with it. Between cooking, kids, and life, it became one of those spaces I cleaned constantly but never actually liked.
The beige walls felt sad, the lighting was builder-grade and boring, and don’t even get me started on the backsplash. It looked tired, and I knew it was dragging the whole space down.
So when another project got delayed (shoutout to my brick repair crew for ghosting me that week), I decided, why not tackle the kitchen while I wait? I figured a few simple updates would make a big difference. Spoiler: they did.
Starting with Paint
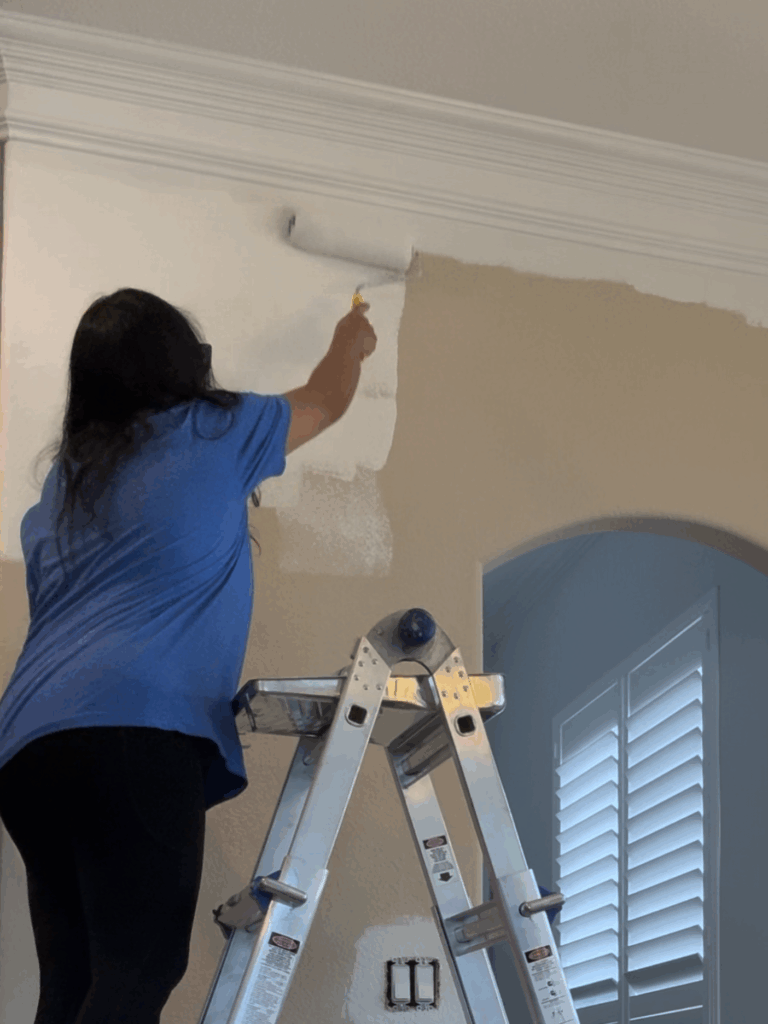
Originally, I was supposed to be finishing my bathroom, but when that had to pause, I picked up a roller instead. I’ve said it before and I’ll say it again: paint is magic.
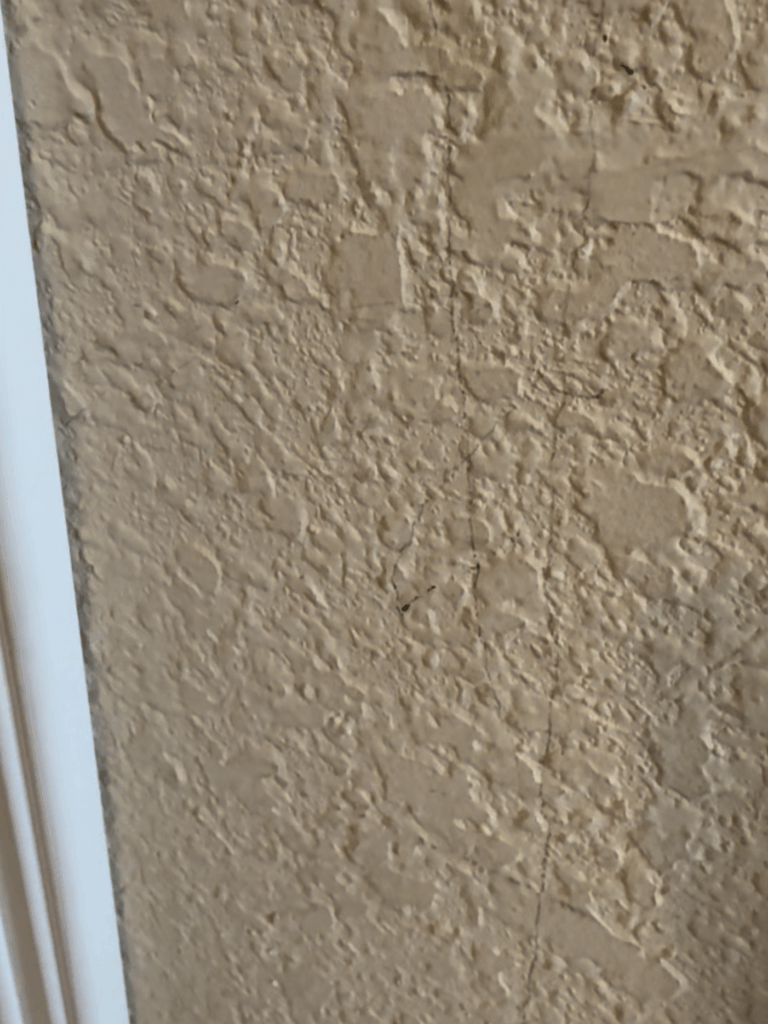
The walls were flat sheen, and y’all, they were a nightmare. You couldn’t really scrub them without the texture coming right off. I learned that the hard way years ago, back when I was a baby homeowner. Tried to clean a spot once and ended up with a patch of missing wall texture that I had to fill with spackle. Lesson learned: never scrub walls with flat paint.
This time, I decided to do it right. I used HGTV Home by Sherwin-Williams paint in the color SW Alabaster, and let me tell you, it’s a winner. The consistency was so nice, the coverage was smooth, and it’s GreenGuard Certified, which makes my crunchy mom heart happy.
I only painted the walls, but even halfway through it already looked so much brighter in here. I debated painting the pantry door a fun color too (because why not?), but my husband gently reminded me I had another project waiting, so I left it for now.
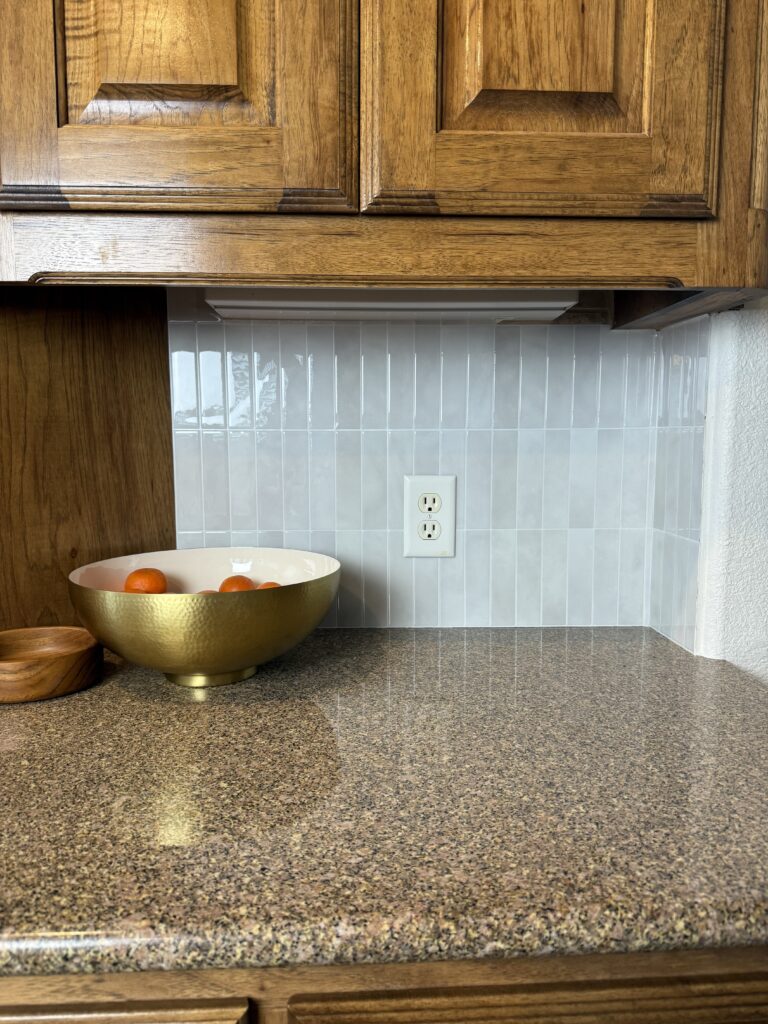
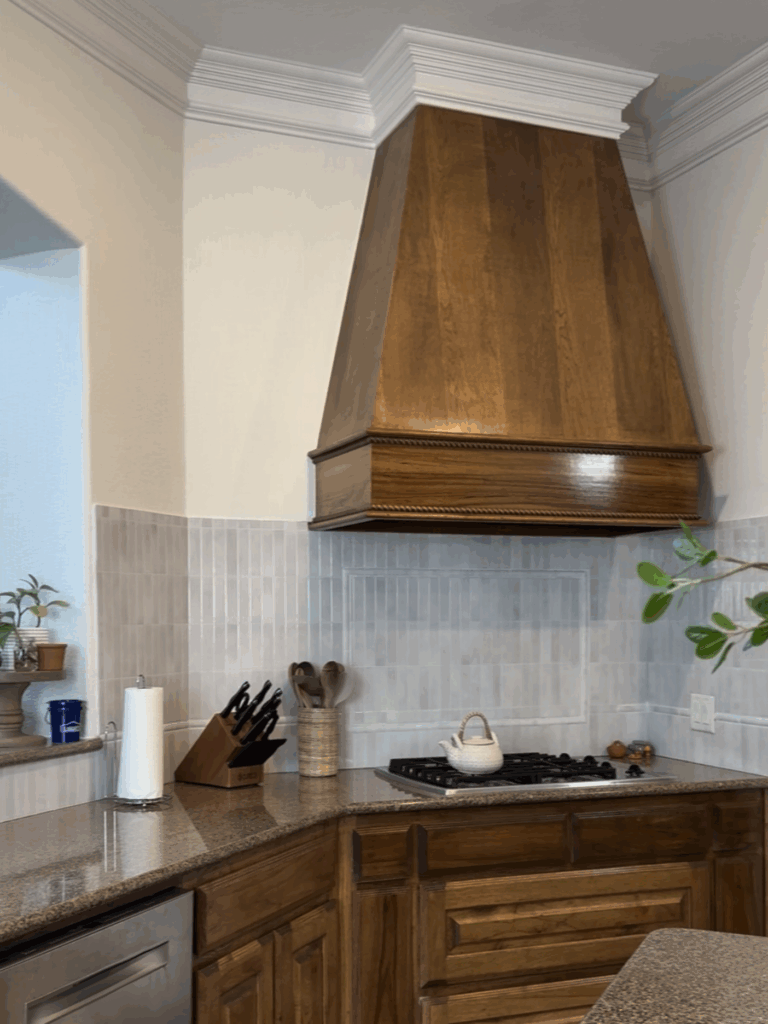
That Beige Backsplash Had to Go
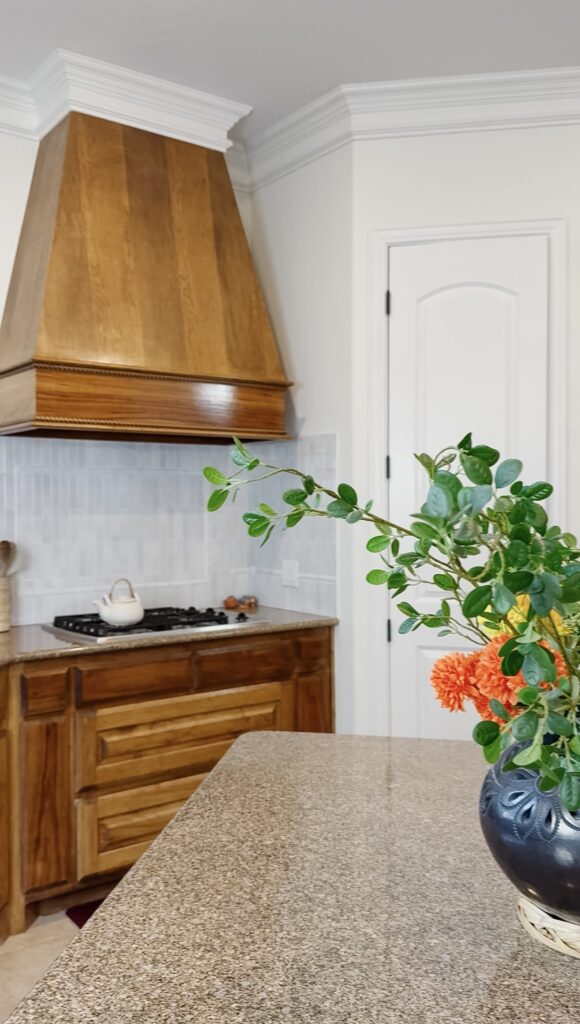
Once the paint dried, I stood back and realized… the walls looked great, but the tile looked even worse next to them.
It’s that builder beige tile that just screams early 2000s. It wasn’t terrible, but after lightening the walls, it stuck out like a sore thumb. I found myself just staring at it one afternoon, questioning all my life decisions.
Now, I’ve dreamed about restructuring this kitchen one day, but that’s a huge project. I’m not ready for full demo or new cabinets, so I wanted something temporary, something that would make the space feel updated without committing to a total remodel.
That’s when I decided to try peel-and-stick tile.
Why Peel-and-Stick Made Sense
Here’s the thing: I didn’t want to demo. I didn’t want the mess or the cost, and honestly, I wanted something I could knock out in a weekend.
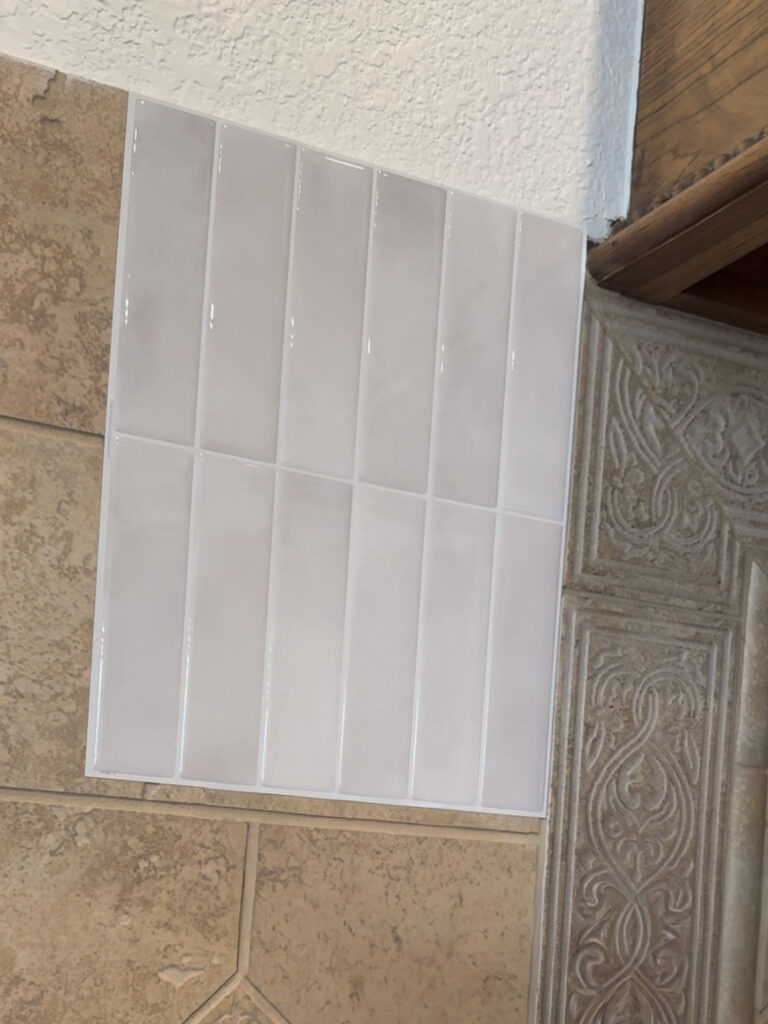
I found Smart Tiles Morocco Essaouira peel-and-stick backsplash at Lowe’s, and it checked all the boxes. It’s thick, glossy, and has a really pretty subtle texture that looks like real tile once it’s up.
You can actually shop everything I used on my Lowe’s storefront here. This project was sponsored by Lowe’s (not this post, just the project itself), and I’m so grateful I got to partner with them for it.
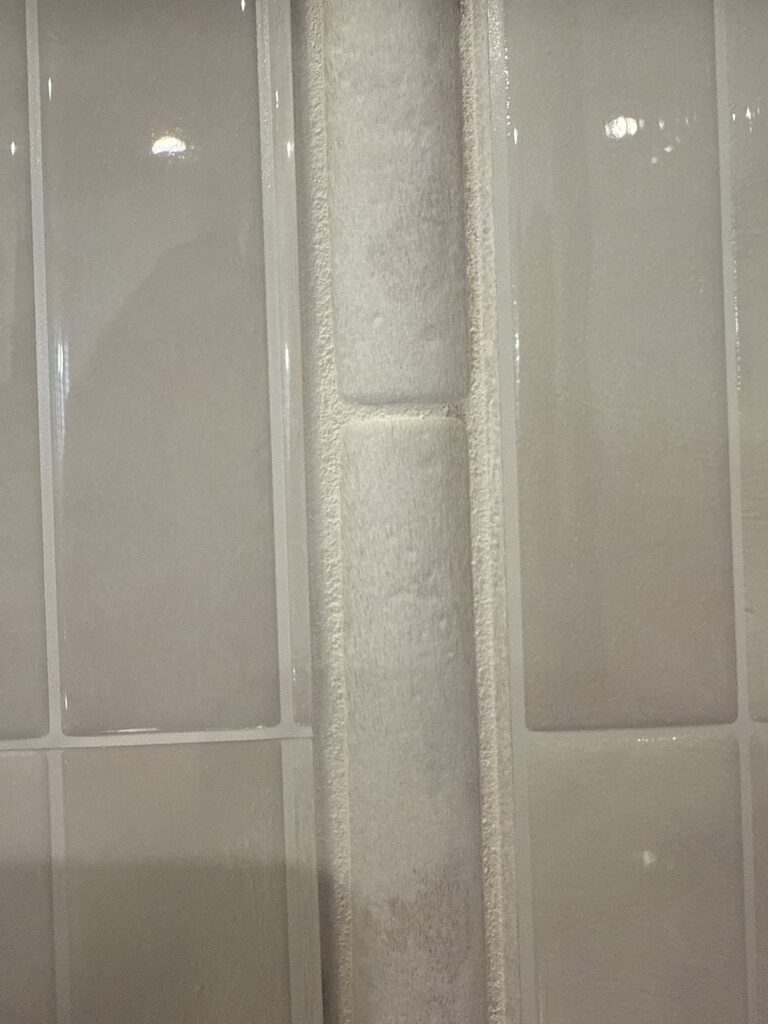
The tiles were self-adhesive and went right over my old tile. An area of my tile has raised tile and at first I wasn’t sure how that would work, but it ended up looking great! I actually considered painting the raised tiles in an accent color but ended up just priming it and loving how the primer looked, so I left it that way. I cut the peel and stick so it would go to the edge of the grout and it looks great!
Installing the Peel-and-Stick Tile
If you’ve ever done a backsplash, you know it can get messy fast. But these Smart Tiles? No dust, no grout, no demo.
Here’s what I did:
- Cleaned the existing tile really well.
- Primed the raised tile.
- Lined up the first sheet carefully, pressed it down, and used a roller to smooth it out.
- Continued across the wall, working in sections.
The pattern made it easy to line up, and the adhesive was strong but still gave me a little wiggle room to adjust.
In total, I used about 45 square feet of tile (roughly 15 packs) and each pack covered 2.8 square feet. They’re around $25 per pack, so the total came to about $375 plus tax.
So yeah, it’s not the cheapest option in the world, but for a no-demo update? Worth every penny.
My Honest Thoughts
A friend actually asked if I’d recommend peel-and-stick tile for a backsplash, and my answer was… it depends.
If you’re looking for a long-term, high-end finish, I’ll always say real tile is the way to go. But if you want something renter-friendly, easy, and fast, peel-and-stick is perfect. It looks beautiful, feels durable, and you can install it without a single power tool.
Mine’s been up for a while now and it’s holding great. I did notice that if your old tile has deep grout lines or heavy patterns, you might see a little texture through it, but it’s minor.
For best results:
- Go slow and line it up along the old grout lines.
- Use caulk or grout around the edges to give it a finished, seamless look.
- Don’t skip cleaning and priming your surface first.


Can You Use Peel-and-Stick Tile on Regular Walls?
Yes, but with a little disclaimer.
You can apply it directly to drywall, but if your walls have texture (like mine), the adhesive may pull off a bit of that texture if you ever remove it. It’s not the end of the world, but something to know ahead of time.
In my case, I was going over old tile, so it wasn’t a concern. And honestly, even if you ever decided to switch to real tile later, removing regular tile is still way more demo than taking off peel-and-stick.
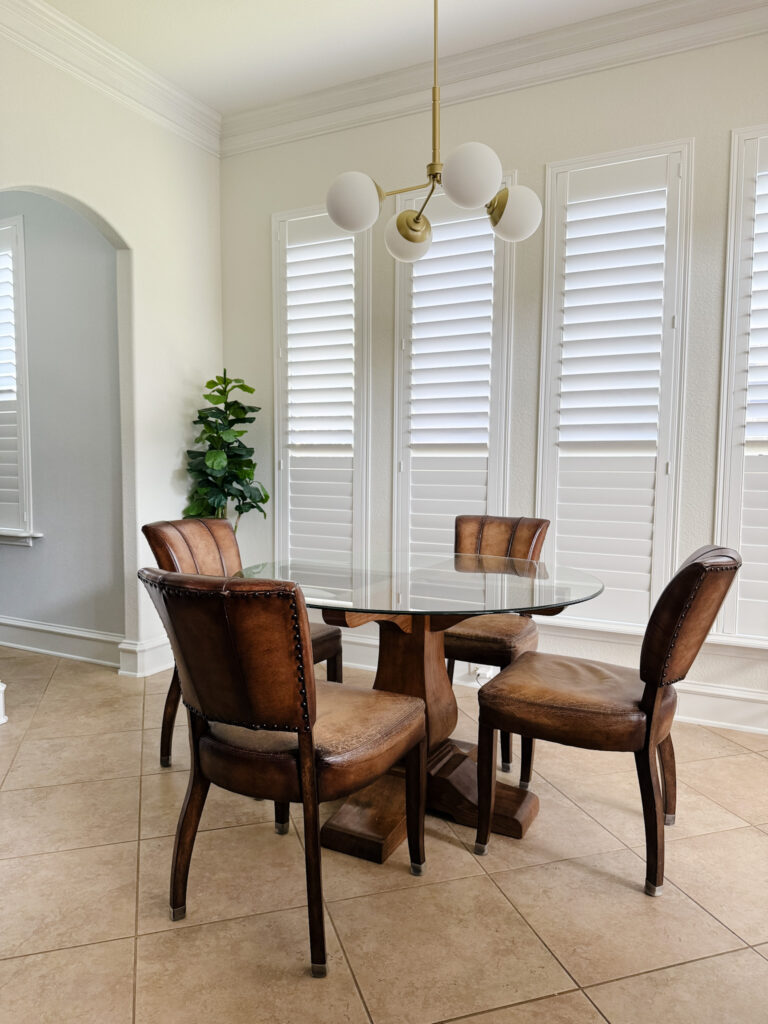
Lighting Makes All the Difference
Once the tile went up, I knew I couldn’t stop there. That builder-grade chandelier had to go.
After painting, I swapped it out for something fresh and simple. I got my arm workout for the week doing it (seriously, holding your arms up that long should count as cardio). Shoutout to my husband who filmed the process for me, I ran out of space on my phone, so he used his. He never records anything, so of course he had all the storage.
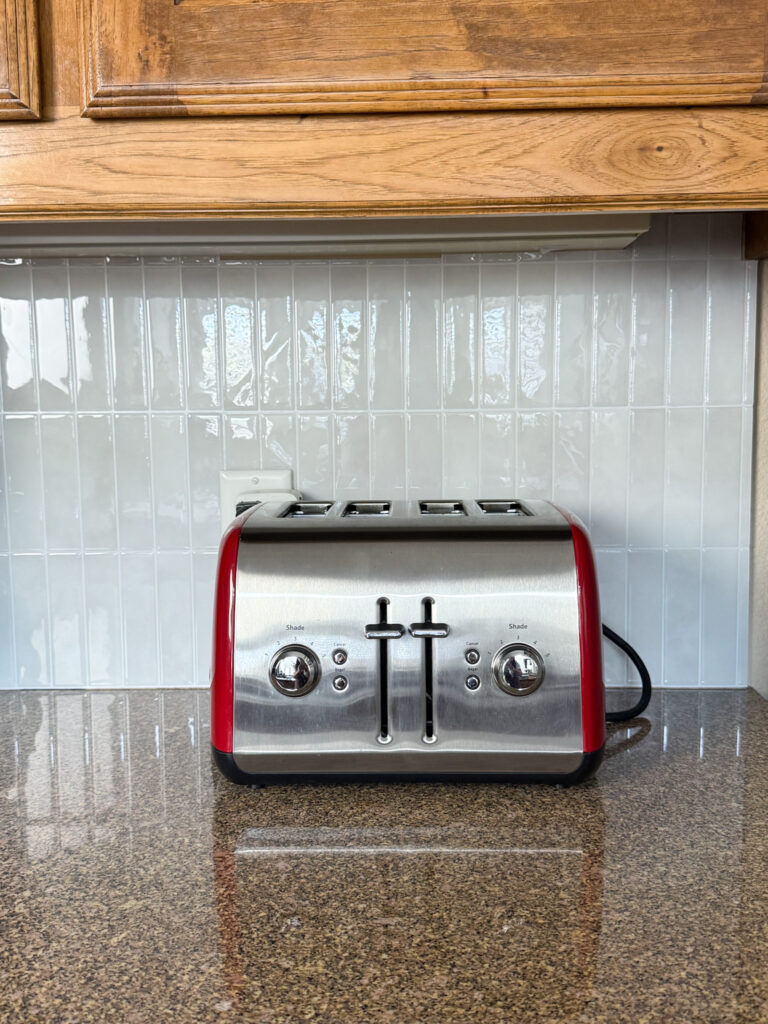
Changing the light was the cherry on top. It instantly made the kitchen feel brighter and cleaner, and all those little updates; the paint, the tile, the light, finally came together.
The Final Reveal
When I stood back and looked at everything, I couldn’t believe the difference. The kitchen feels so much happier now.
Before, it was dark and dated. The beige walls and tile sucked the life out of the space. Now it’s bright, cozy, and feels like “me” again.
The best part? I didn’t have to tear out a single thing.
Total cost:
- Paint + supplies: around $80
- Peel-and-stick tile: around $375
- Light fixture: about $150
- Miscellaneous tools, primer, tape, and caulk: about $75
Grand total: just under $700-$800.
That’s a huge transformation for less than $1,000, and zero demo.
A Few Takeaways from the Project
- Paint is magic. If you’re stuck, start there.
- Flat paint is the enemy in a kitchen, it doesn’t clean well and will tear if you scrub.
- Peel-and-stick tile is a lifesaver if you want quick results without dust or grout.
- Lighting changes everything. It’s wild how a single fixture can make your kitchen feel brand new.
- Don’t be afraid to pivot. I wasn’t planning this project, but I’m so glad I went for it while I was waiting on something else.
Final Thoughts
This kitchen glow-up wasn’t fancy or complicated, it was just a few thoughtful changes that made a world of difference.
If you’ve got a dated kitchen and a few free weekends, I promise you can do this too. Paint, peel-and-stick tile, a little patience, and maybe an extra cup of coffee.
You’ll look up one day, see the light hit those fresh walls, and think, “Why didn’t I do this sooner?”
I’ll be sharing more about this project soon in a full YouTube video with all the details, so if you have questions, reach out! Y’all know I’m always happy to help and answer anything.


