

When I started my guest bathroom renovation, I wanted something clean, modern, and seamless. I was tired of grout lines, constant scrubbing, and the traditional tiled look. That is when I discovered microcement, and it completely transformed my space.
This post walks you through the entire process of creating a DIY microcement bathroom, from the products I used, to the steps I followed, to the mistakes I made along the way. By the end, you’ll know exactly how to take on your own bathroom project.
What is Microcement?
Microcement, also called micro concrete, is a polymer-modified cement-based coating that is applied in thin layers, usually one to three millimeters. The mix includes fine cement, resins, and liquid polymers, which make it flexible, strong, and waterproof once sealed.
It is especially popular in bathrooms because:
- It becomes waterproof and mold-resistant once sealed
- It creates a smooth, continuous finish with no grout lines
- It can be applied over many surfaces, including Kerdi board, tile, and plaster
- The look is modern, organic, and spa-like
For me, the biggest benefit was the seamless finish. I wanted my guest bathroom to feel high-end but still be practical for everyday use.
Can You Apply Microcement Over Kerdi Board?
This was my biggest question going into the project. My shower walls were Kerdi board, and I had no idea if microcement would bond. I could not find a single tutorial online that answered this.
After speaking with Schluter, here is what I learned:
- Yes, you can apply microcement directly over Kerdi board.
- Do not use additional products like Redgard. They can interfere with adhesion.
- Seal properly at the end. The sealer is what locks everything in and makes the walls waterproof.
So if you’ve been searching “how to microcement over Kerdi board,” the answer is yes. You can, and it looks amazing when done correctly.
Can You Apply Microcement Over Tile?
This is another common question for anyone considering a bathroom renovation. Many people want to know if microcement will bond to existing tile, and the good news is yes, it can.This is actually one of the reasons microcement has become so popular for bathroom renovations.
Here is what you need to know:
- Yes, you can apply microcement directly over tile.
- The tiles must be stable, clean, and lightly sanded or ground down to remove the glossy surface.
- Grout lines should be filled so they do not show through the finish.
- Depending on the product, you may also need a primer or bonding agent before applying your first coat.
So if you’ve been searching “can you apply microcement over tile,” the answer is yes. With the right prep work, you can cover old tiles and create the same seamless, waterproof finish that makes microcement so popular.
The Products I Used
Here is the exact supply list I used for my DIY microcement bathroom project:
- Surecrete Surespray Microcement
- Surecrete XS Color Pigment Pack – White Waterer
- Dewalt Drill
- Mixing Attachment
- 6 inch Drywall Knife
- 2 inch Chip Brush
- Foam Rollers (Set of 2)
- Small Paint Tray
- Surecrete XS 327 Polyurethane Sealer
- Painter’s tape and plastic drop cloths
These tools made the biggest difference, especially the drywall knife, the mixer, and the sealer system.
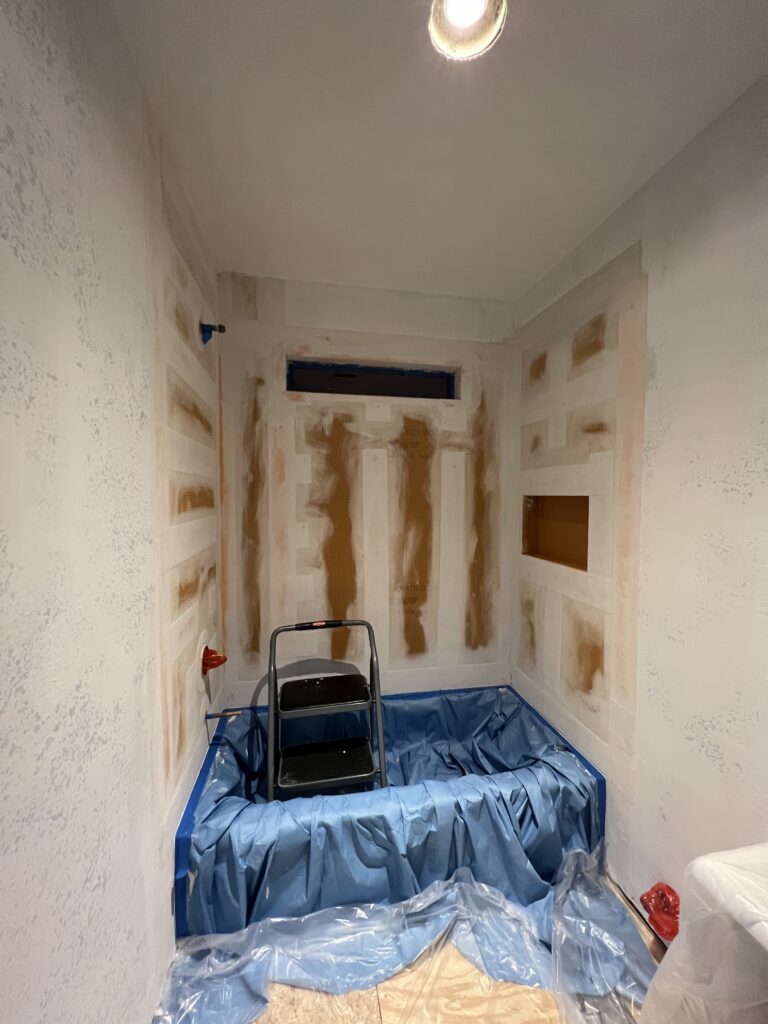
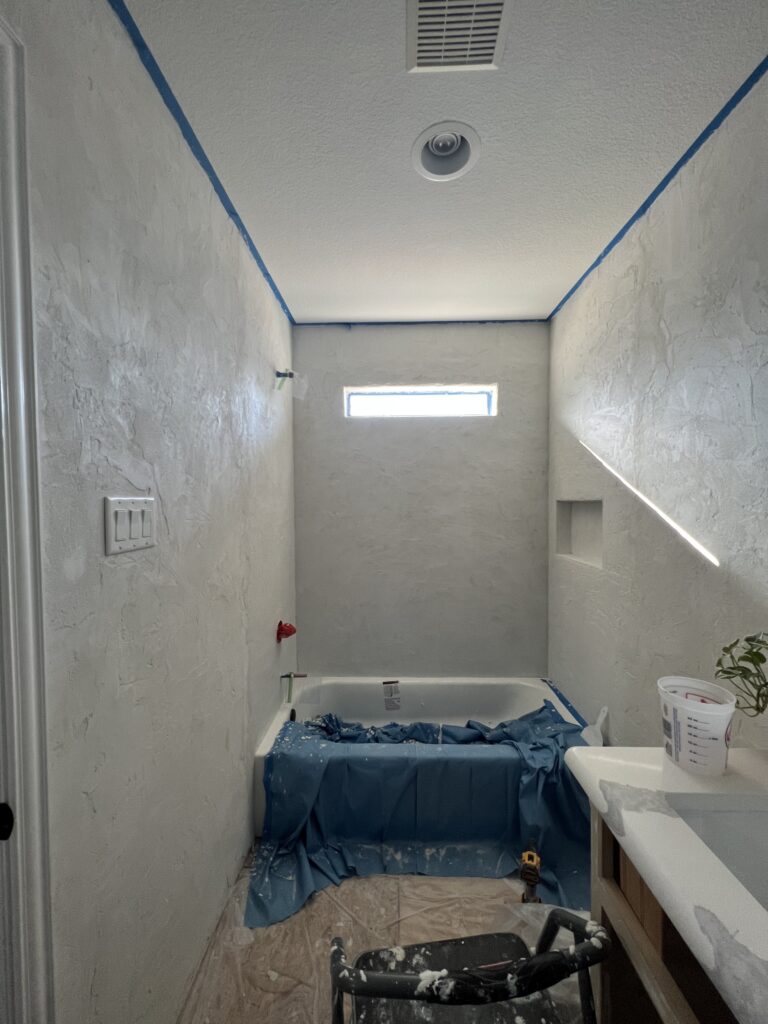
Step 1: Prepping the Bathroom
Before I even opened the first bag of microcement, I had to get the bathroom ready. My shower walls were Kerdi board, which is already waterproof, so I didn’t need to add anything like Redgard. In fact, Schluter told me not to. That saved me a step, but I still had a lot of prep to do.
First, I taped off every single edge. The line where the ceiling meets the wall, the trim, even the tiniest little corner, it all got taped. Then I draped plastic drop cloths over the tub, vanity, floor, and anything else I didn’t want ruined. Let me just say: this job is messy. One blogger had warned me about it, and she was not lying. Imagine fine cement dust settling over everything and blobs of cement all around the edges. Take the time to protect your space before you start.
I also got out my mask, goggles, and gloves. At first, I thought maybe I could skip them, but later on I learned the hard way that this stuff can irritate your skin and lungs. Do yourself a favor and put them on from the beginning.
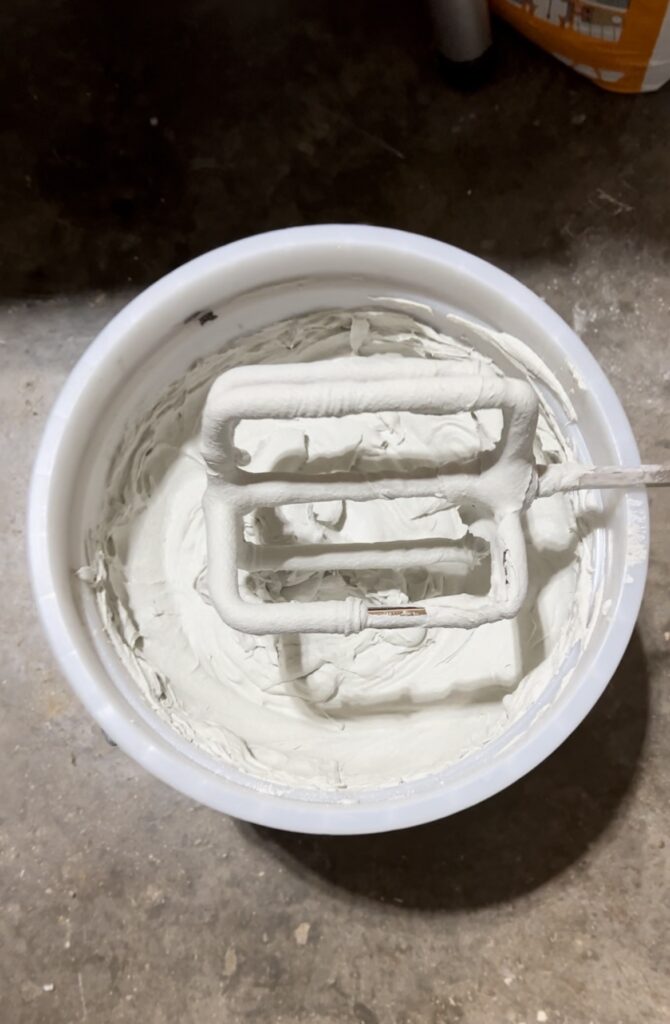
Step 2: Mixing the Microcement
Mixing microcement turned out to be more like cooking than construction. The texture you want is like pancake batter; not too runny, not too thick. If it’s too dry, it gets chunky and refuses to stick. If it’s too watery, it drips everywhere and won’t stay on your knife.
For each bag of Surecrete Surespray, I added one XS Color pigment pack in White Waterer. That’s what transformed the natural gray into a creamy white. I poured it into my bucket and used my Dewalt Drill with a Mixing Attachment. Honestly, that drill saved my arms.
Here’s what I learned:
- Mix in small batches. I thought I could handle a full bucket at once, but the material dries quickly. By the time I worked my way across the wall, the stuff at the bottom was already hardening.
- Keep a little water nearby. Every twenty minutes or so, I splashed a bit in and gave it a remix. That kept it smooth and spreadable.
- Try to do an entire wall with the same batch. I didn’t, and you could see the color difference where one batch stopped and another began. Thankfully, my second coat covered it, but I wouldn’t make that mistake again.

Step 3: Applying the First Coat
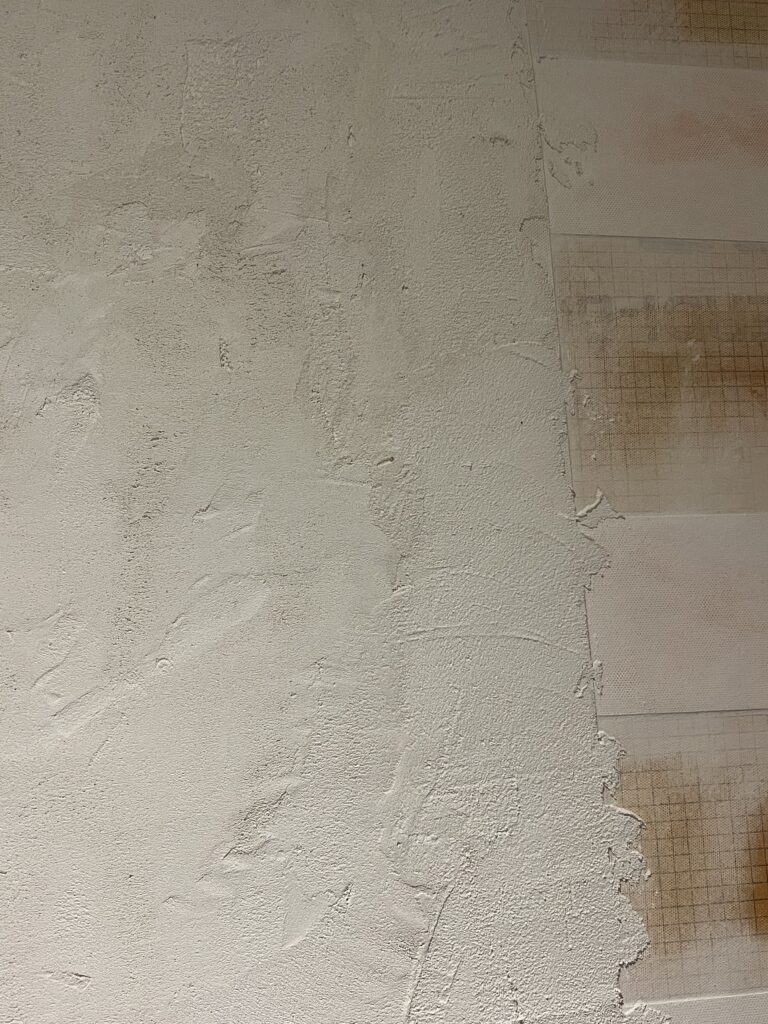
Here’s where it got real. I started with a plastic trowel because I read somewhere it would be easier. Maybe it was for them, but for me it was a disaster. I switched to a 6 inch Drywall Knife, and that was a game changer. It gave me smoother strokes and better control.
The first coat looked rough, and that’s completely normal. Think clumps, streaks, uneven patches, mine had it all. The texture is sandy, not like mudding or plastering, so don’t expect that creamy smoothness. This stage is about coverage, not perfection.
Here’s a mistake I’ll never make again: I left the painter’s tape on until after it dried. Bad idea. Once microcement hardens, it sticks to tape like glue. I had to fight with it and nearly ruined my edges. Pull the tape off while it’s still damp. Trust me on this one.
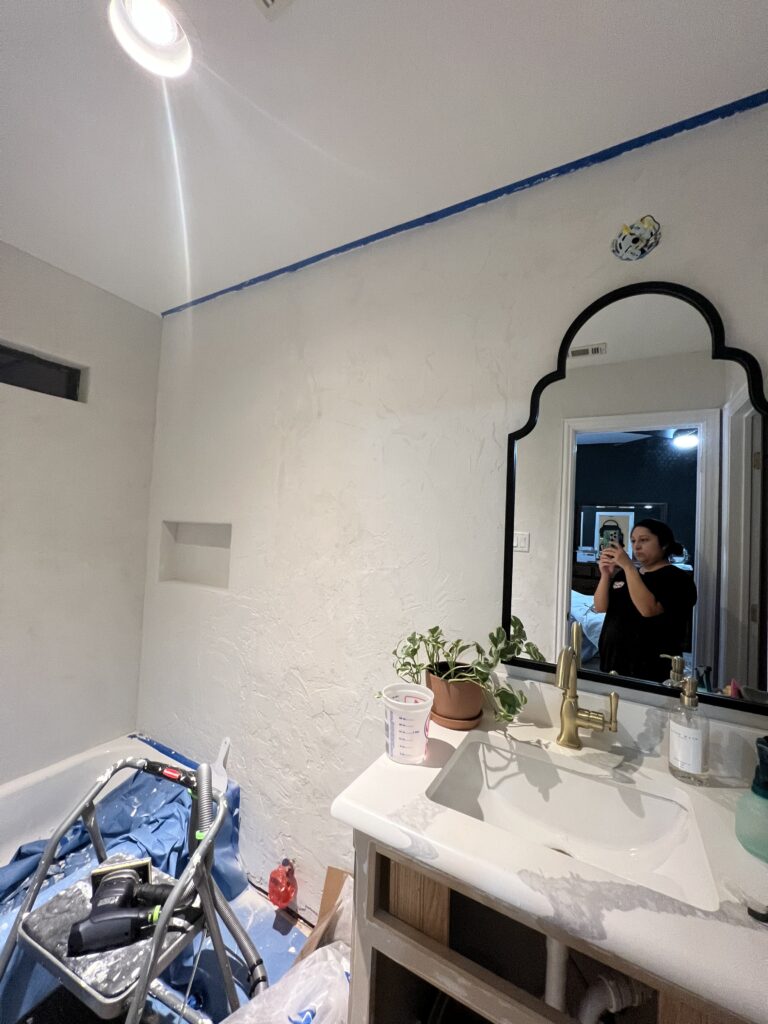
Step 4: Smoothing the Surface
After the first coat dried, I stepped back and thought, “Oh no, what have I done?” The walls looked chunky and uneven. That’s when I discovered the magic of a rub brick. Sandpaper won’t work here, this is cement. The rub brick let me grind down the high spots and smooth out the worst areas.
It’s dusty work. Dust in your hair, dust in the air, dust everywhere. I wore a mask, vacuumed afterward, and wiped the walls down so the next coat had a clean surface. This part felt like erasing my mistakes, which was oddly satisfying.
Step 5: Applying the Second Coat
For the second coat, I focused on the shower walls. Since they take the brunt of the water, they needed the extra durability. The rest of the bathroom only got one coat, which was plenty.
I mixed up a fresh batch of microcement and pigment, kept the consistency just right, and started applying with smoother, lighter strokes. By this point, I had the hang of it. It still wasn’t perfect, but compared to the first coat, it felt much easier. I let it dry for a full forty-eight hours before touching it again.
Step 6: Sanding for a Smooth Finish
This part tested my patience. I wanted my walls to feel sleek and refined, not gritty. So I grabbed my sander with 80 grit paper and went to work. I went through about 22 sheets of sandpaper. Halfway through, I questioned all my life decisions. But when I ran my hand over the surface, it felt smooth and luxurious, and I knew it was worth it.
If you like a more textured, rustic look, you can stop earlier. But I wanted that spa-like polish, so I kept sanding until I got it.
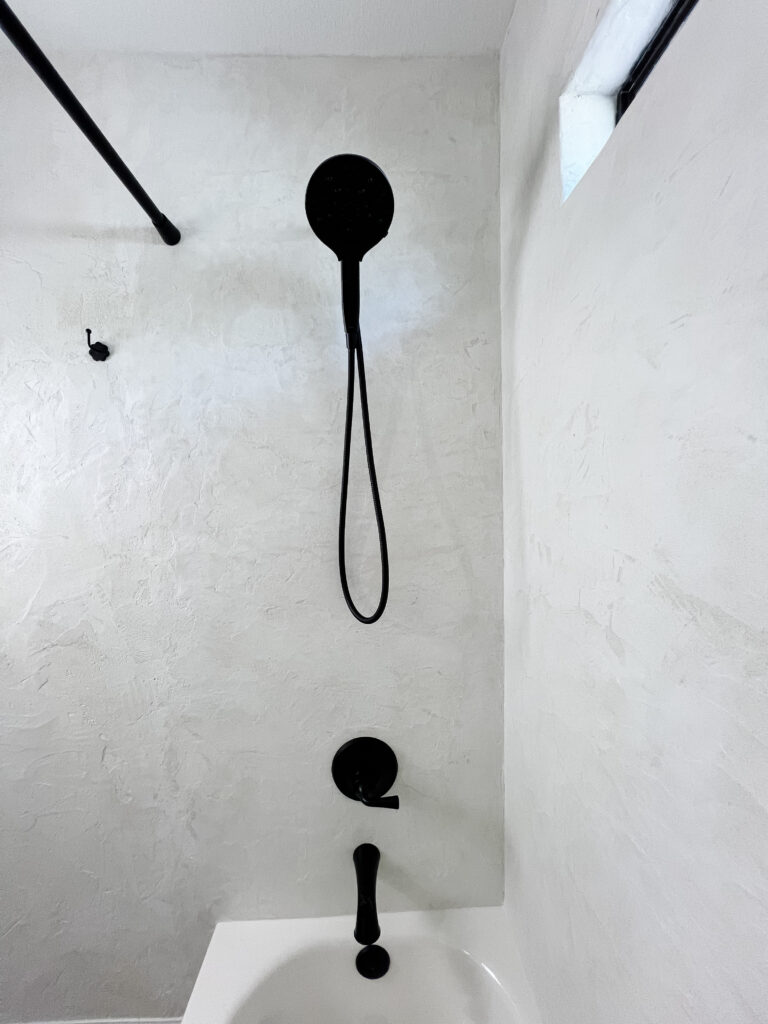
Step 7: Sealing the Microcement Bathroom
Sealing is the step that takes your bathroom from looking good to being functional. Without it, water will eventually ruin all your hard work. I used Surecrete XS 327 Sealer.
The first layer is a primer coat, which you make by mixing one part sealer to seven parts water. I used a 2 inch Chip Brush around the edges and a Foam Roller with a Small Paint Tray for the main walls. A spray bottle helped too, and it was one of the best pieces of advice I picked up along the way.
After that, I applied three more coats on the shower walls and two coats on the rest of the bathroom. Each coat needed to dry before the next one went on. Only mix as much as you can use in an hour, or you’ll end up tossing the leftovers.
A word of caution: wear a mask and goggles. The first time I didn’t, and I ended up with a mild allergic reaction on my face. Nothing serious, but definitely uncomfortable. Learn from me.
Step 8: Cure Time and Final Touches
Once the last coat of sealer went on, I left the bathroom alone. The instructions said to let it cure for seven days, but I played it safe and gave it two full weeks.
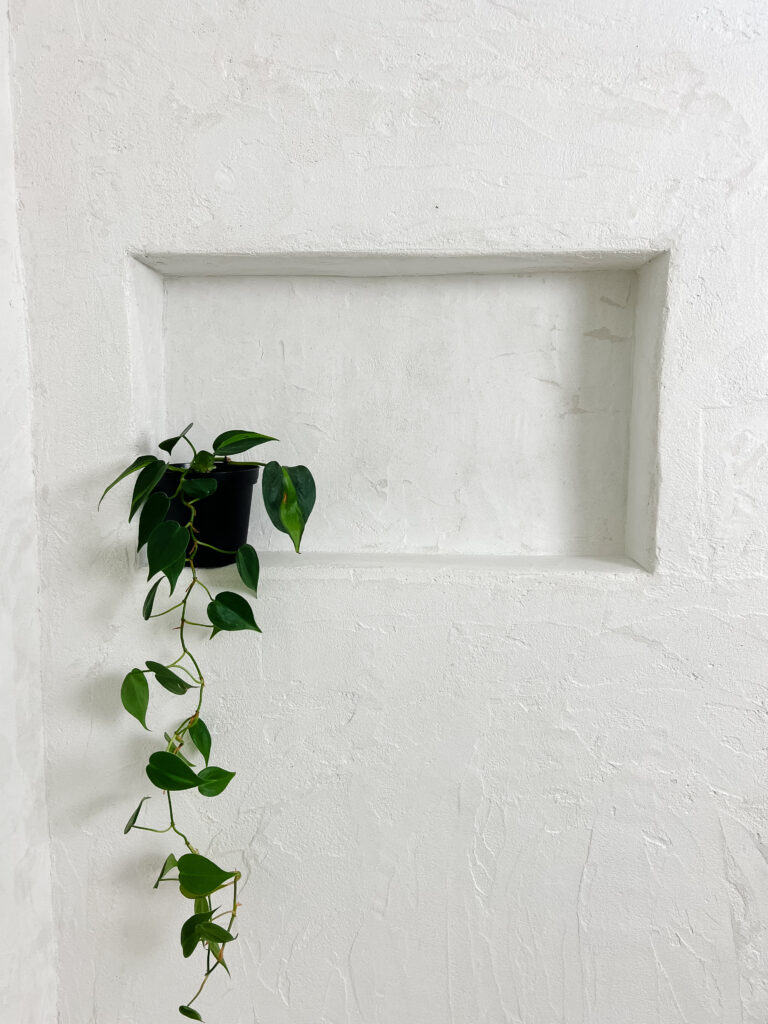
When it was ready, I caulked all the edges where the microcement met the tub and trim. I taped it off so I could get clean, crisp lines. Then I stepped back and admired the result. After months of dust, sanding, and second guessing, the microcement bathroom was finally done.
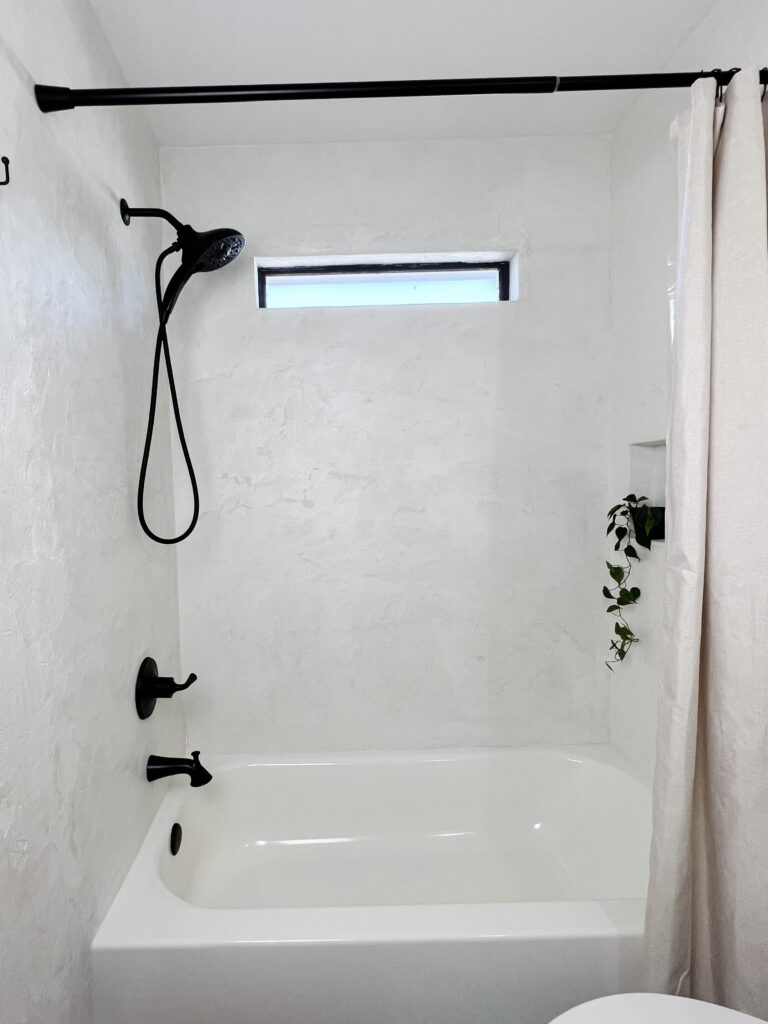
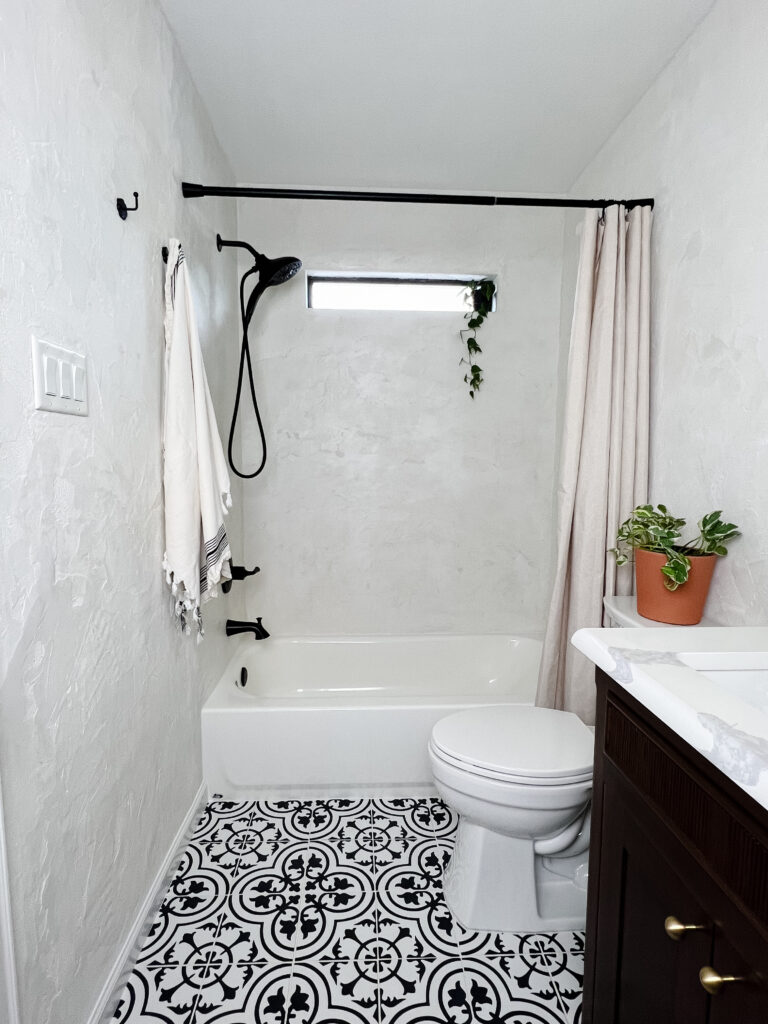
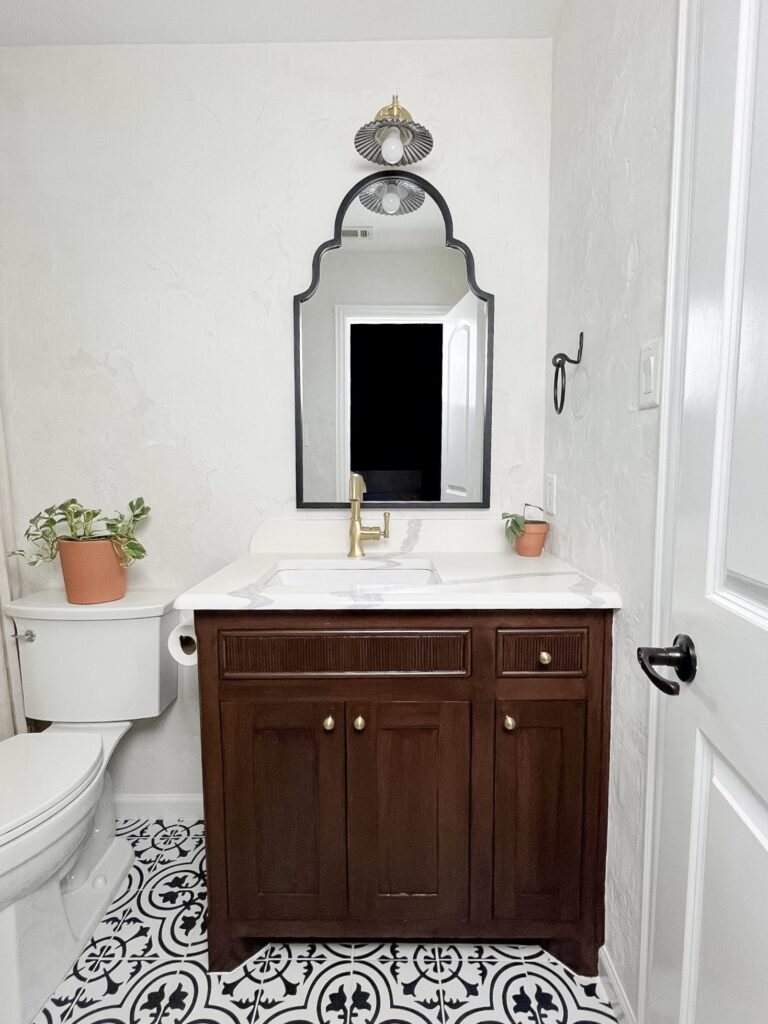
The Results
When I finally stepped back after months of work, I almost couldn’t believe I had done it myself. This project stretched out over about three months because, well, life. Between the holidays, kids, and all the little interruptions, I never had big chunks of time to dedicate. If you had a free weekend or two, you could absolutely get this done faster, but for me it was a slow and steady kind of project.
The payoff, though, was so worth it. This microcement bathroom now feels like something out of a boutique hotel. The finish is seamless from wall to wall, and it instantly elevates the entire space. Cleaning has become ridiculously easy. There are no grout lines to scrub, no mold creeping in between tiles, just one smooth surface that wipes down in seconds. The first time I ran the shower and watched the water bead up and roll off like it was coated in Rain-X, I actually laughed out loud. It felt like a magic trick.
What surprised me most was how much other people noticed. Every time friends or family come over, they comment on it. I’ve lost track of how many times I’ve heard, “Wait, you did this yourself?” The best part is that it really does look professional, even though there were plenty of moments along the way where I wanted to quit. That sense of accomplishment every time I walk past the bathroom door makes all the dust, ruined tools, and late nights completely worth it.
Cost Breakdown
- Surecrete Surespray + Pigment Packs: $475
- Tools I already owned: drill, mixer, buckets, rollers, brushes, sander
- Extra supplies: rub brick, painter’s tape, drop cloths: under $50
Total cost: about $475
Estimated labor savings: $2,000 to $3,000
What I Would Do Differently
If I could go back, I would start with a smaller project like a powder room instead of a full bathroom. I would also make sure to clean my tools immediately after each use. Cement dries quickly and ruined more than one of my mixers. Finally, I would commit to finishing one wall with a single batch of material to keep the color completely consistent.
Final Thoughts
I do love a DIY project, but a DIY microcement bathroom is not a quick weekend project, yet it is very achievable. It takes patience, attention to detail, and the right tools, but the end result is a modern, seamless bathroom that feels custom and high-end.
If you came here wondering how to microcement over Kerdi board, the answer is yes. It works beautifully, and now you have the exact steps to make it happen.
Shop My Microcement Bathroom Supplies
- Dewalt Drill
- Mixing Attachment
- 6 inch Drywall Knife
- 2 inch Chip Brush
- Foam Rollers (Set of 2)
- Small Paint Tray
- Surecrete Surespray Microcement
- Surecrete XS Color Pigment Pack
- Surecrete XS 327 Primer and Sealer
DIY Microcement Bathroom FAQs
Yes. You can apply Surecrete Surespray Microcement directly over Kerdi board. Schluter confirmed that you do not need additional waterproofing products, and sealing with XS 327 makes it fully waterproof.
Yes. As long as the tiles are stable and the surface is properly prepped, microcement can be applied directly over them. Clean the tiles thoroughly, roughen the surface for adhesion, fill grout lines, and follow with primer if your product requires it. After that, you can apply microcement and seal it.
Once sealed, yes. The sealer locks out moisture and protects the surface.
Use soap and water. Avoid abrasive cleaners that could scratch the finish.
If applied correctly over a stable surface like Kerdi board, it should not crack.
With proper care and sealing, it can last ten to fifteen years or more.


